
- Last Updated

We guide you from preparation to execution for experiencing the sample game.
Experience the Sample Game (Quick Start)
Overview
- This page covers the sample game integrated with the STOVE Mobile SDK. You can see and experience firsthand the SDK integration that might be hard to grasp from documentation alone.
- The sample game has the main features of the STOVE Mobile SDK integrated according to the actual game flow. When you run the app, it proceeds in the order of
SDK Initialization → Login → Identity Verification → Character Setup → Enter Game, and you can personally check when the SDK is called at each stage. - Since you can experience all the core features of the STOVE Mobile SDK, such as login, payment, identity verification, device registration, and in-game settings, within one game, you can reduce trial and error when integrating it into your own game.
Please use this for reference only
ㆍThis sample is for reference to show how to integrate. We recommend using it to understand the SDK call flow rather than copying the code and UI structure directly into a commercial game.
Prerequisites
Before proceeding with this guide, the following items must be prepared.
Server
| Item | Description | Note |
|---|---|---|
| Docker Desktop | Run 3 servers with Docker Compose. Docker Engine must remain in a running state after installing Docker Desktop. | Required |
| Docker Compose v2 | Use the docker compose |
command. Included by default in Docker Desktop. |
| Git | Required to download 3 repositories. | Required |
| Java 17 or higher | Required when running gradlew bootRun, gradlew test, or gradlew clean bootJar locally without Docker. |
Optional |
| Available Ports | 8010, 8020, 8090, 18021 ports must be free. |
Required |
Client
Before experiencing the sample game, please check the following environmental requirements first. If the environment does not match, errors may occur during the build or execution process.
Execution Environment
You only need to prepare the items corresponding to the platform you intend to experience.
| Platform | Requirements | Remarks |
|---|---|---|
| Android | API 24 (Nougat) or higher | |
| iOS | Xcode 26.0 or higher, iOS 13.0 or higher | Available after onboarding (see below) |
| Unity | Unity 2022.3.13f1 or higher |
Since iOS does not provide an IPA (installation file), you can experience it after onboarding. For more details, please refer to the 게임 실행 방법 below.
Required Tools
| Tool | Purpose | When Required |
|---|---|---|
| Git | Used to download the sample game client repository | Required |
| ADB | Used to install APK on Android devices or emulators | When experiencing Android |
How to Run the Game
Server
The sample server consists of the 3 repositories below.
| Repository | Role | GitHub |
|---|---|---|
sample-game-api-server | Game API Server (:8010) | (In preparation) |
sample-game-socket-server | Real-time Socket Server (:8020) | (In preparation) |
sample-stove-server | STOVE mock server (:8090) | (In preparation) |
- Download the sample server repository.
git clone '실제 주소/sample-game-api-server'
git clone '실제 주소/sample-game-socket-server'
git clone '실제 주소/sample-stove-server'
- Navigate to the parent directory where the 3 servers are located.
cd sample-game

예시 디렉터리 구조
sample-game/
├─ sample-stove-server/
├─ sample-game-socket-server/
└─ sample-game-api-server/
- Create the Docker shared network (only required once).
- If a message appears stating it already exists, you may proceed to the next step.
docker network create sample-game-server-mock-net
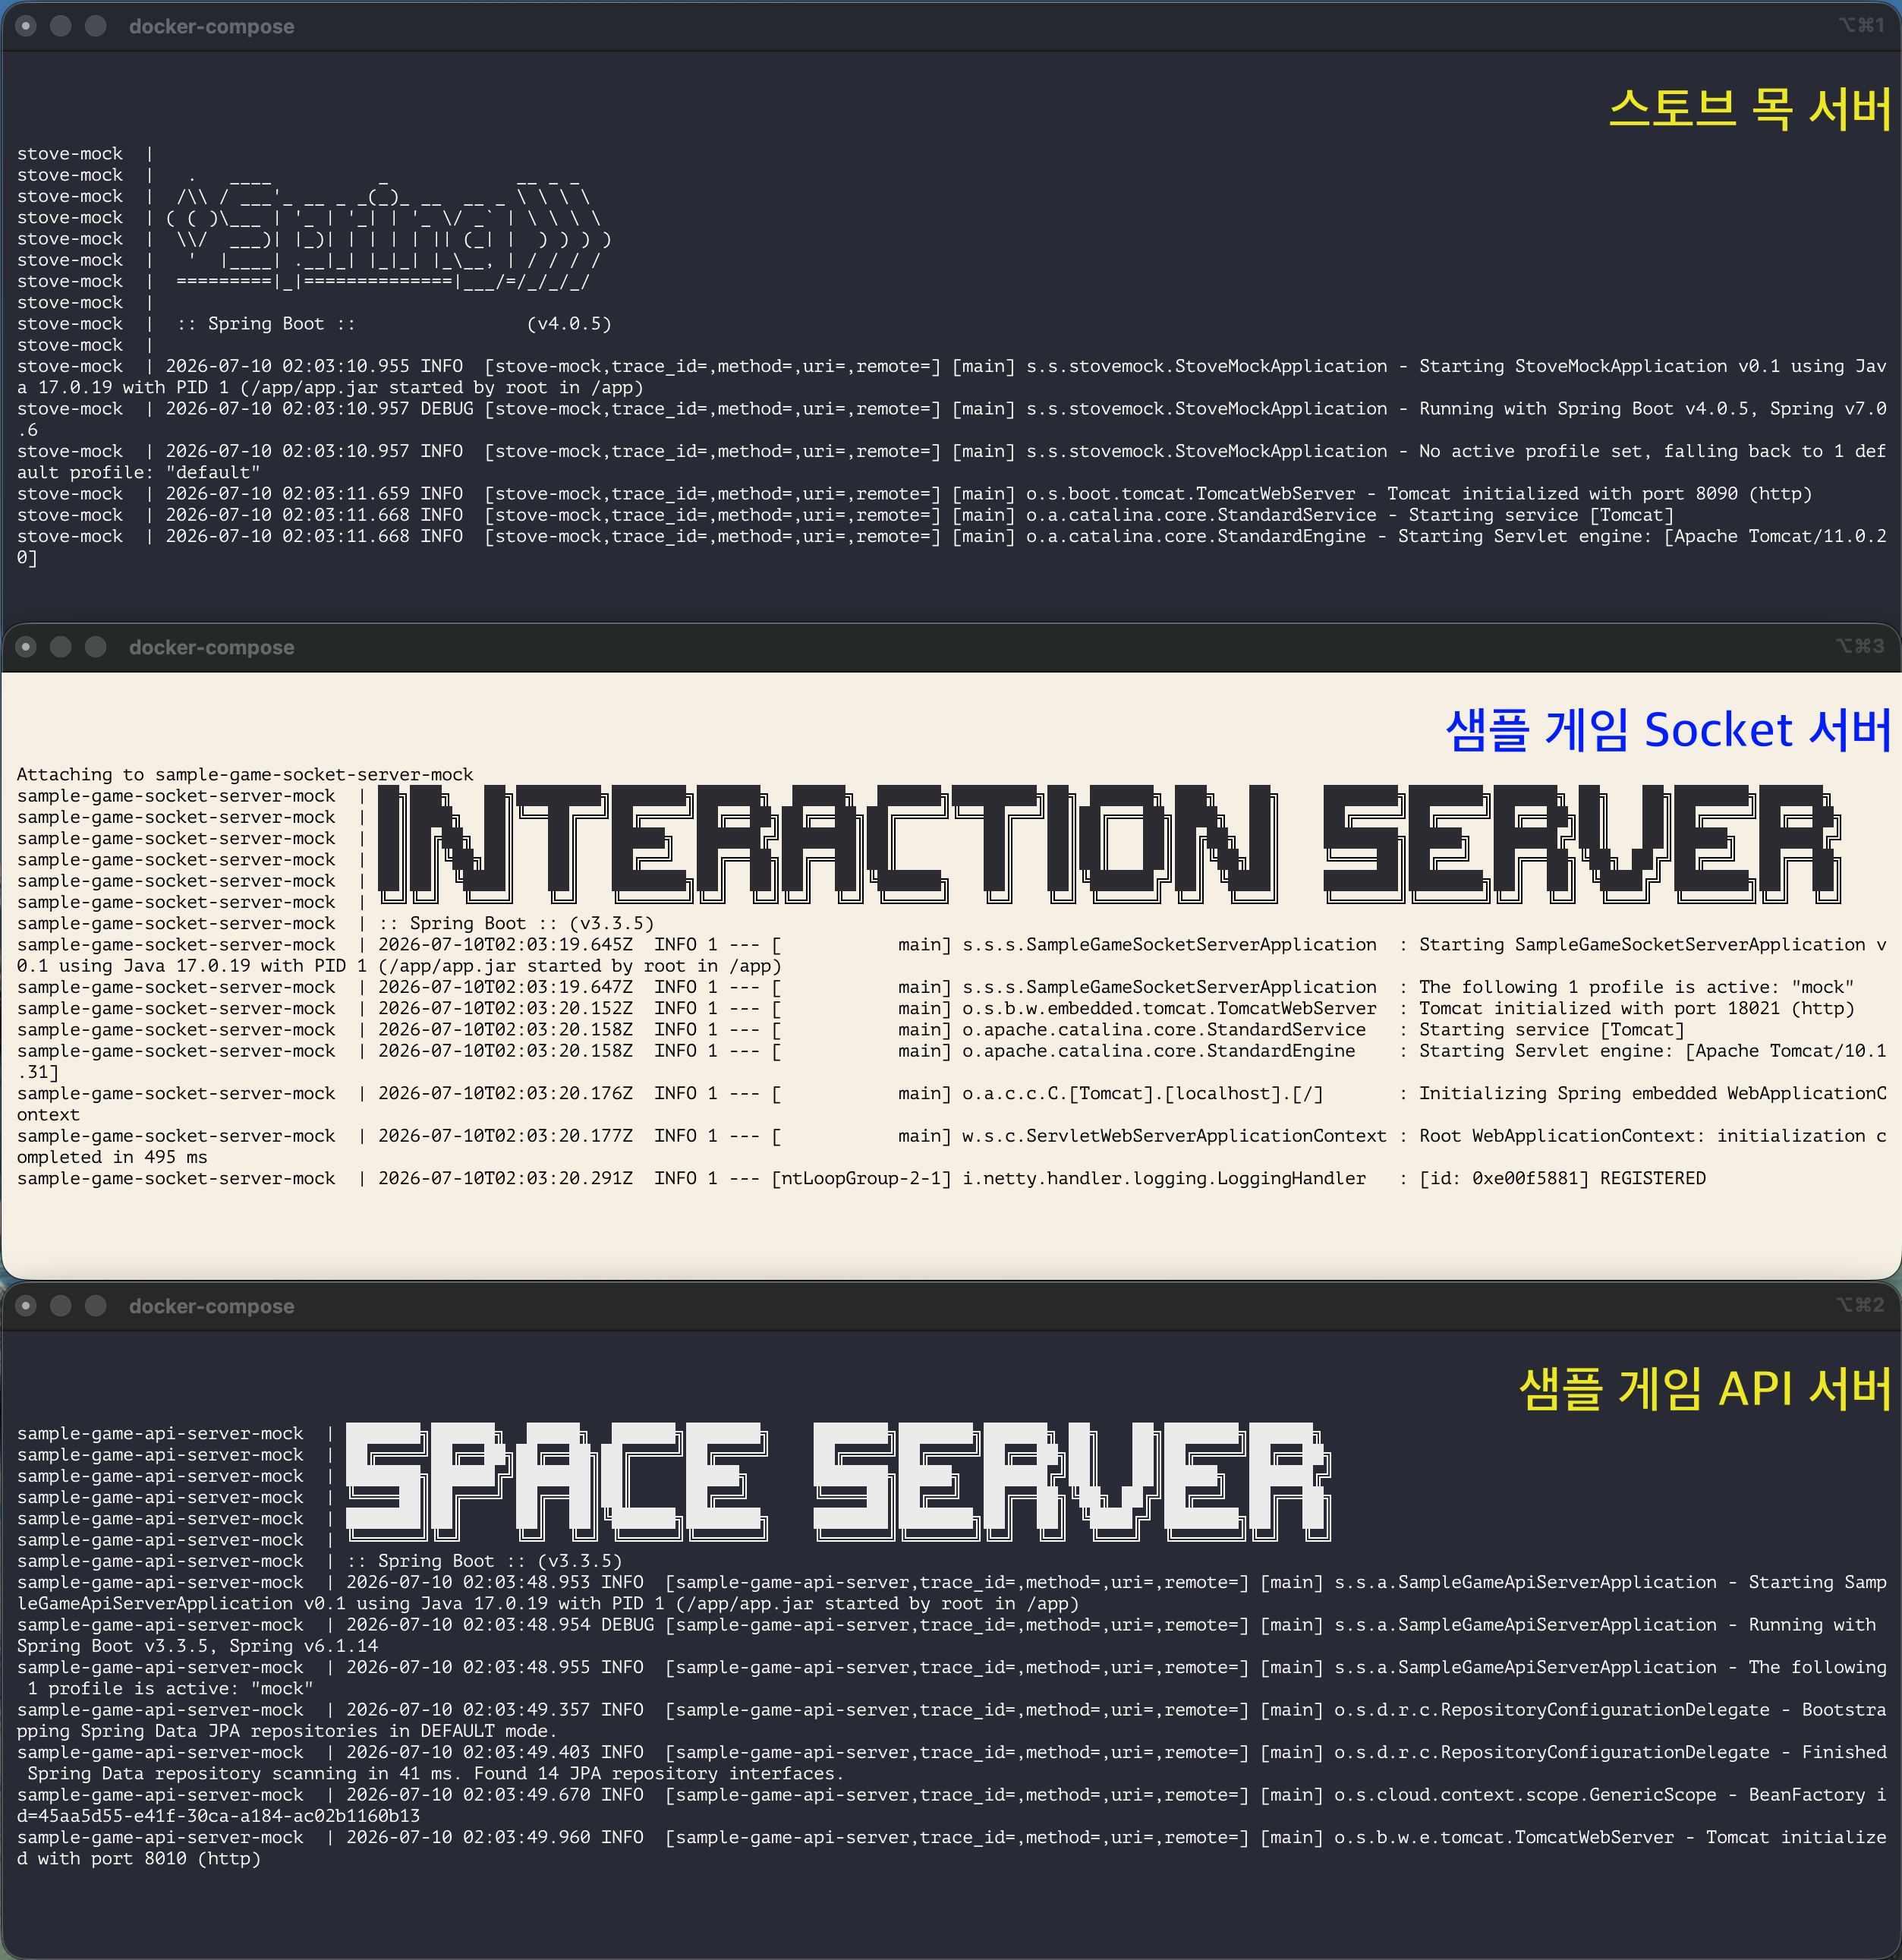
- Run the STOVE mock server.
cd sample-stove-server
docker compose -f docker-compose.mock.yml up --build
- Open a new terminal and run the Game Socket server.
cd sample-game-socket-server
docker compose -f docker-compose.mock.yml up --build
- Open a new terminal and run the Game API server.
cd sample-game-api-server
docker compose -f docker-compose.mock.yml up --build
- Server execution is complete when the ports below are opened.
sample-stove-server        http://localhost:8090
sample-game-api-server     http://localhost:8010
sample-game-socket-server  ws://localhost:8020
socket internal HTTP       http://localhost:18021
- If you want to run in the background, you can use the command below.
docker compose -f sample-stove-server/docker-compose.mock.yml up --build -d
docker compose -f sample-game-socket-server/docker-compose.mock.yml up --build -d
docker compose -f sample-game-api-server/docker-compose.mock.yml up --build -d
- Use the command below to check the logs.
docker compose -f sample-stove-server/docker-compose.mock.yml logs -f
docker compose -f sample-game-socket-server/docker-compose.mock.yml logs -f
docker compose -f sample-game-api-server/docker-compose.mock.yml logs -f
- Follow the sequence below to shut down.
docker compose -f sample-game-api-server/docker-compose.mock.yml down
docker compose -f sample-game-socket-server/docker-compose.mock.yml down
docker compose -f sample-stove-server/docker-compose.mock.yml down
- Use the command below to initialize even the stored API server data.
docker compose -f sample-game-api-server/docker-compose.mock.yml down -v
Client
The client uses the repository below.
| Repository | Role | GitHub |
|---|---|---|
sample-game-client | Unity Sample Game Client | (In preparation) |
There are two ways to experience the client.
Method 1. Install Sample Game (Android)
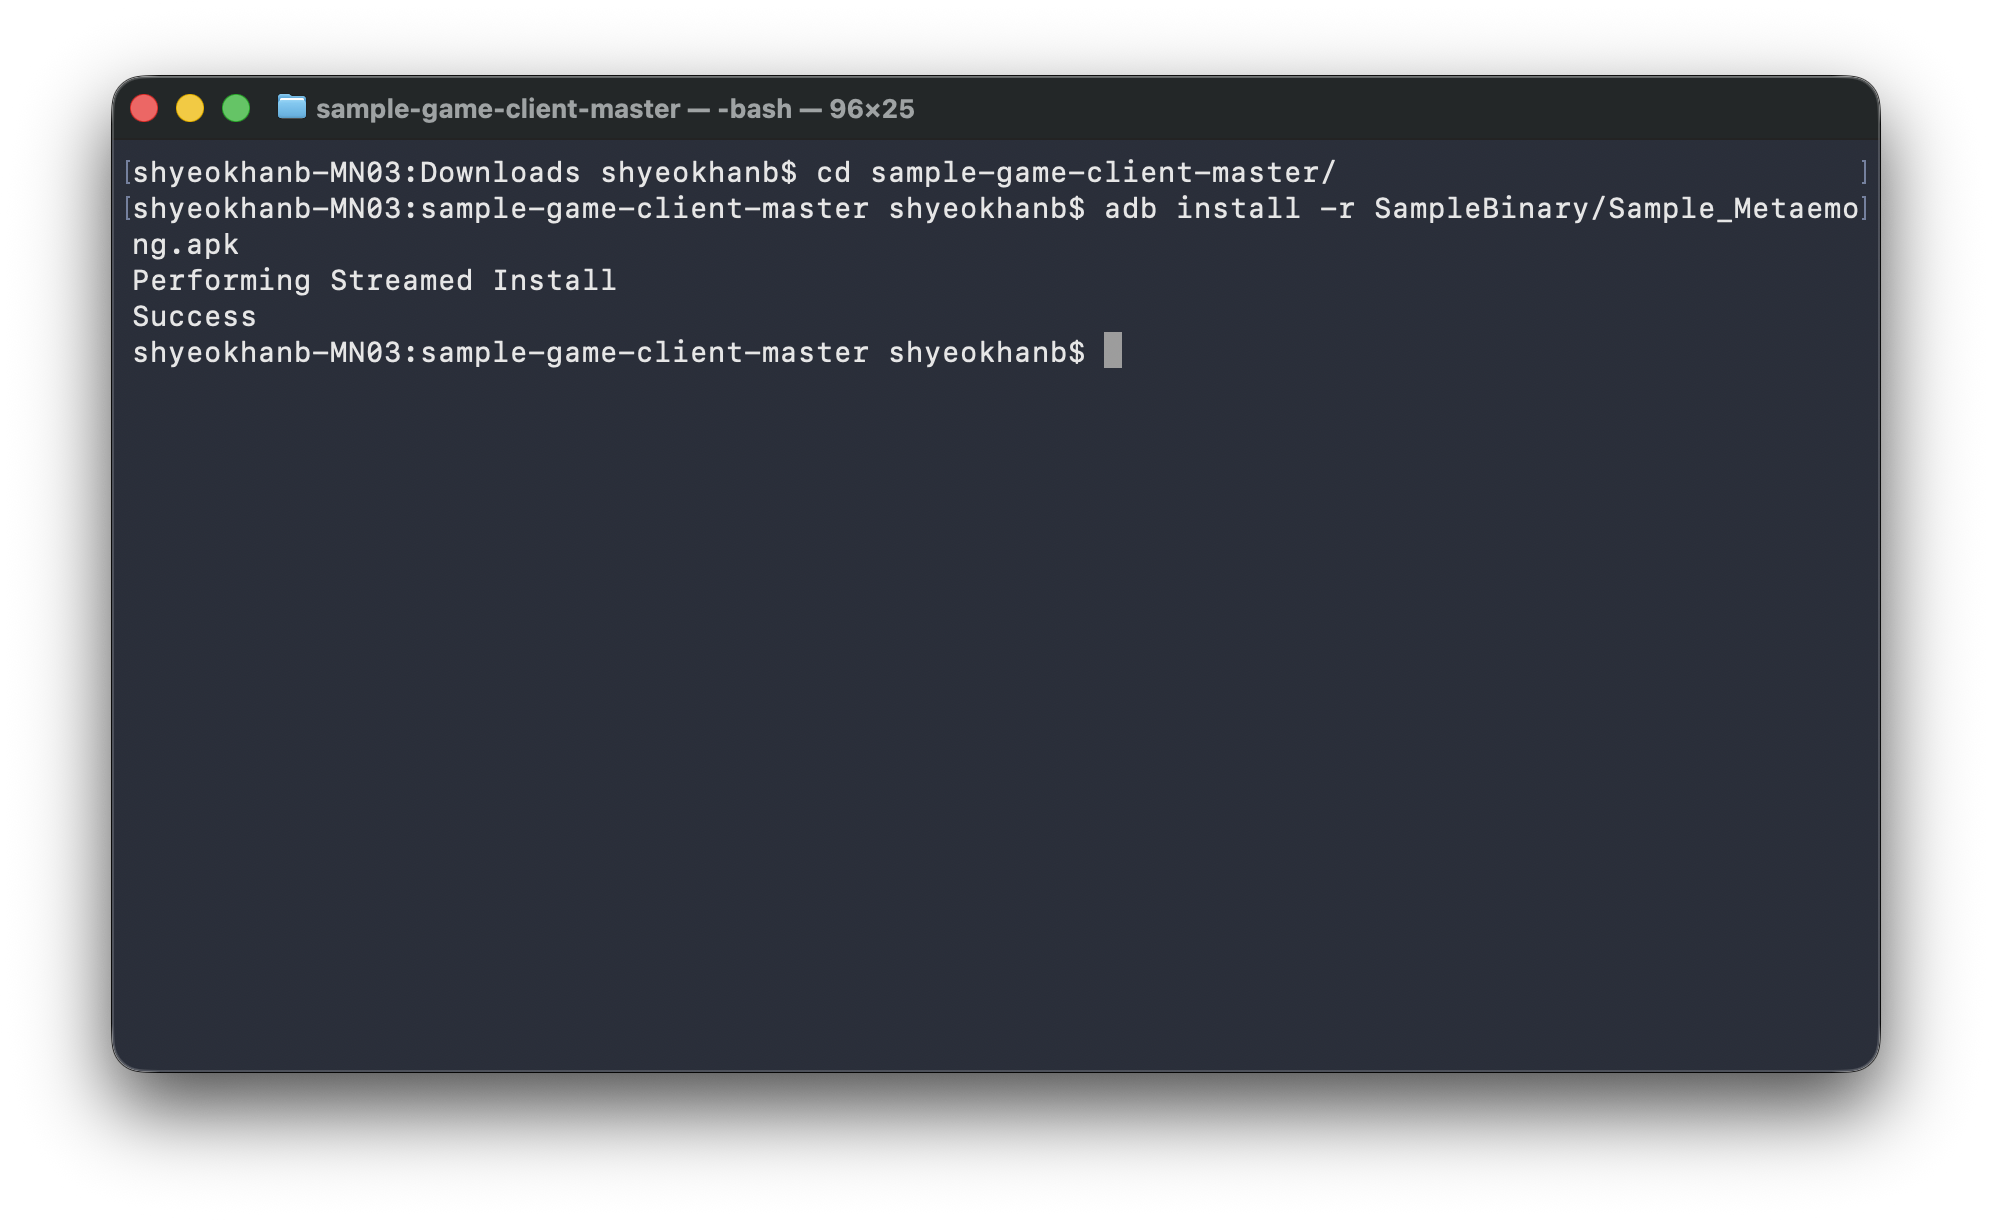
Download the repository and install the APK.
git clone '실제 주소/sample-game-client'
cd sample-game-client-master

adb install -r SampleBinary/Sample_Metaemong.apk
iOS does not provide an installation file (IPA). Due to provisioning profiles, it cannot be distributed as a common binary, so you can experience the iOS sample game after onboarding.
Game Scenario
When you launch the app, it proceeds in the order of SDK Initialization → Login → Identity Verification → Character Setup → Lobby Entry. Follow along with the screens to see when and for what purpose the STOVE Mobile SDK is called at each stage.
The screens below are based on the demo environment (local sample server).
In a real service environment, some steps such as demo 호스트 입력·DEMO 배너·상점 환불 버튼 may not appear.
Server Setup & Build Installation
게임 실행 방법Follow the guide to install and run the server and client build.
Network
- The actual device and the PC running the local sample server must be connected to the same Wi-Fi.
- Ensure that the PC firewall is not blocking the local server port.
Checking PC Wi-Fi IP
- Windows:
ipconfig→ IPv4 address of the Wi-Fi adapter - macOS: System Settings → Network → Wi-Fi → IP address (or
ifconfig)
Entering Local Host Address
Entering Local Host Address
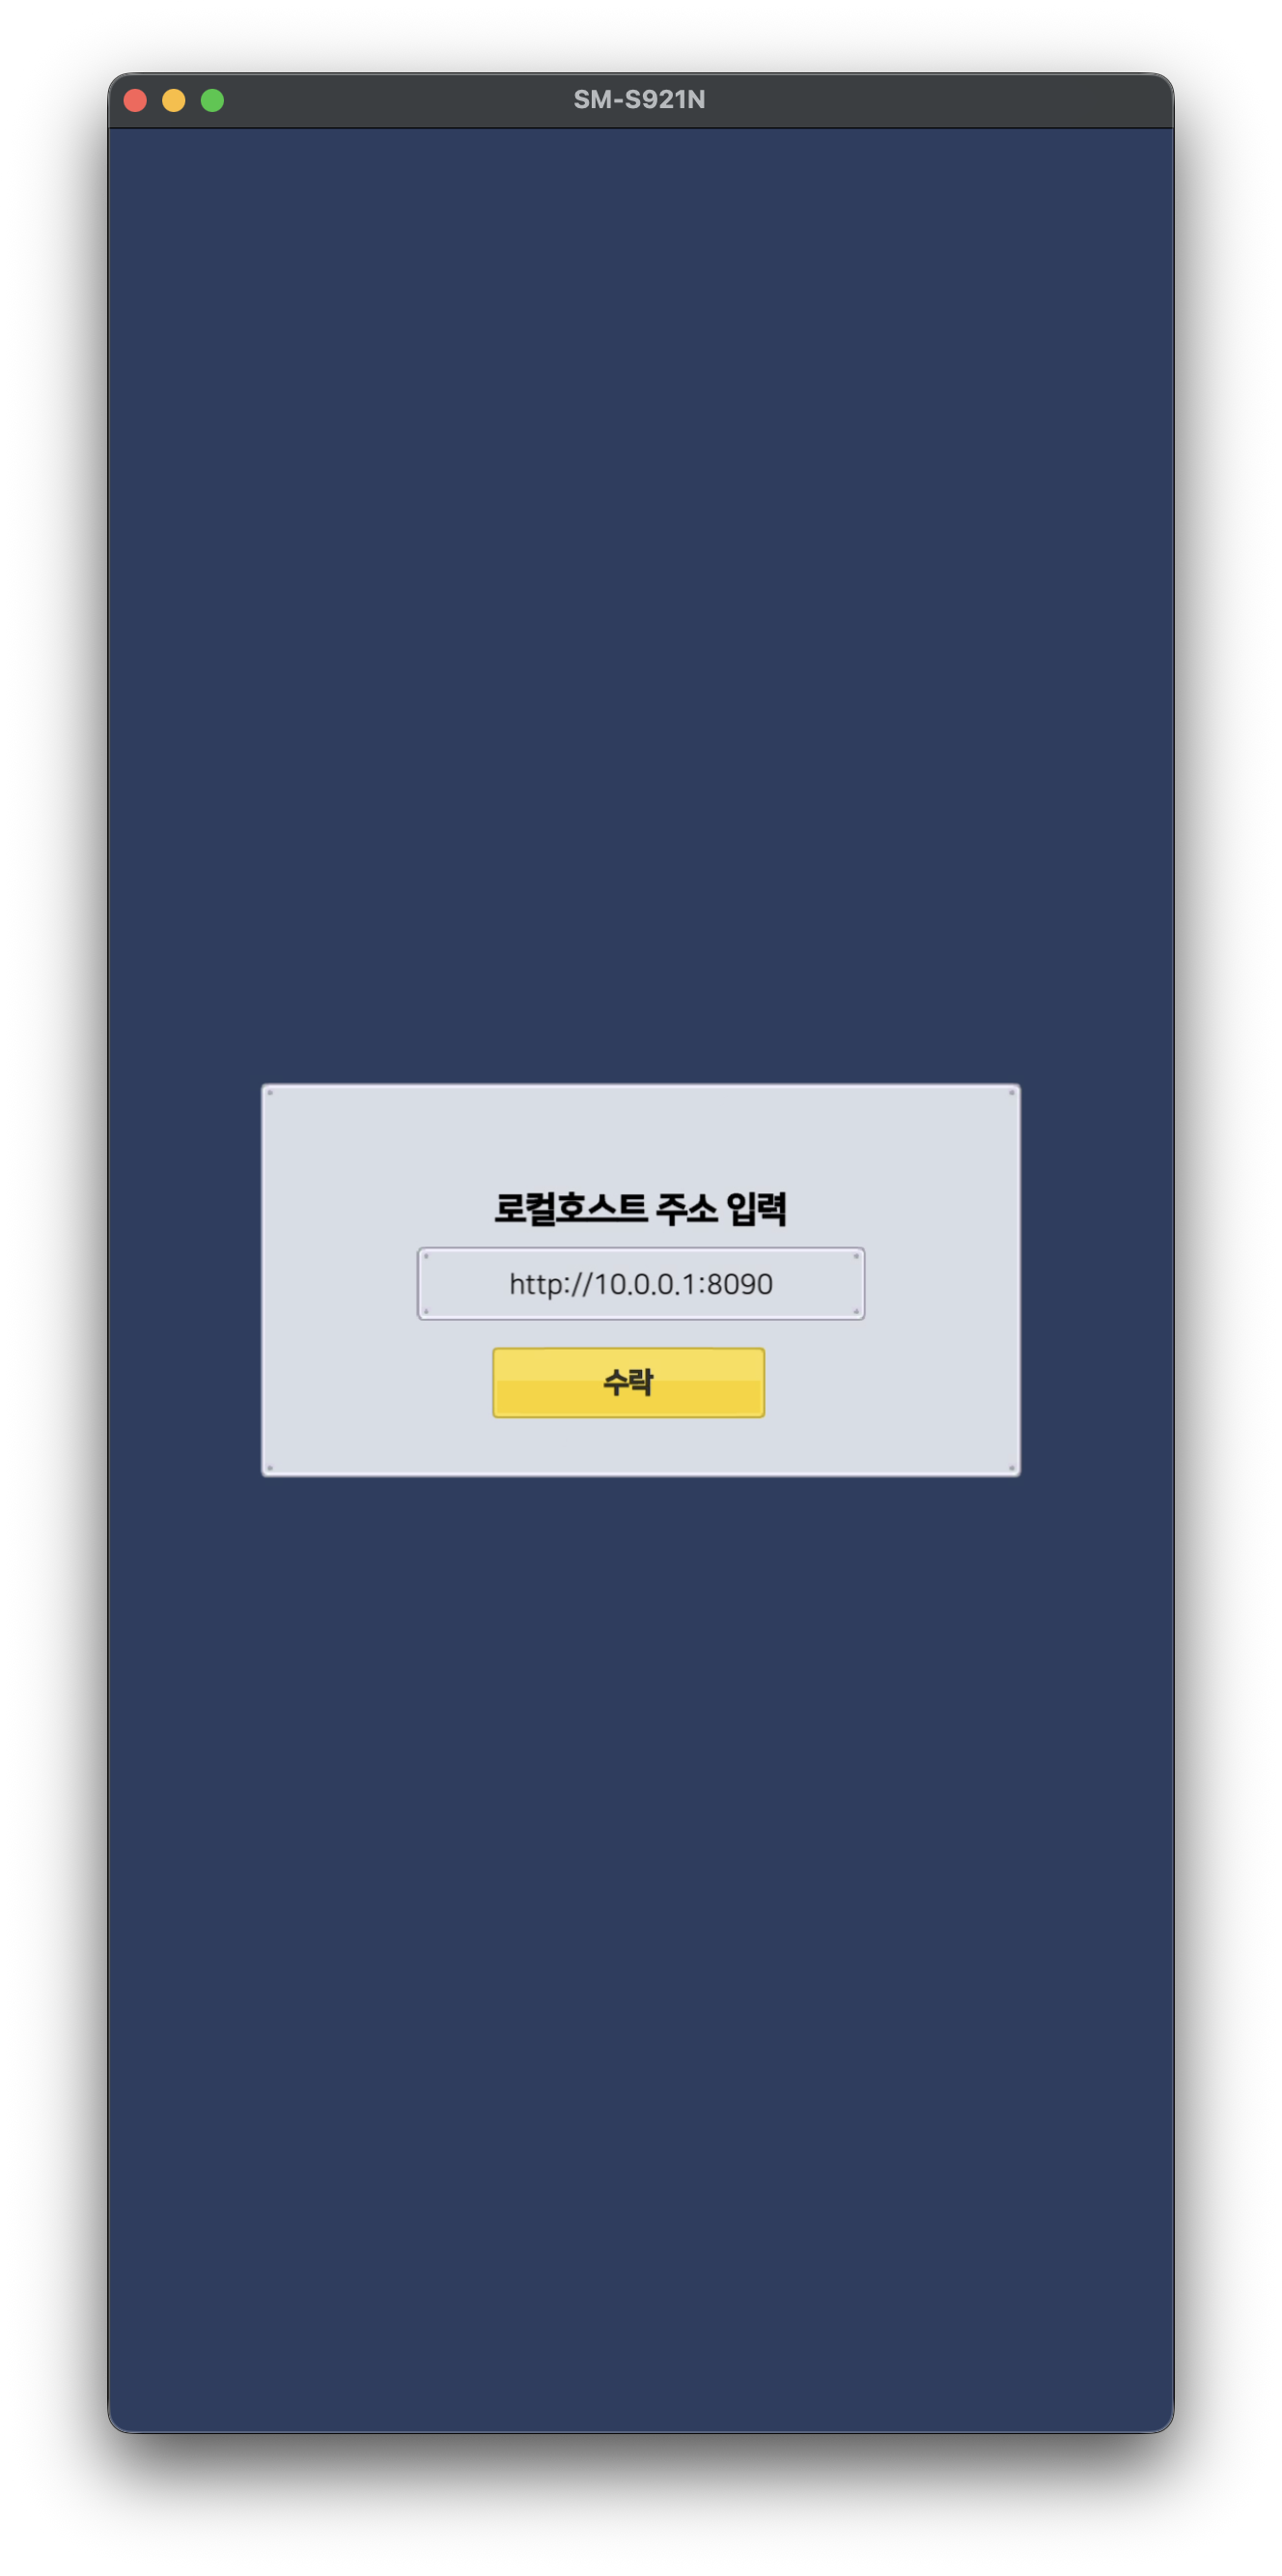
- When you launch the app for the first time (or when there is no saved address), a demo host address input popup is displayed right before
Auth.Initialize. - Enter the Wi-Fi IP of the local server PC and port 8090.
- Format example:
http://192.168.0.12:8090 - Do not use
127.0.0.1·localhoston an actual device. You must enter the PC's Wi-Fi IP.
- Format example:
- After confirmation, SDK initialization proceeds, and upon success, the game API is automatically set to the same host.
- The last entered address is saved in the app and reused as the default value for the next launch.
Login Screen
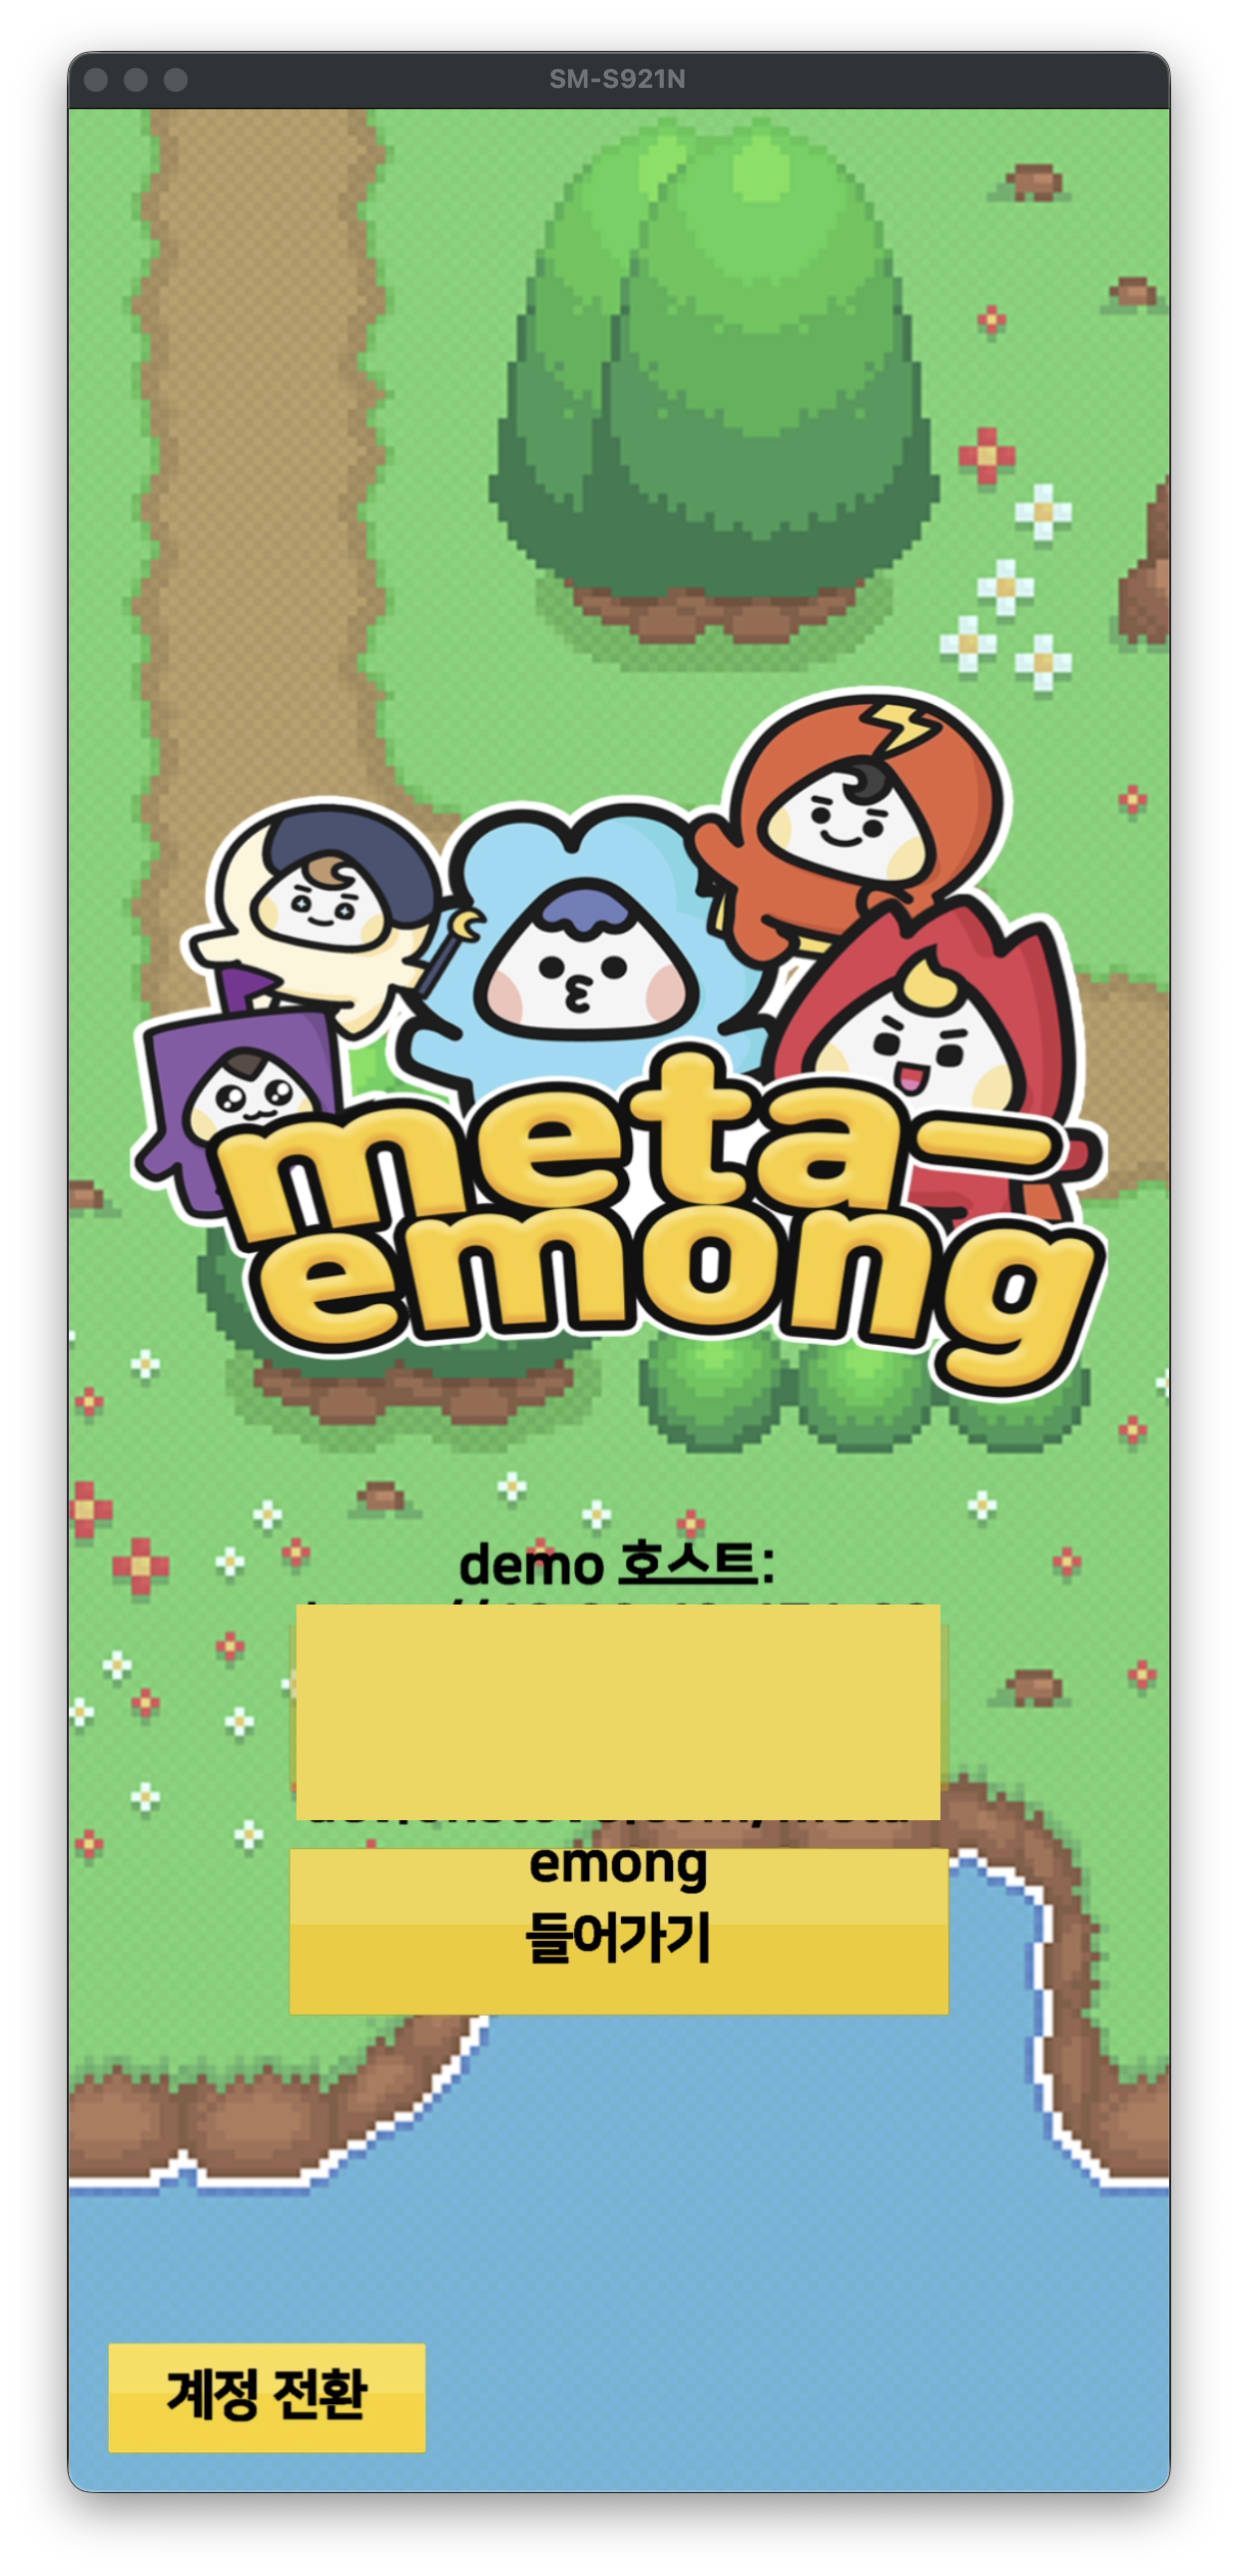
Title Screen
- Once
Auth.Initializeis finished, the title screen is displayed. Pressing the Enter button callsAuthUI.Loginand opens the STOVE login window.
Selecting Login Method
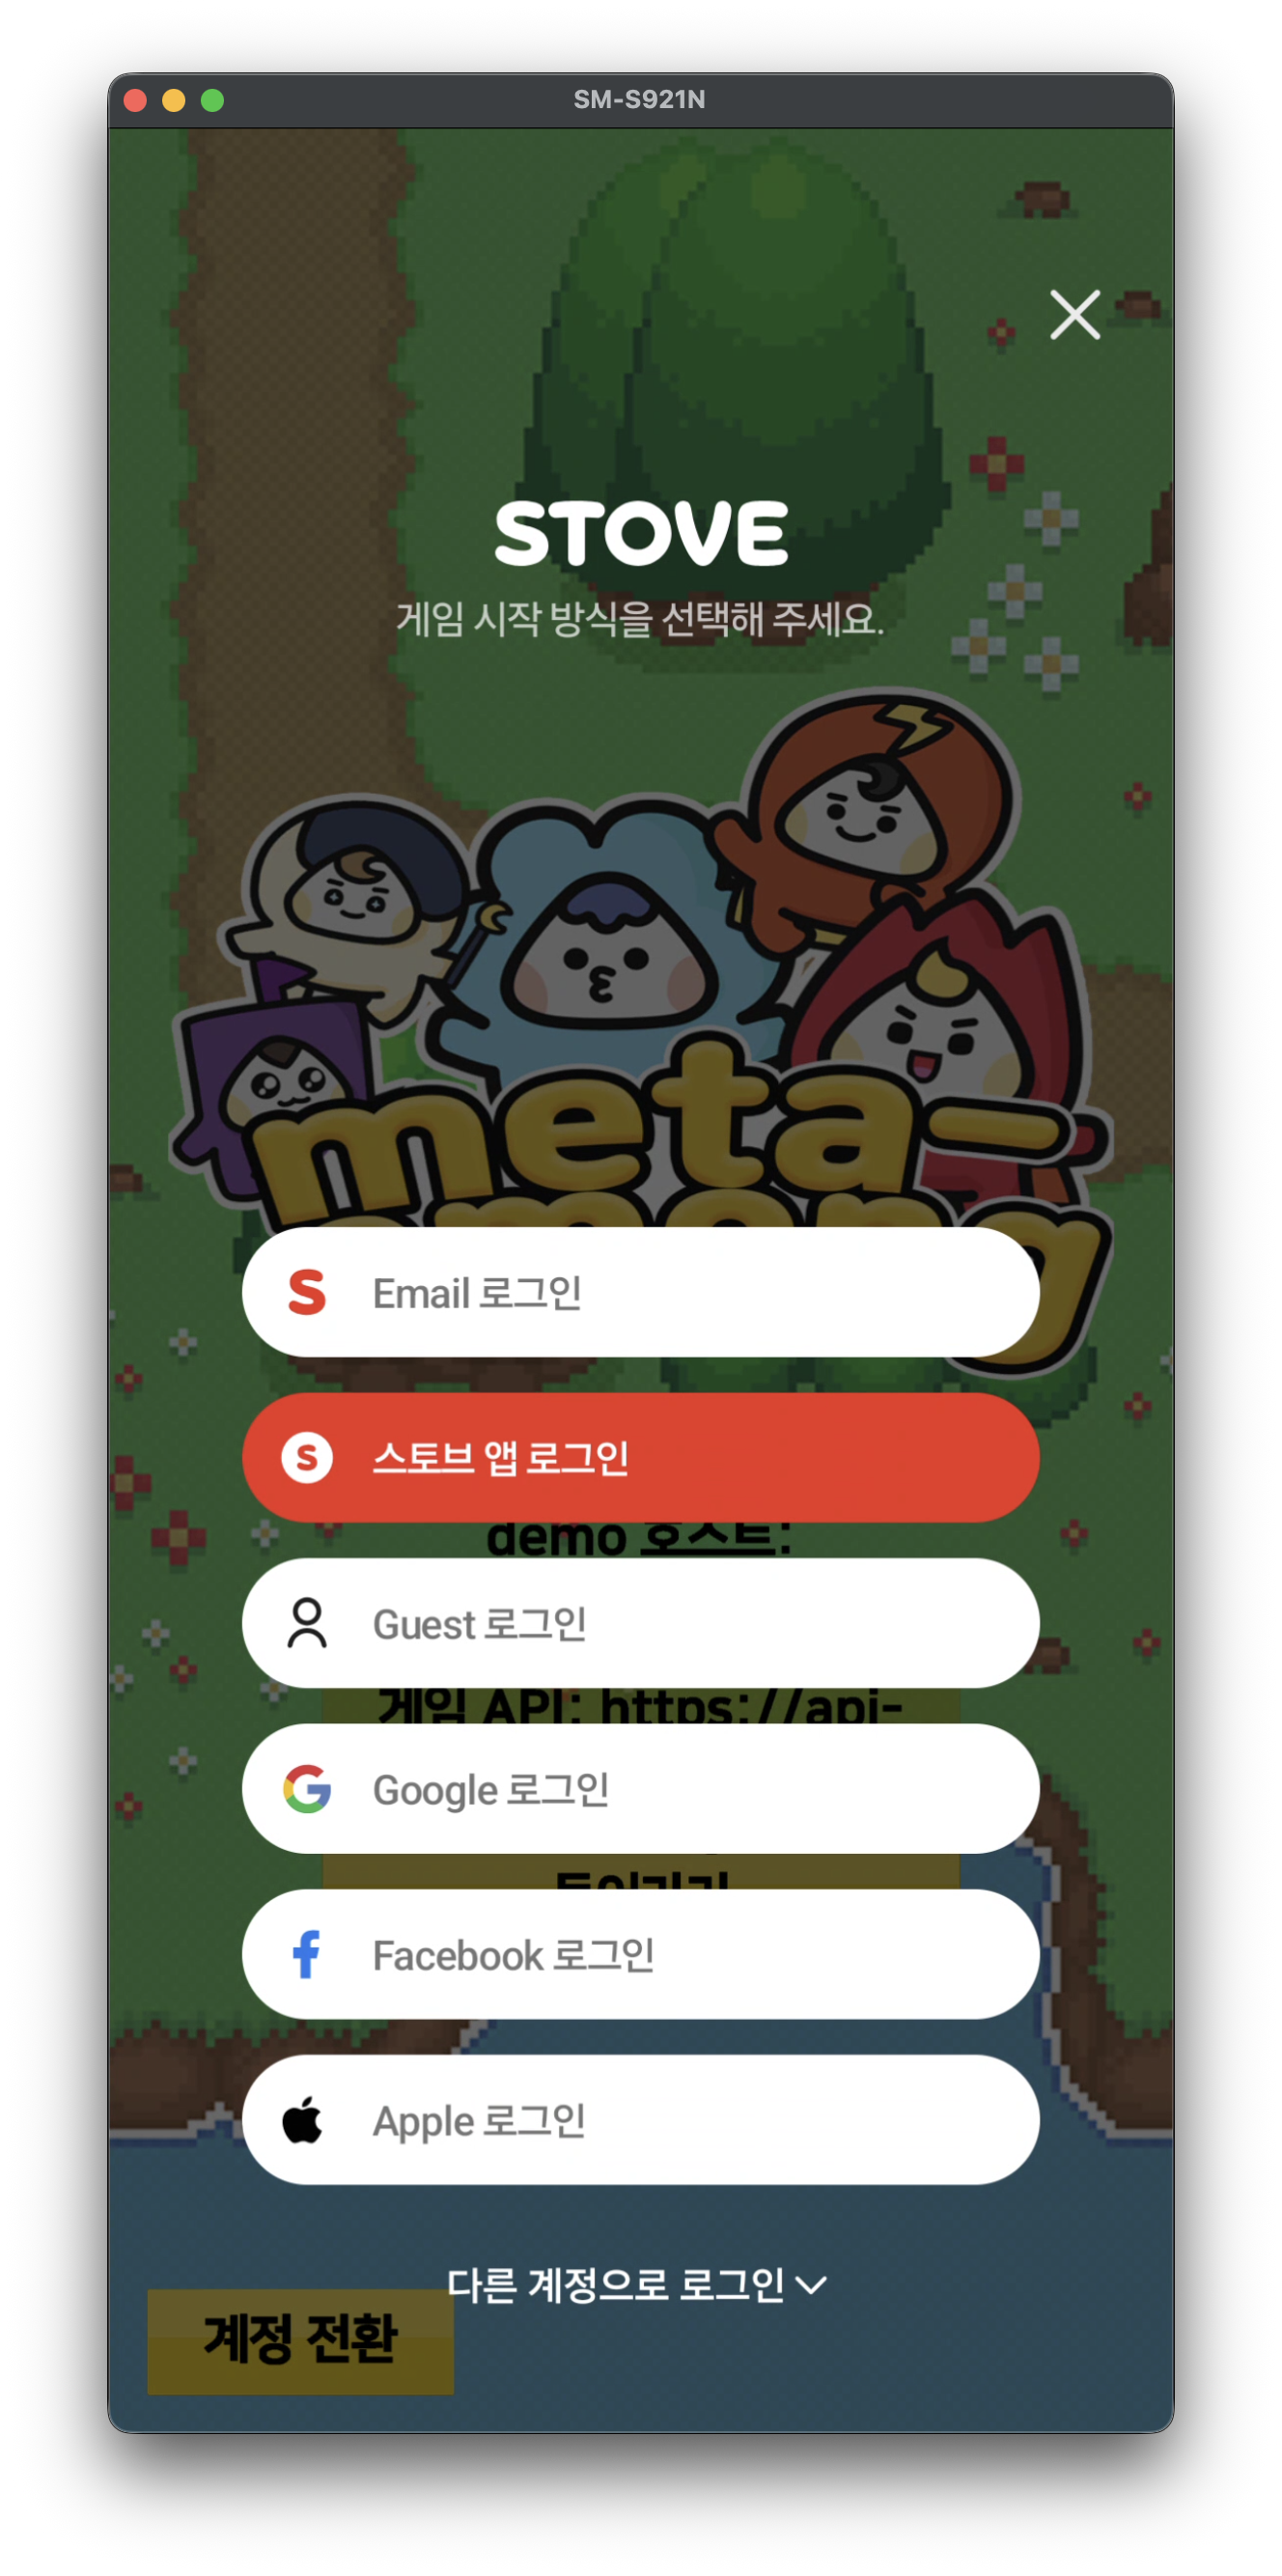
- The login window displays the login methods provided by STOVE (Email, STOVE App, Guest, Google, Facebook, Apple, etc.). The displayed methods follow the STOVE Login Provider settings.
- For the sample game experience, we provide Email Login and Guest Login, which can be checked without separate settings or accounts.
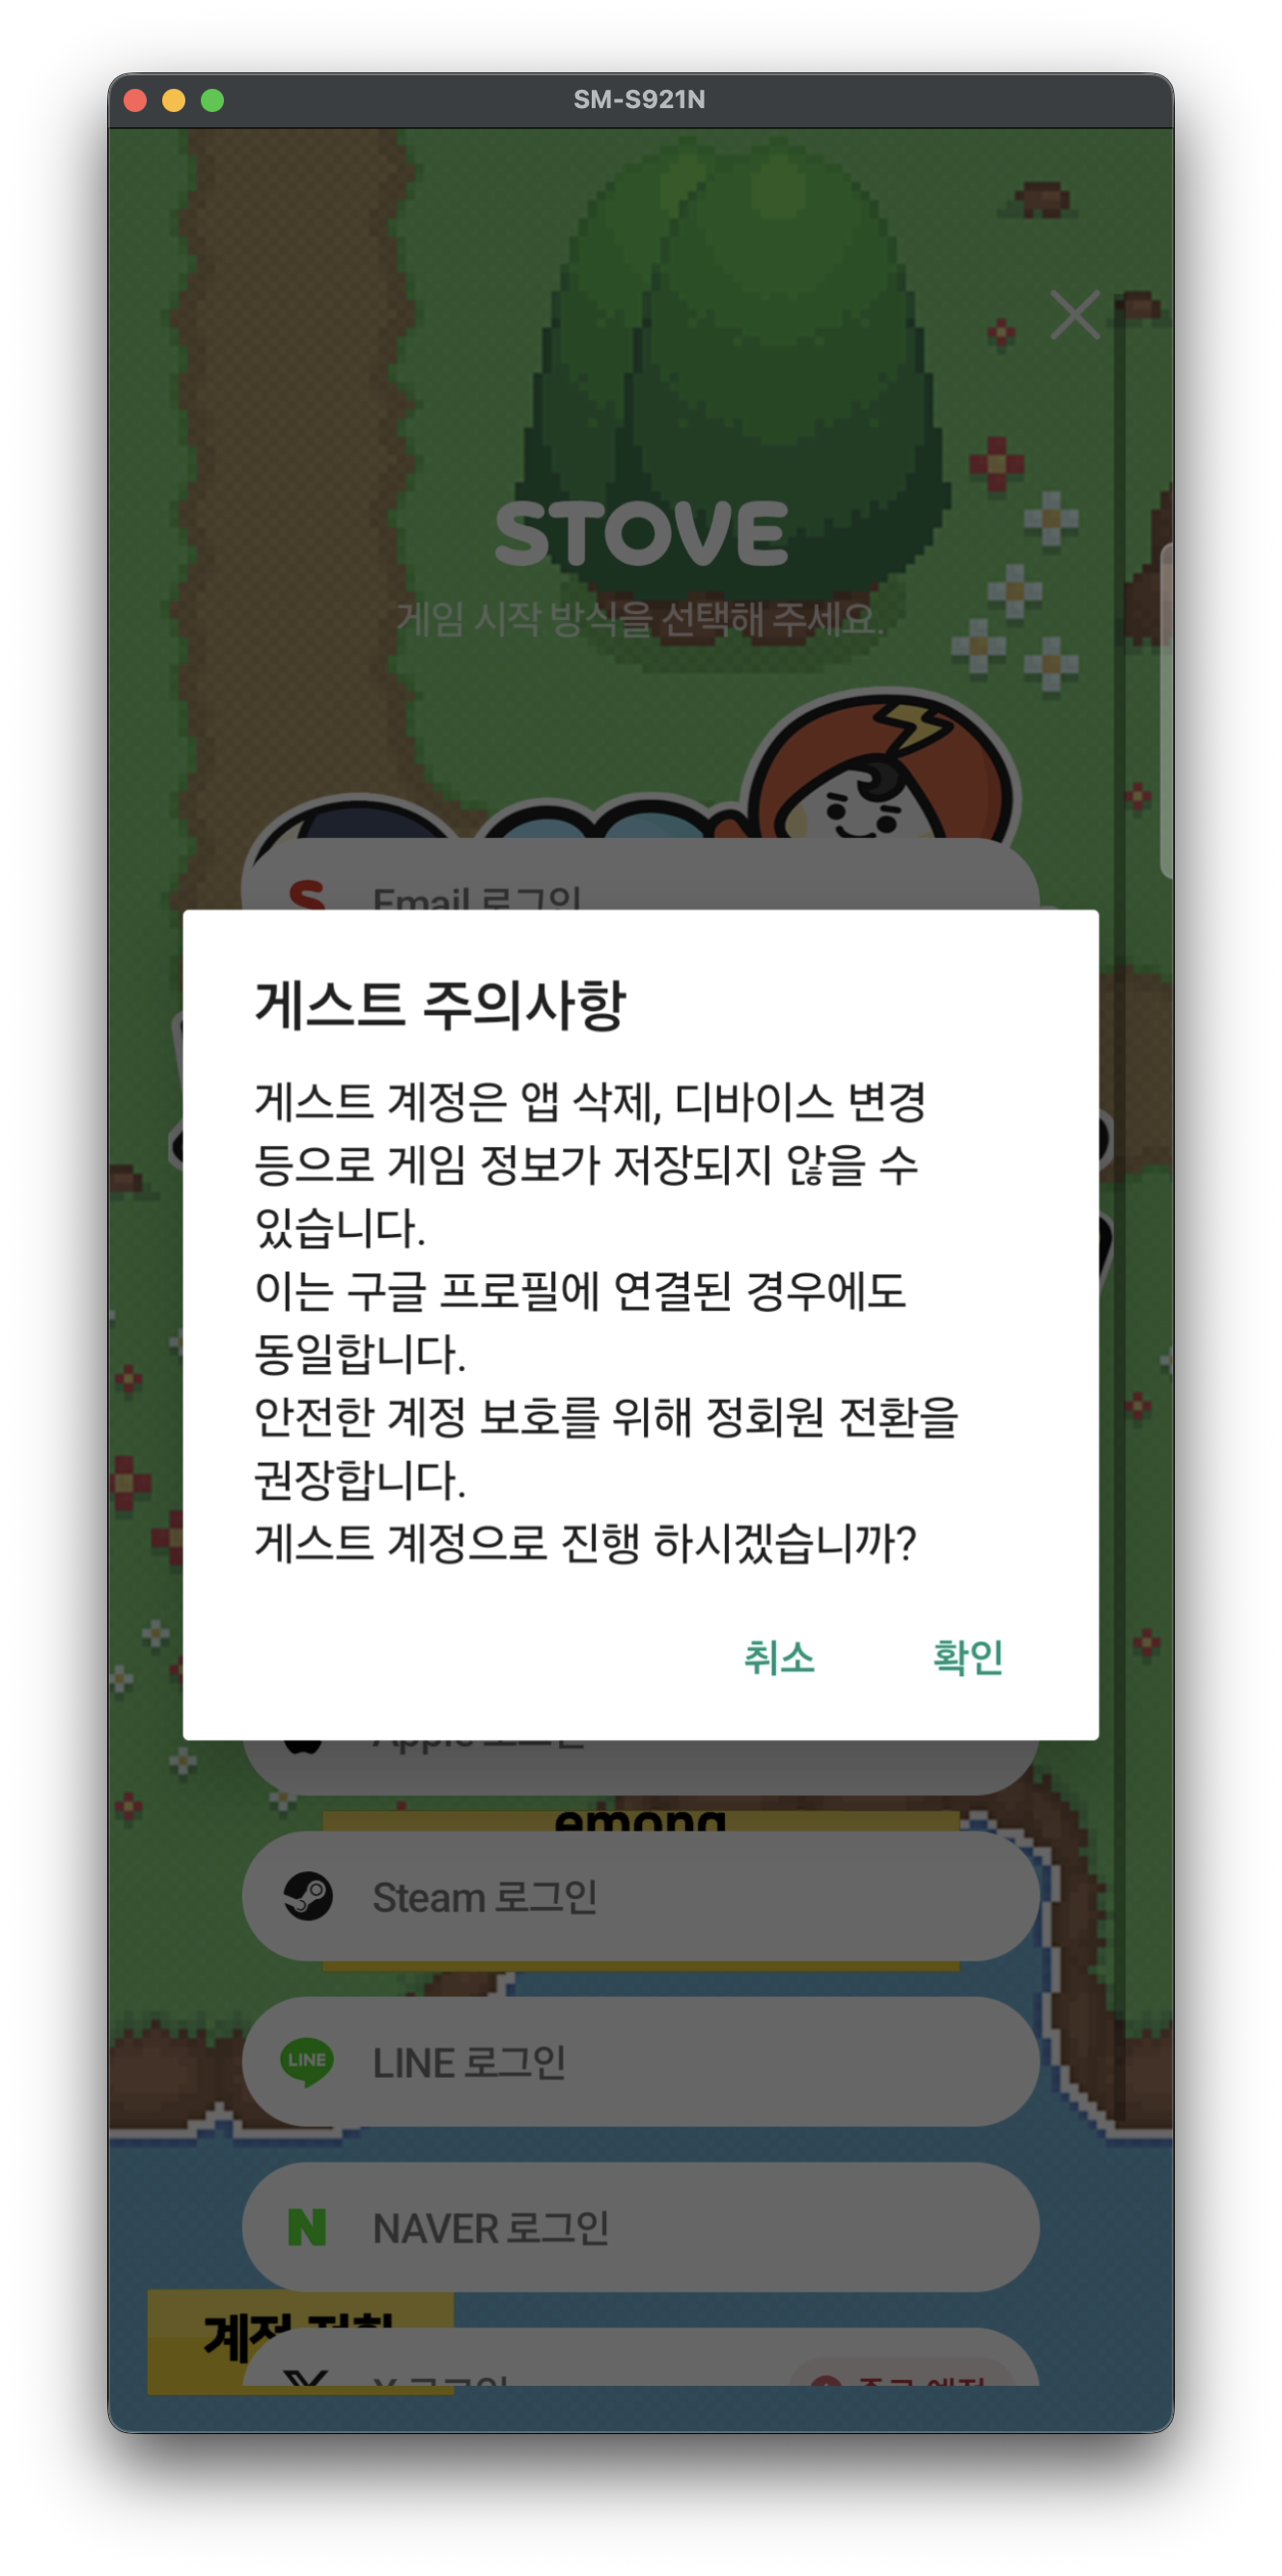
Guest Login
- A guide popup is displayed first because game information may not be maintained when deleting the app or changing devices. After confirmation, you proceed with a guest account.
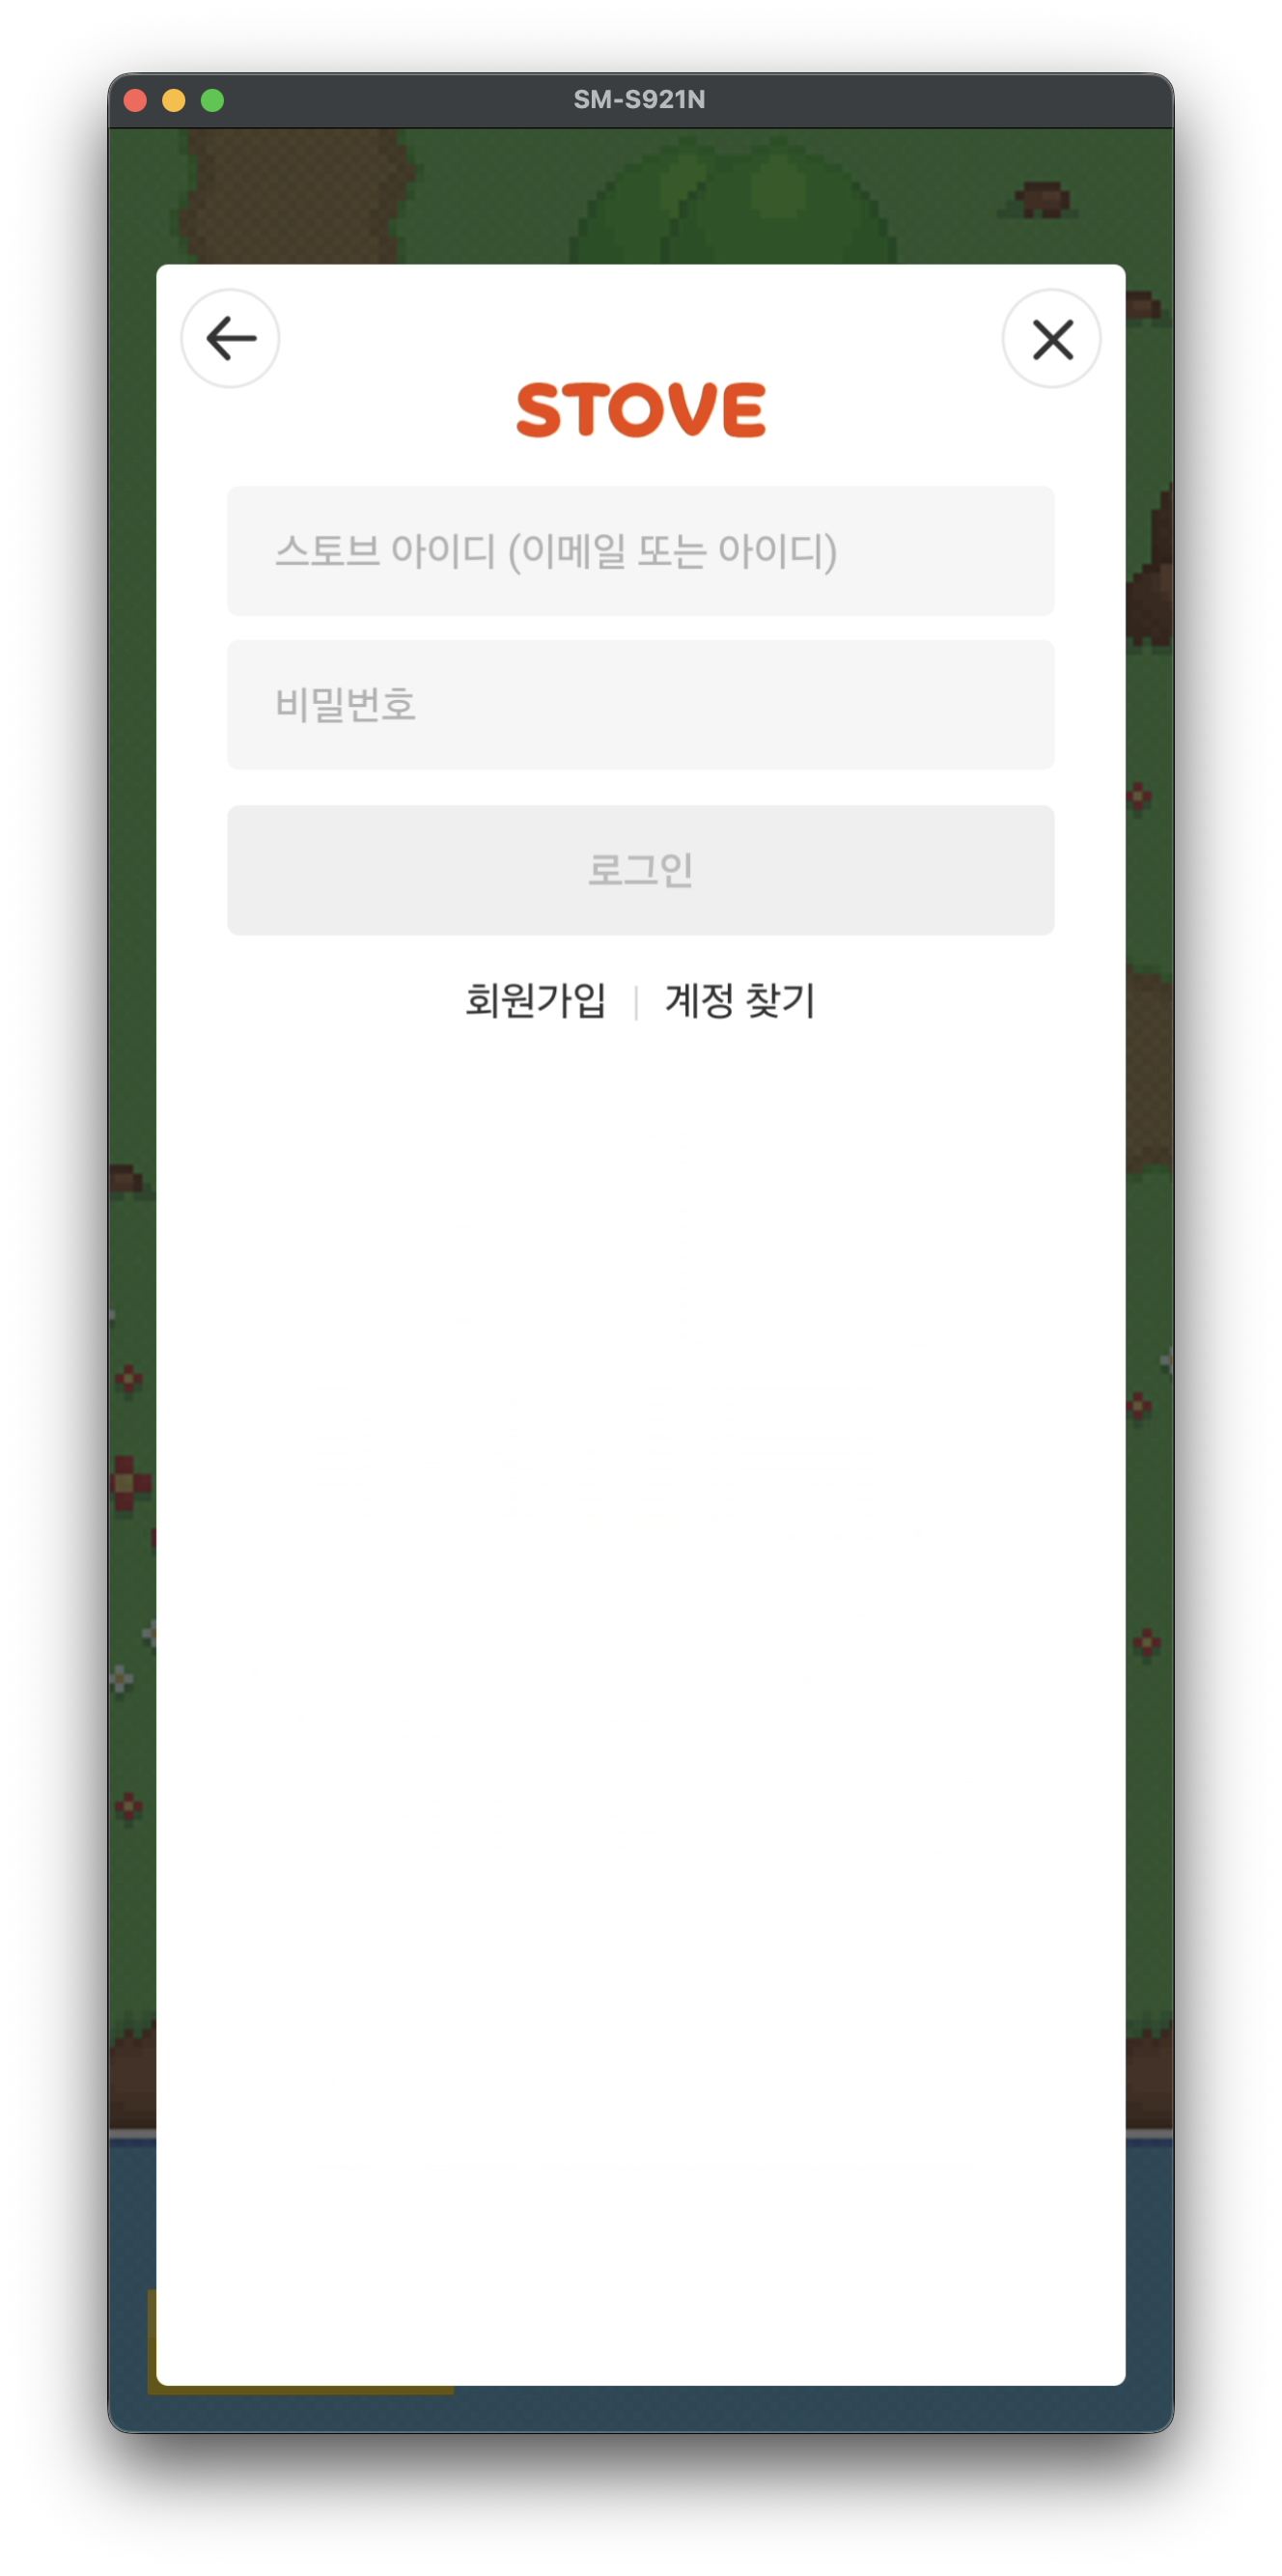
Email Login
- Enter your STOVE ID (email) and password to log in or sign up.
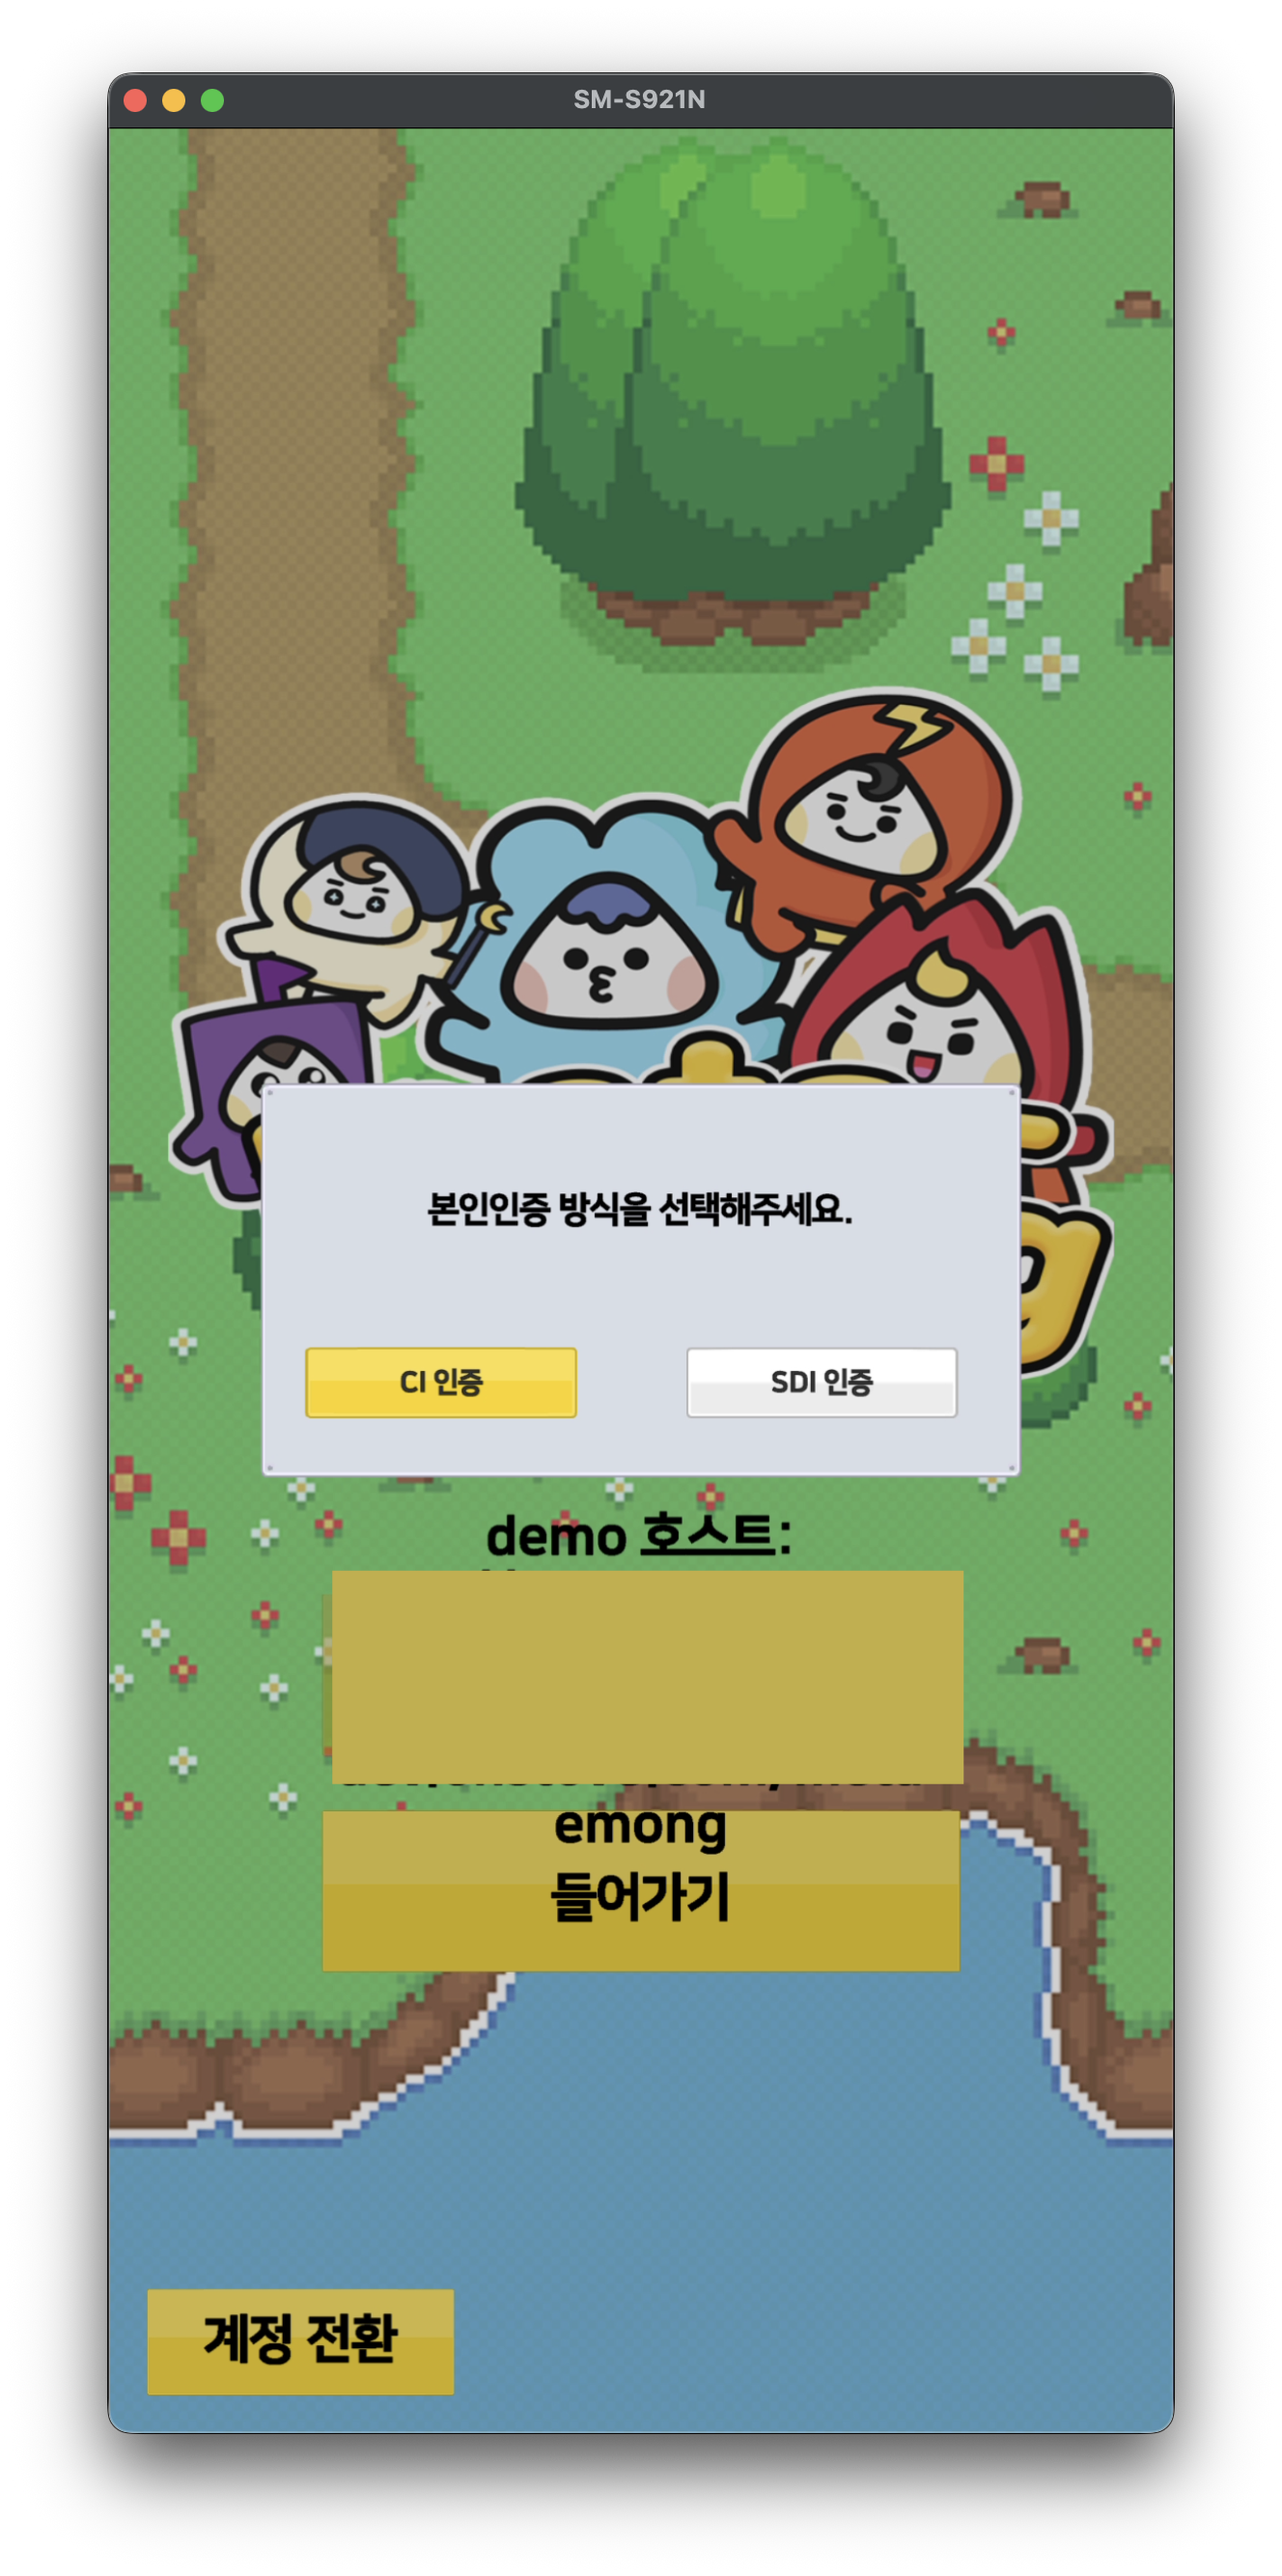
Identity Verification
Selecting Identity Verification Method
- Identity verification is called via
AuthUI.VerifyIdentification, and can be called from the point after login. - In the sample game, identity verification is called immediately after login (before entering the character selection scene), and it is configured to allow you to choose between CI verification and SDI verification.
- The actual call timing can be freely placed at any stage after login according to game policy.
Character Creation/Inquiry
- Before entering the lobby, you check for characters, and the flow changes depending on whether a character exists.
Character Creation
- When there is no character: Select a character (avatar) and enter a nickname on the
내 프로필 설정screen to create one.
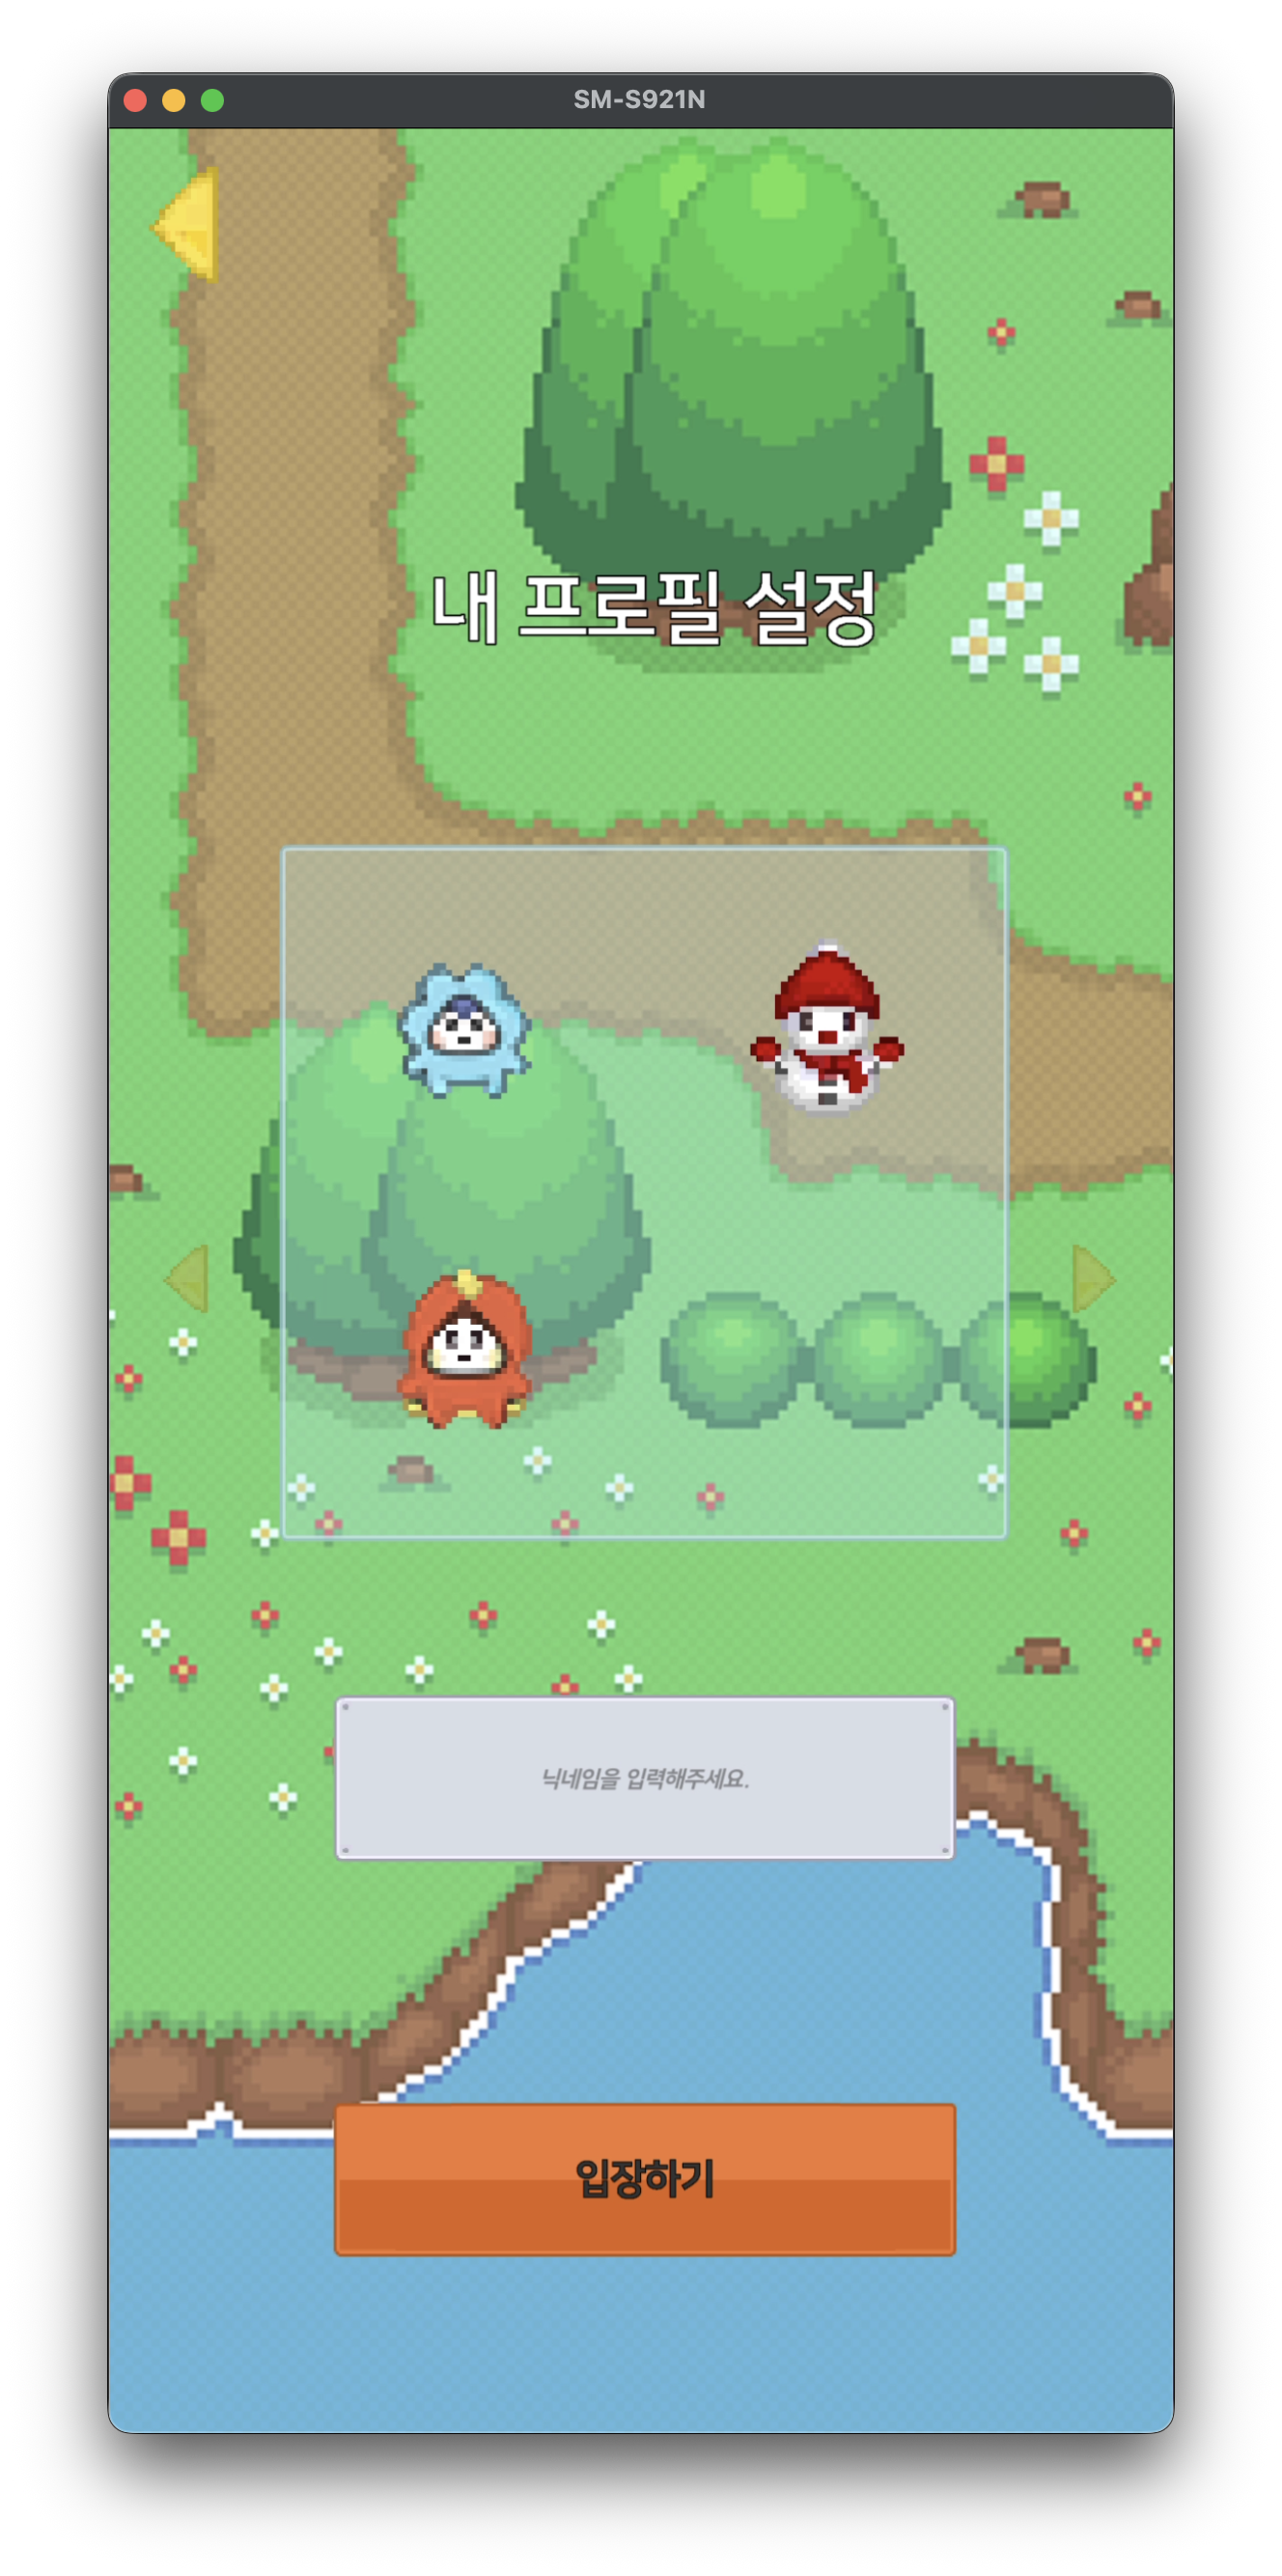
Checking Characters, Entering
- When there is a character: Check the existing character and select
프로필 수정하기or입장하기. - Pressing Enter sets the SDK Game Profile (
GameProfile) just before entering the lobby, and then specifies the payment identifier withSetCustomBillingGUID.
Setting the game profile is a mandatory step to use subsequent features such as store payments. If you skip this step, payments will not work properly.
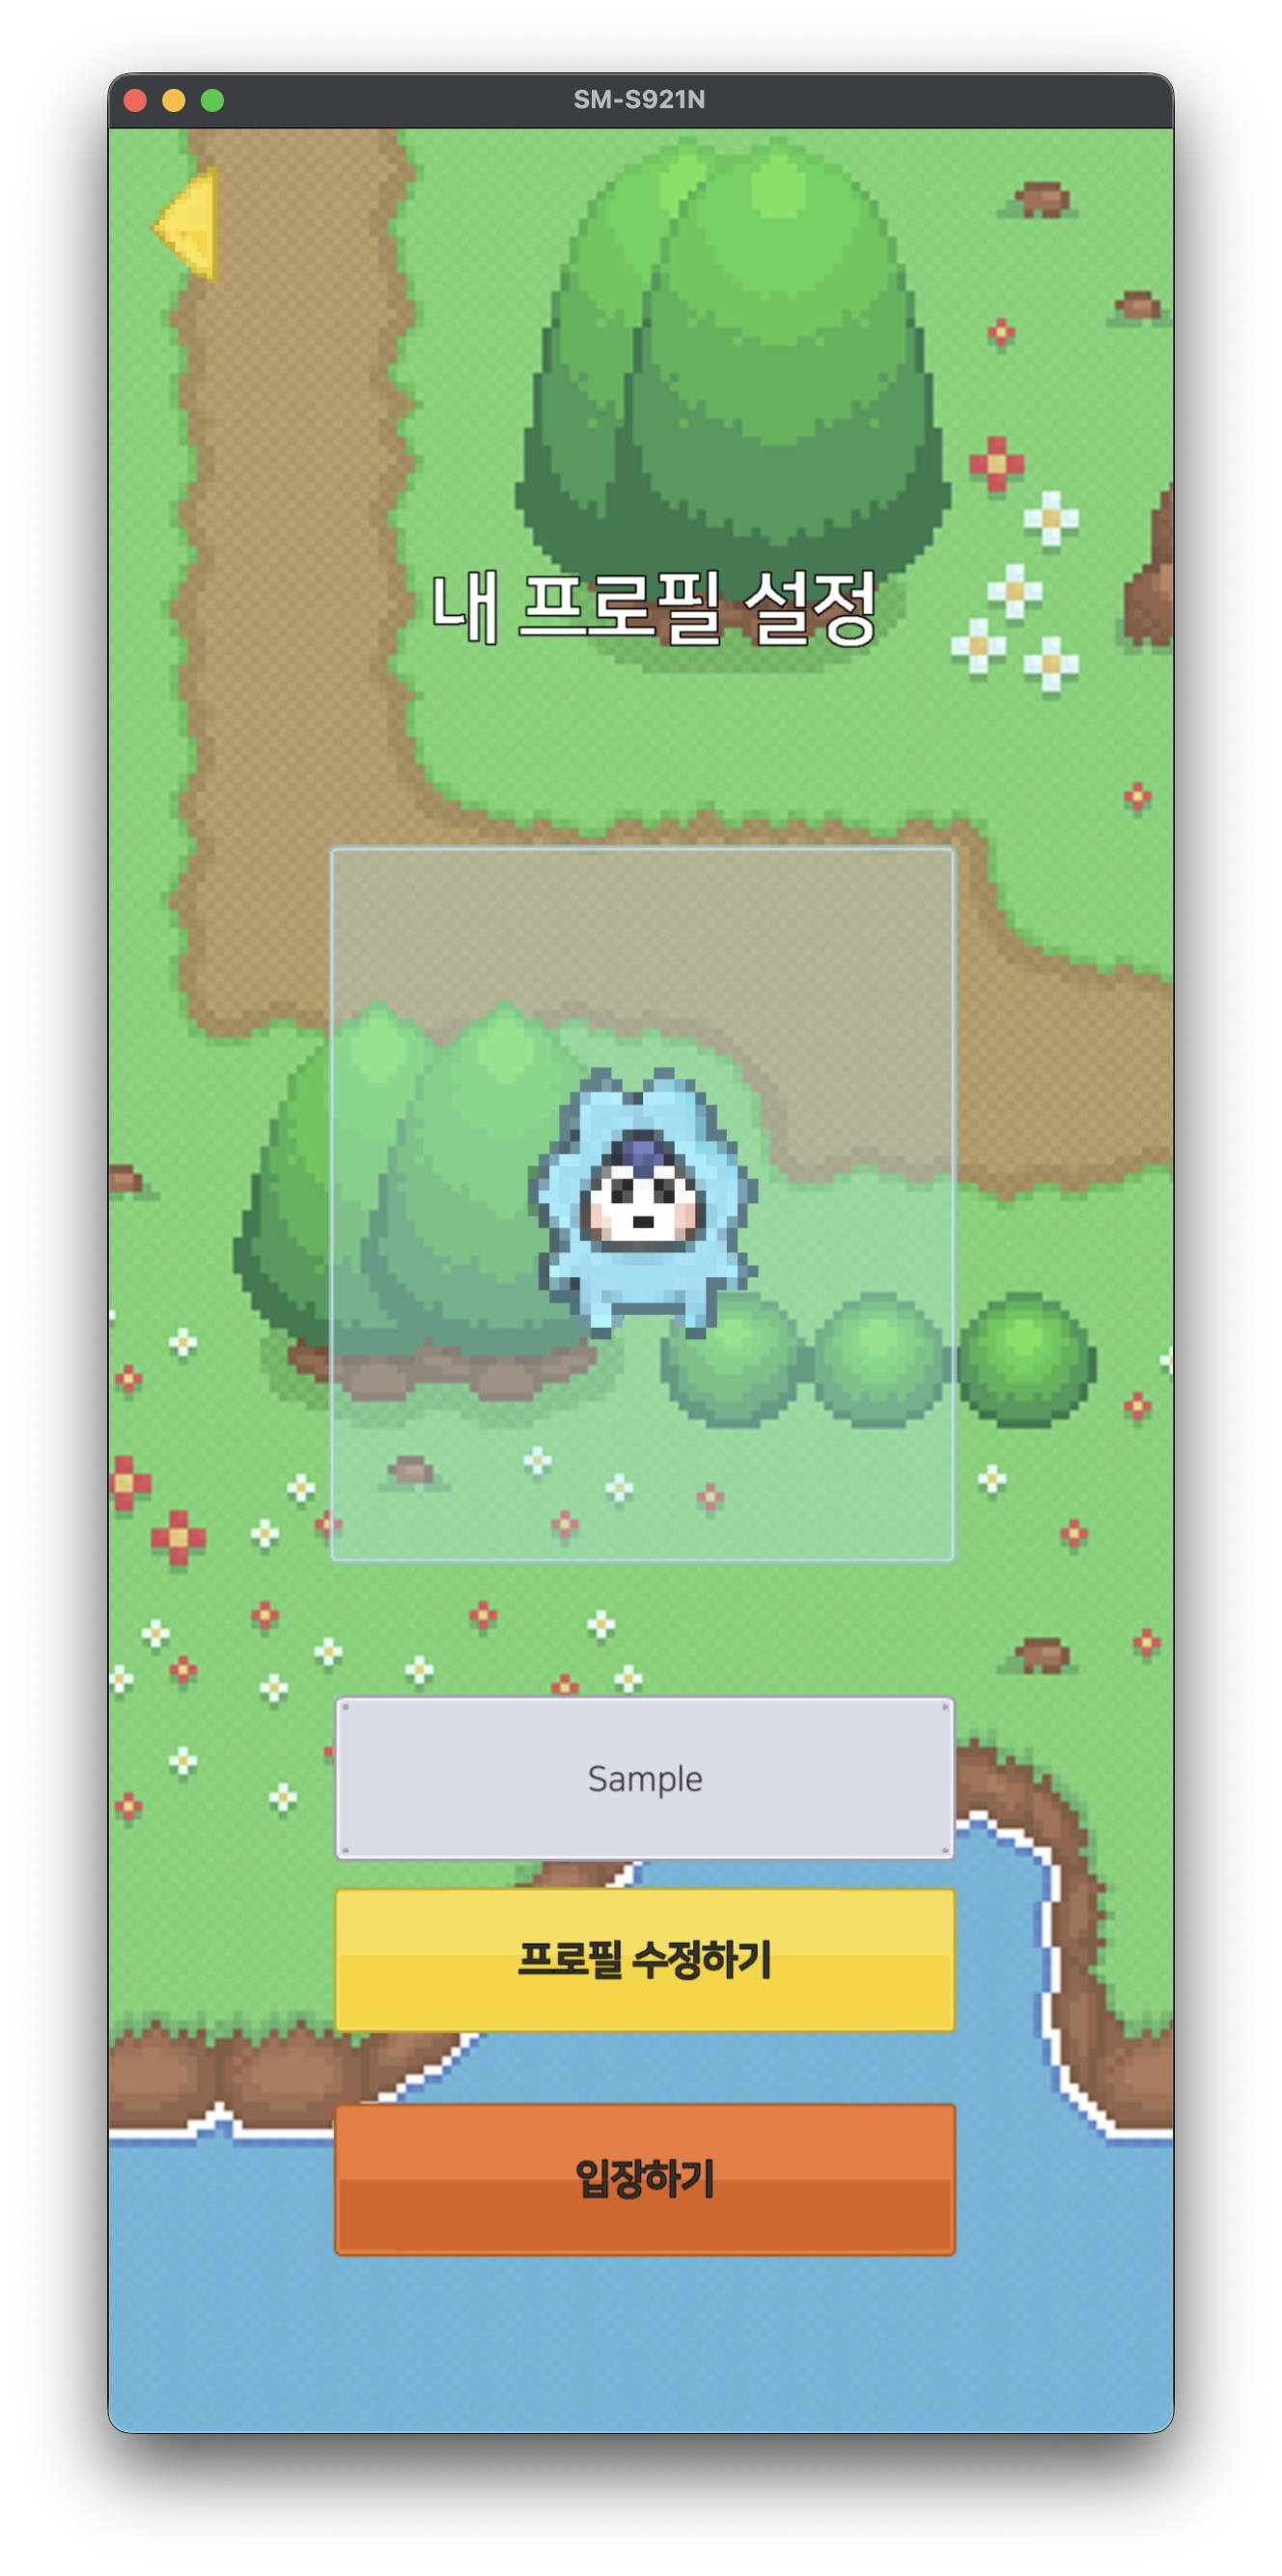
Lobby Entry
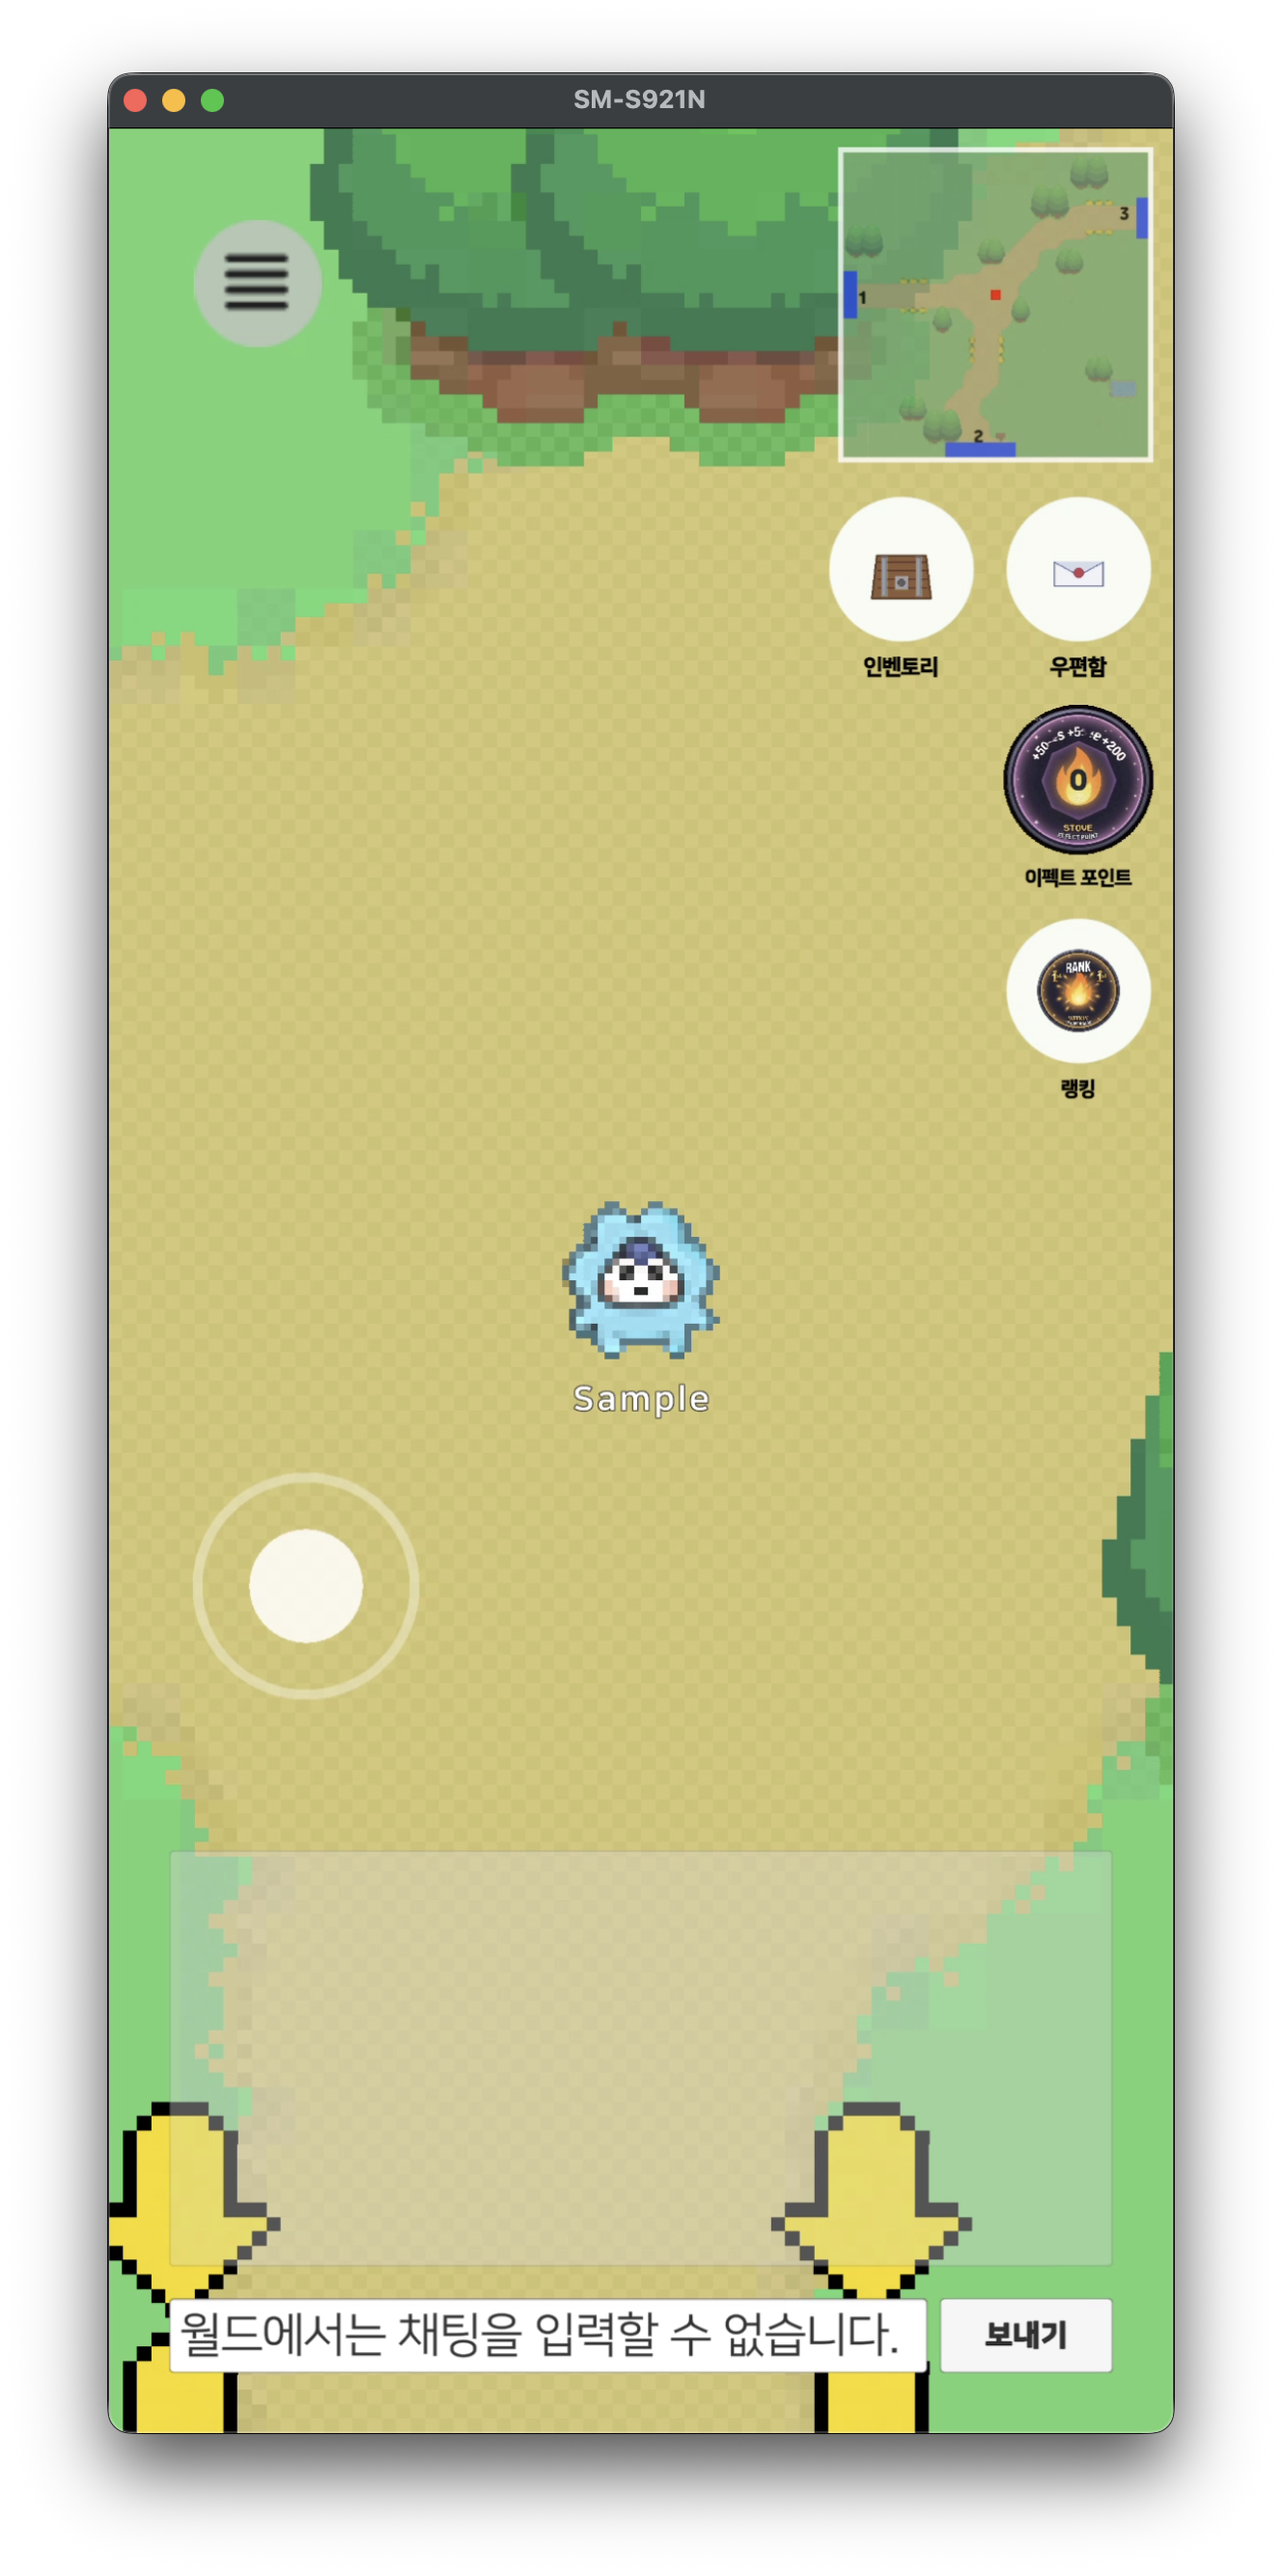
Lobby (World)
- Once you enter the lobby (world), you can control your character and experience the game.
- In the sample game, when entering the lobby, the SDK checks for refunds (
IAP.FetchVoidedPurchases), and if there are any, it calls re-payment for refunds (HandleVoidedPurchases). Please refer to the상점below for the purchase/refund flow.
Menu
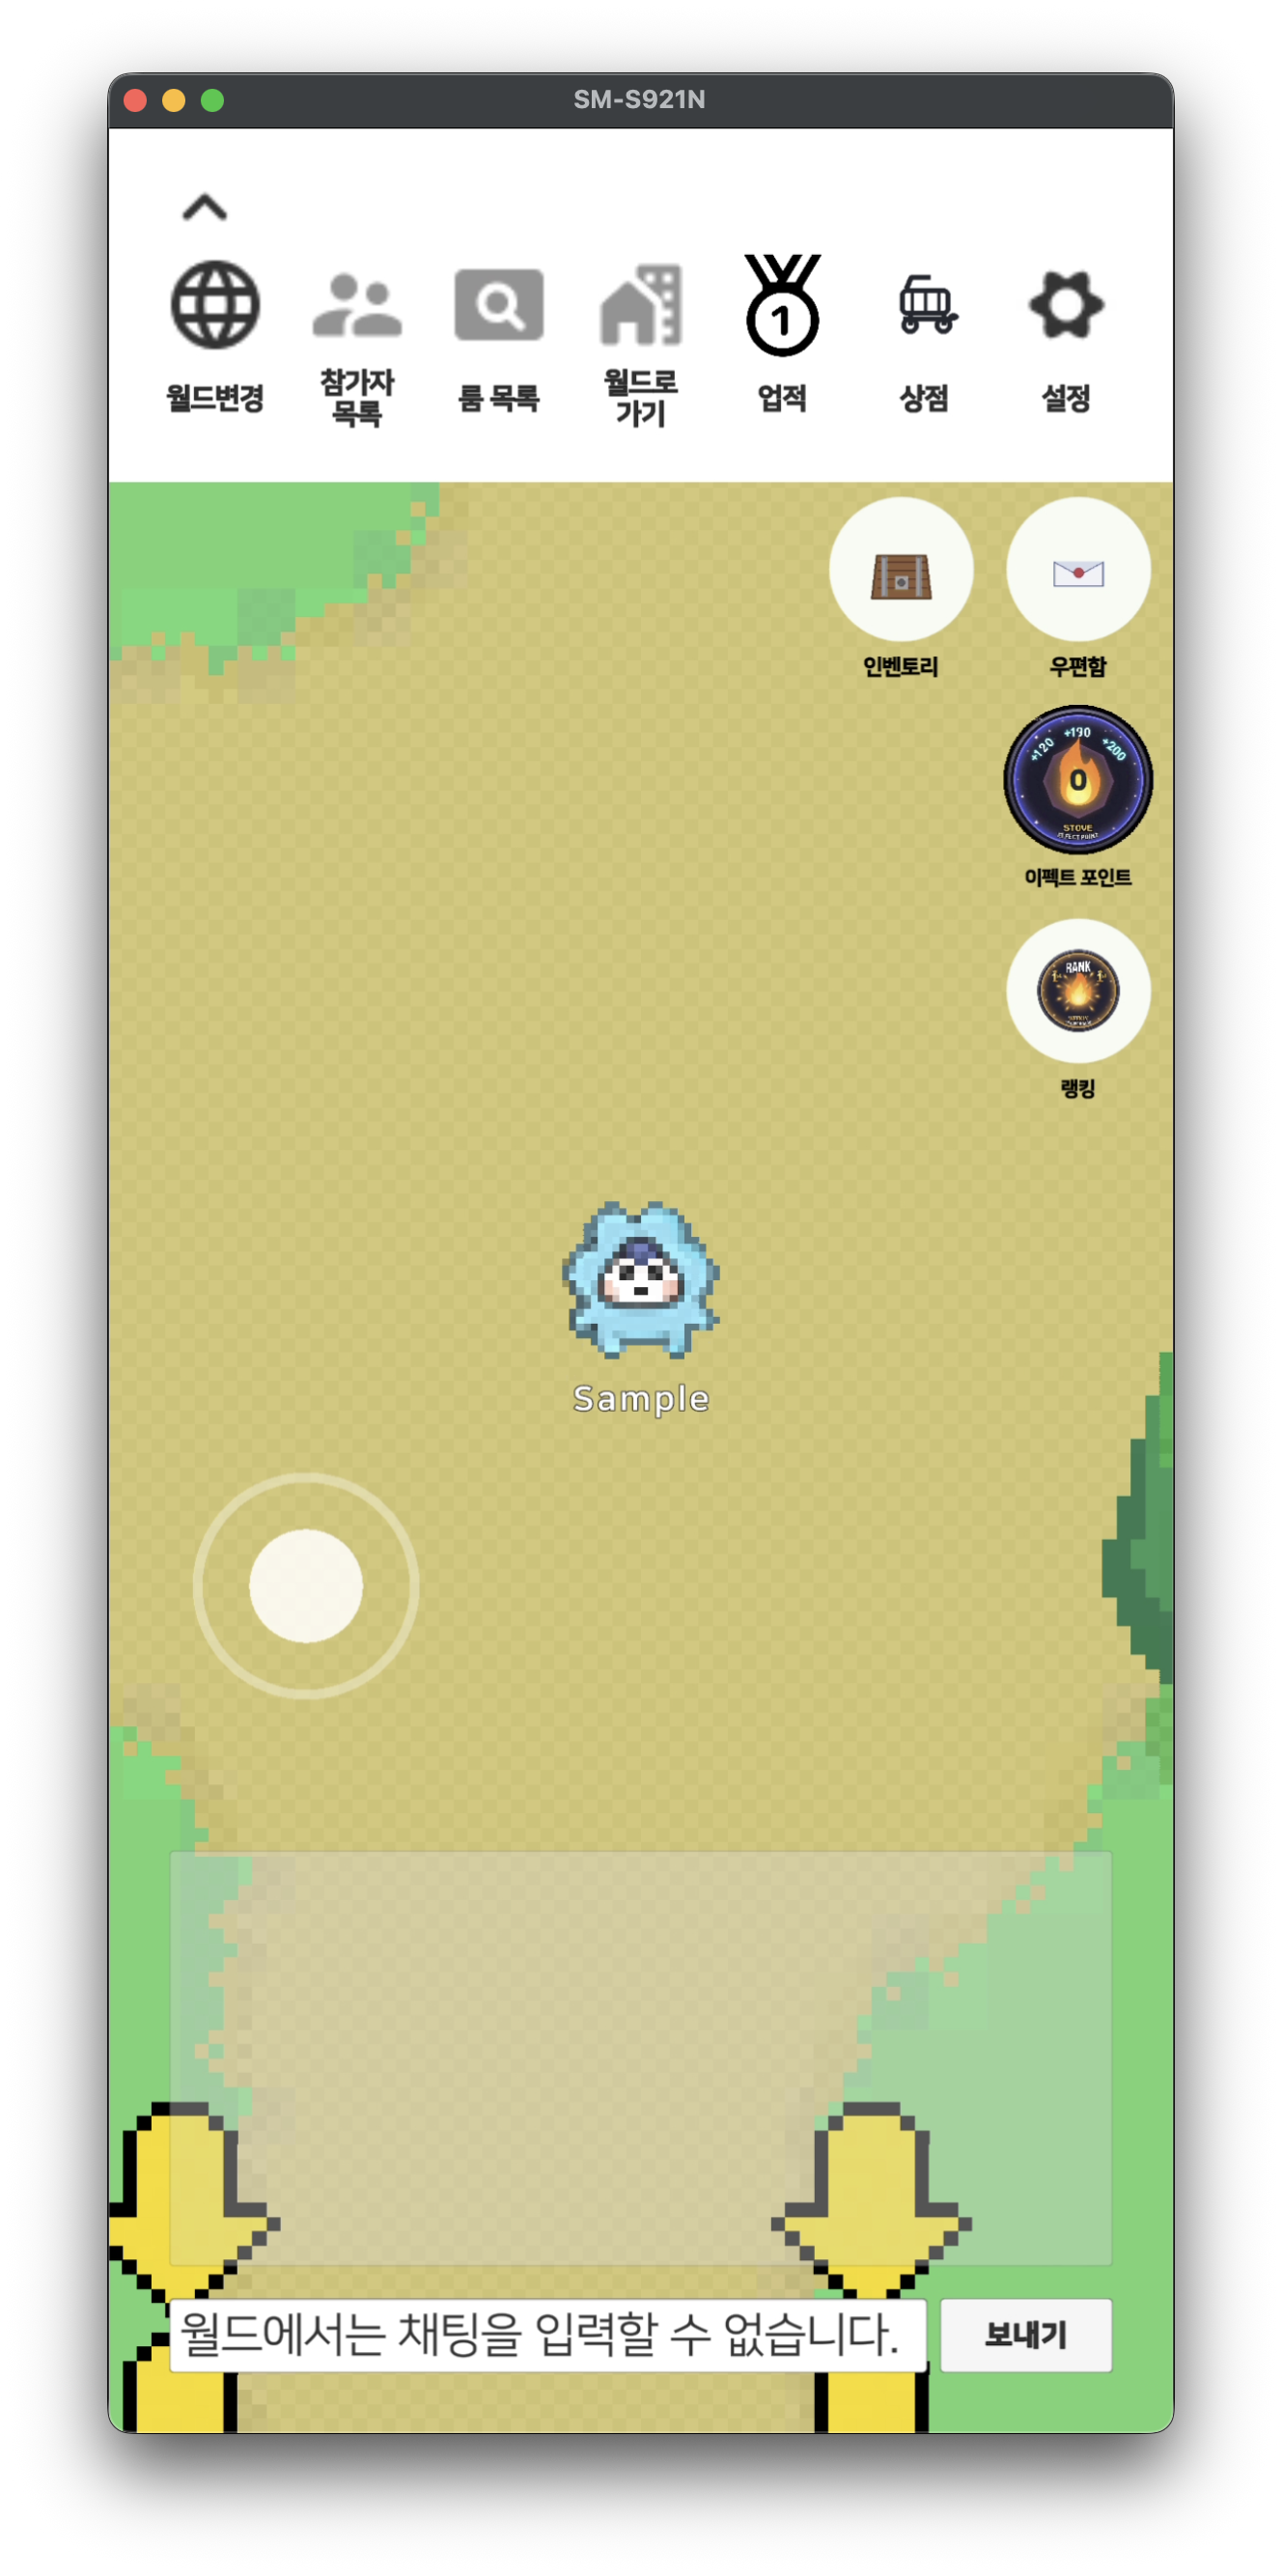
- Pressing the menu (≡) button at the top left allows you to move to
월드 변경,참가자 목록,룸 목록,월드로 가기,업적,상점,설정.
Store
Store Screen
- When you open the store,
IAP.FetchProductsqueries the product list and displays it in the UI. - In the demo environment, the top section displays
DEMO · 실제 과금이 이루어지지 않습니다.banner and환불button together. (The refund button is exclusive to the demo environment.)
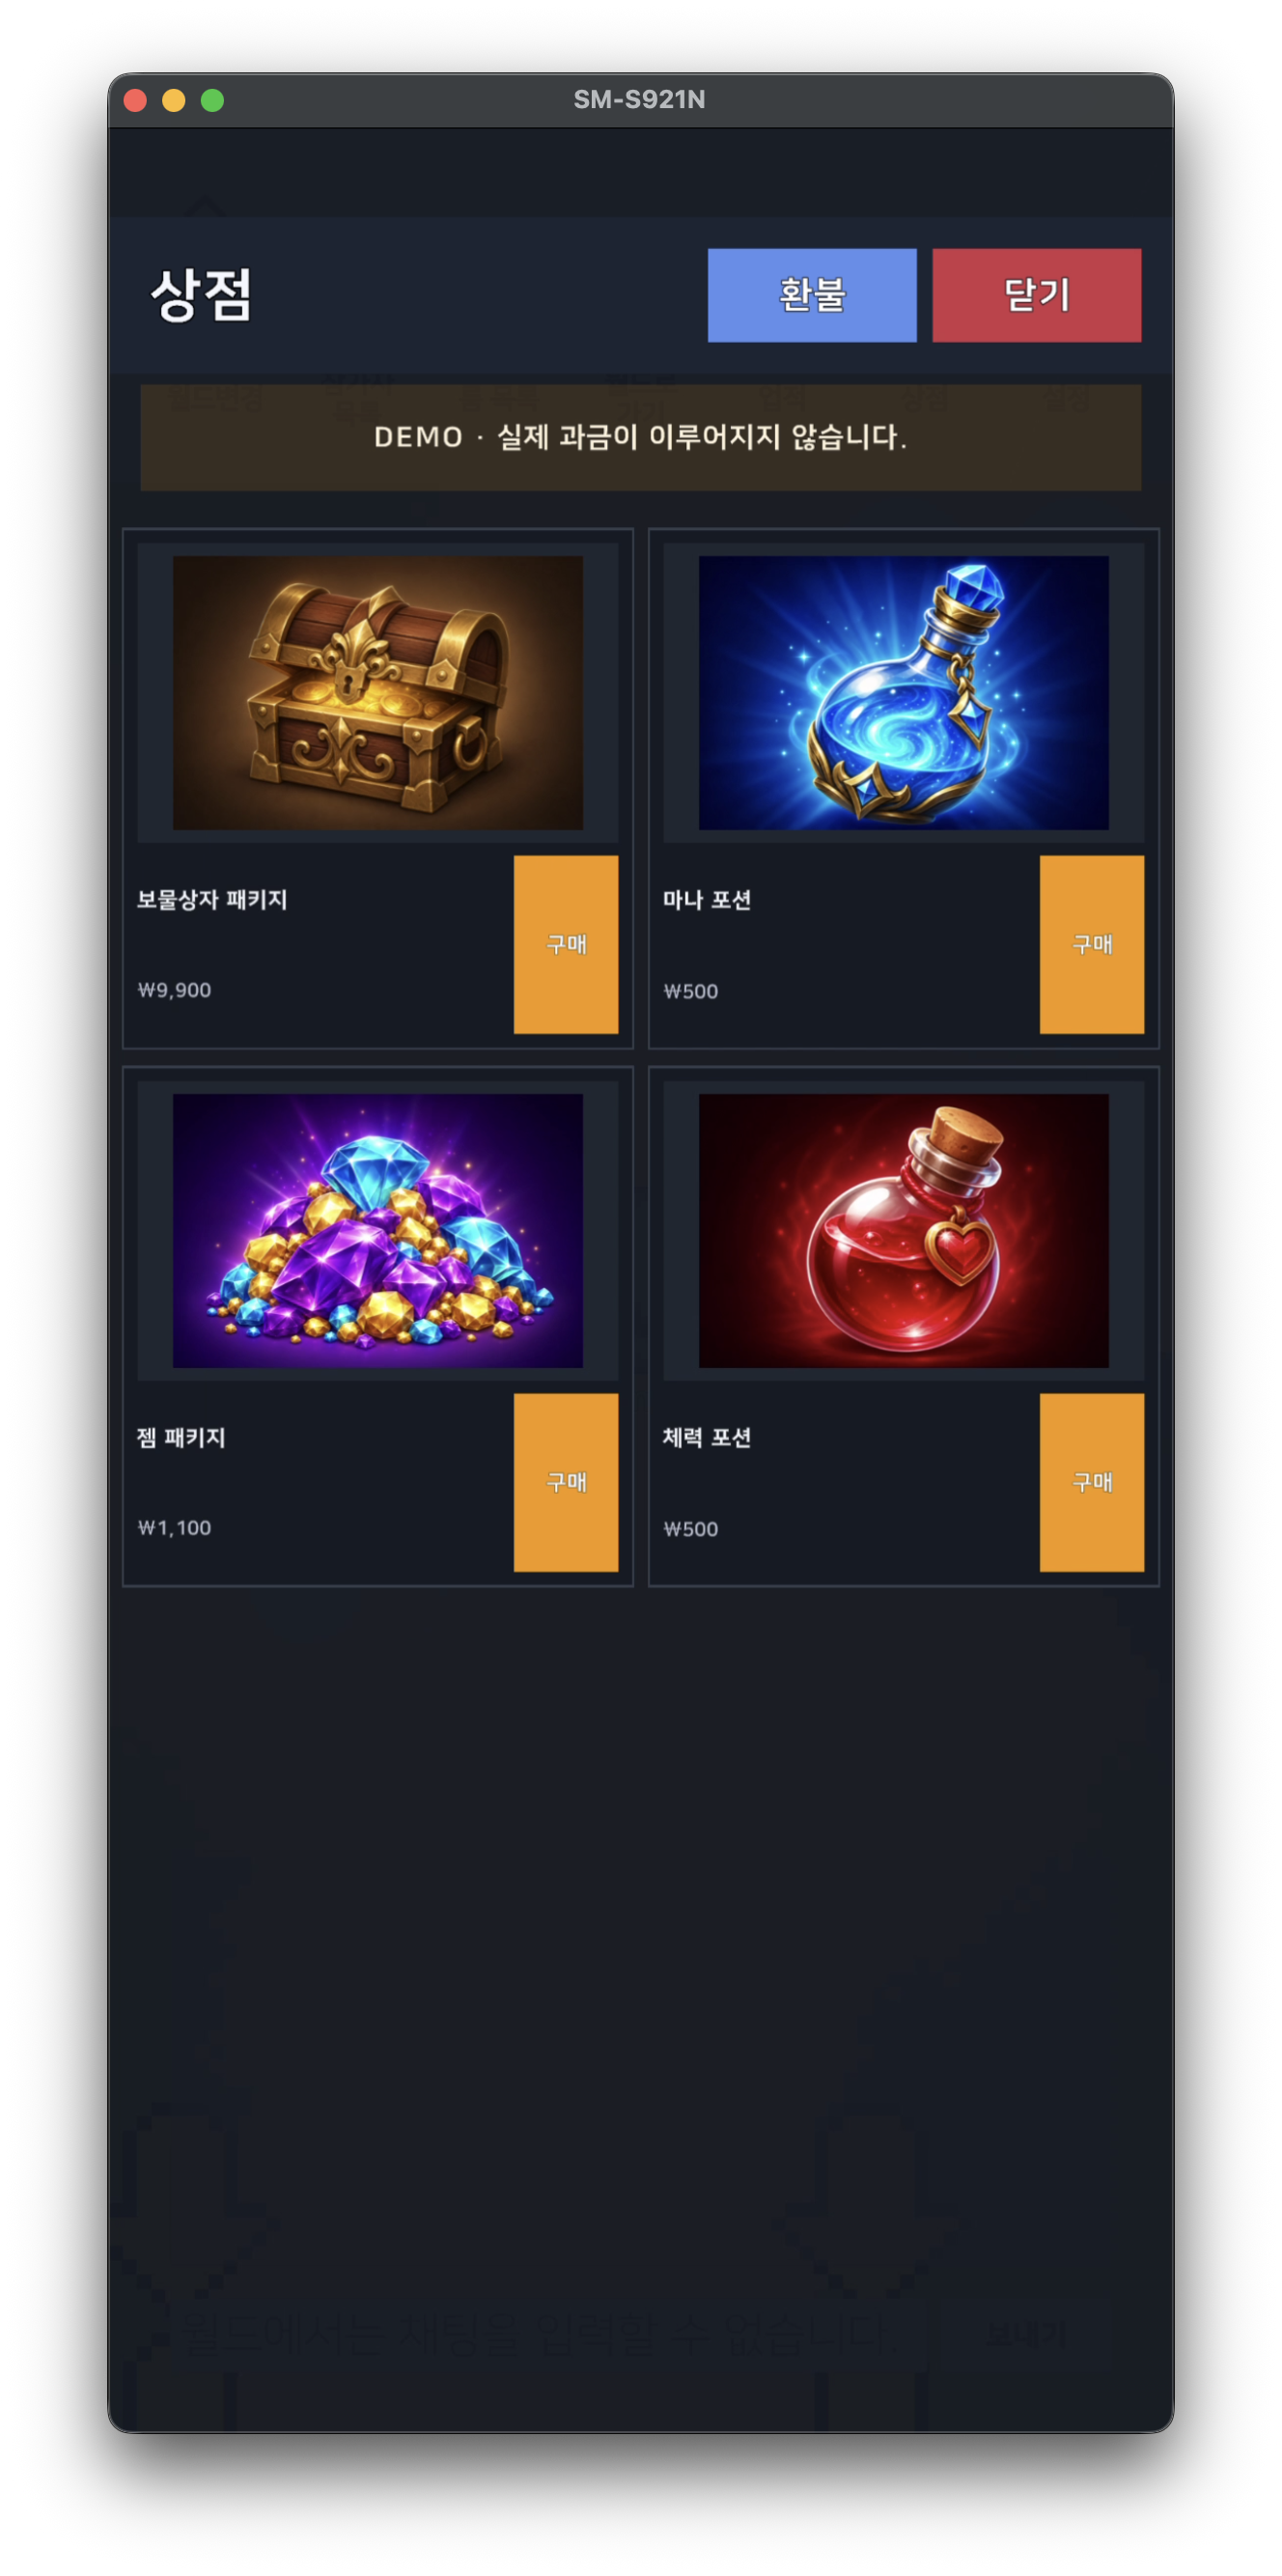
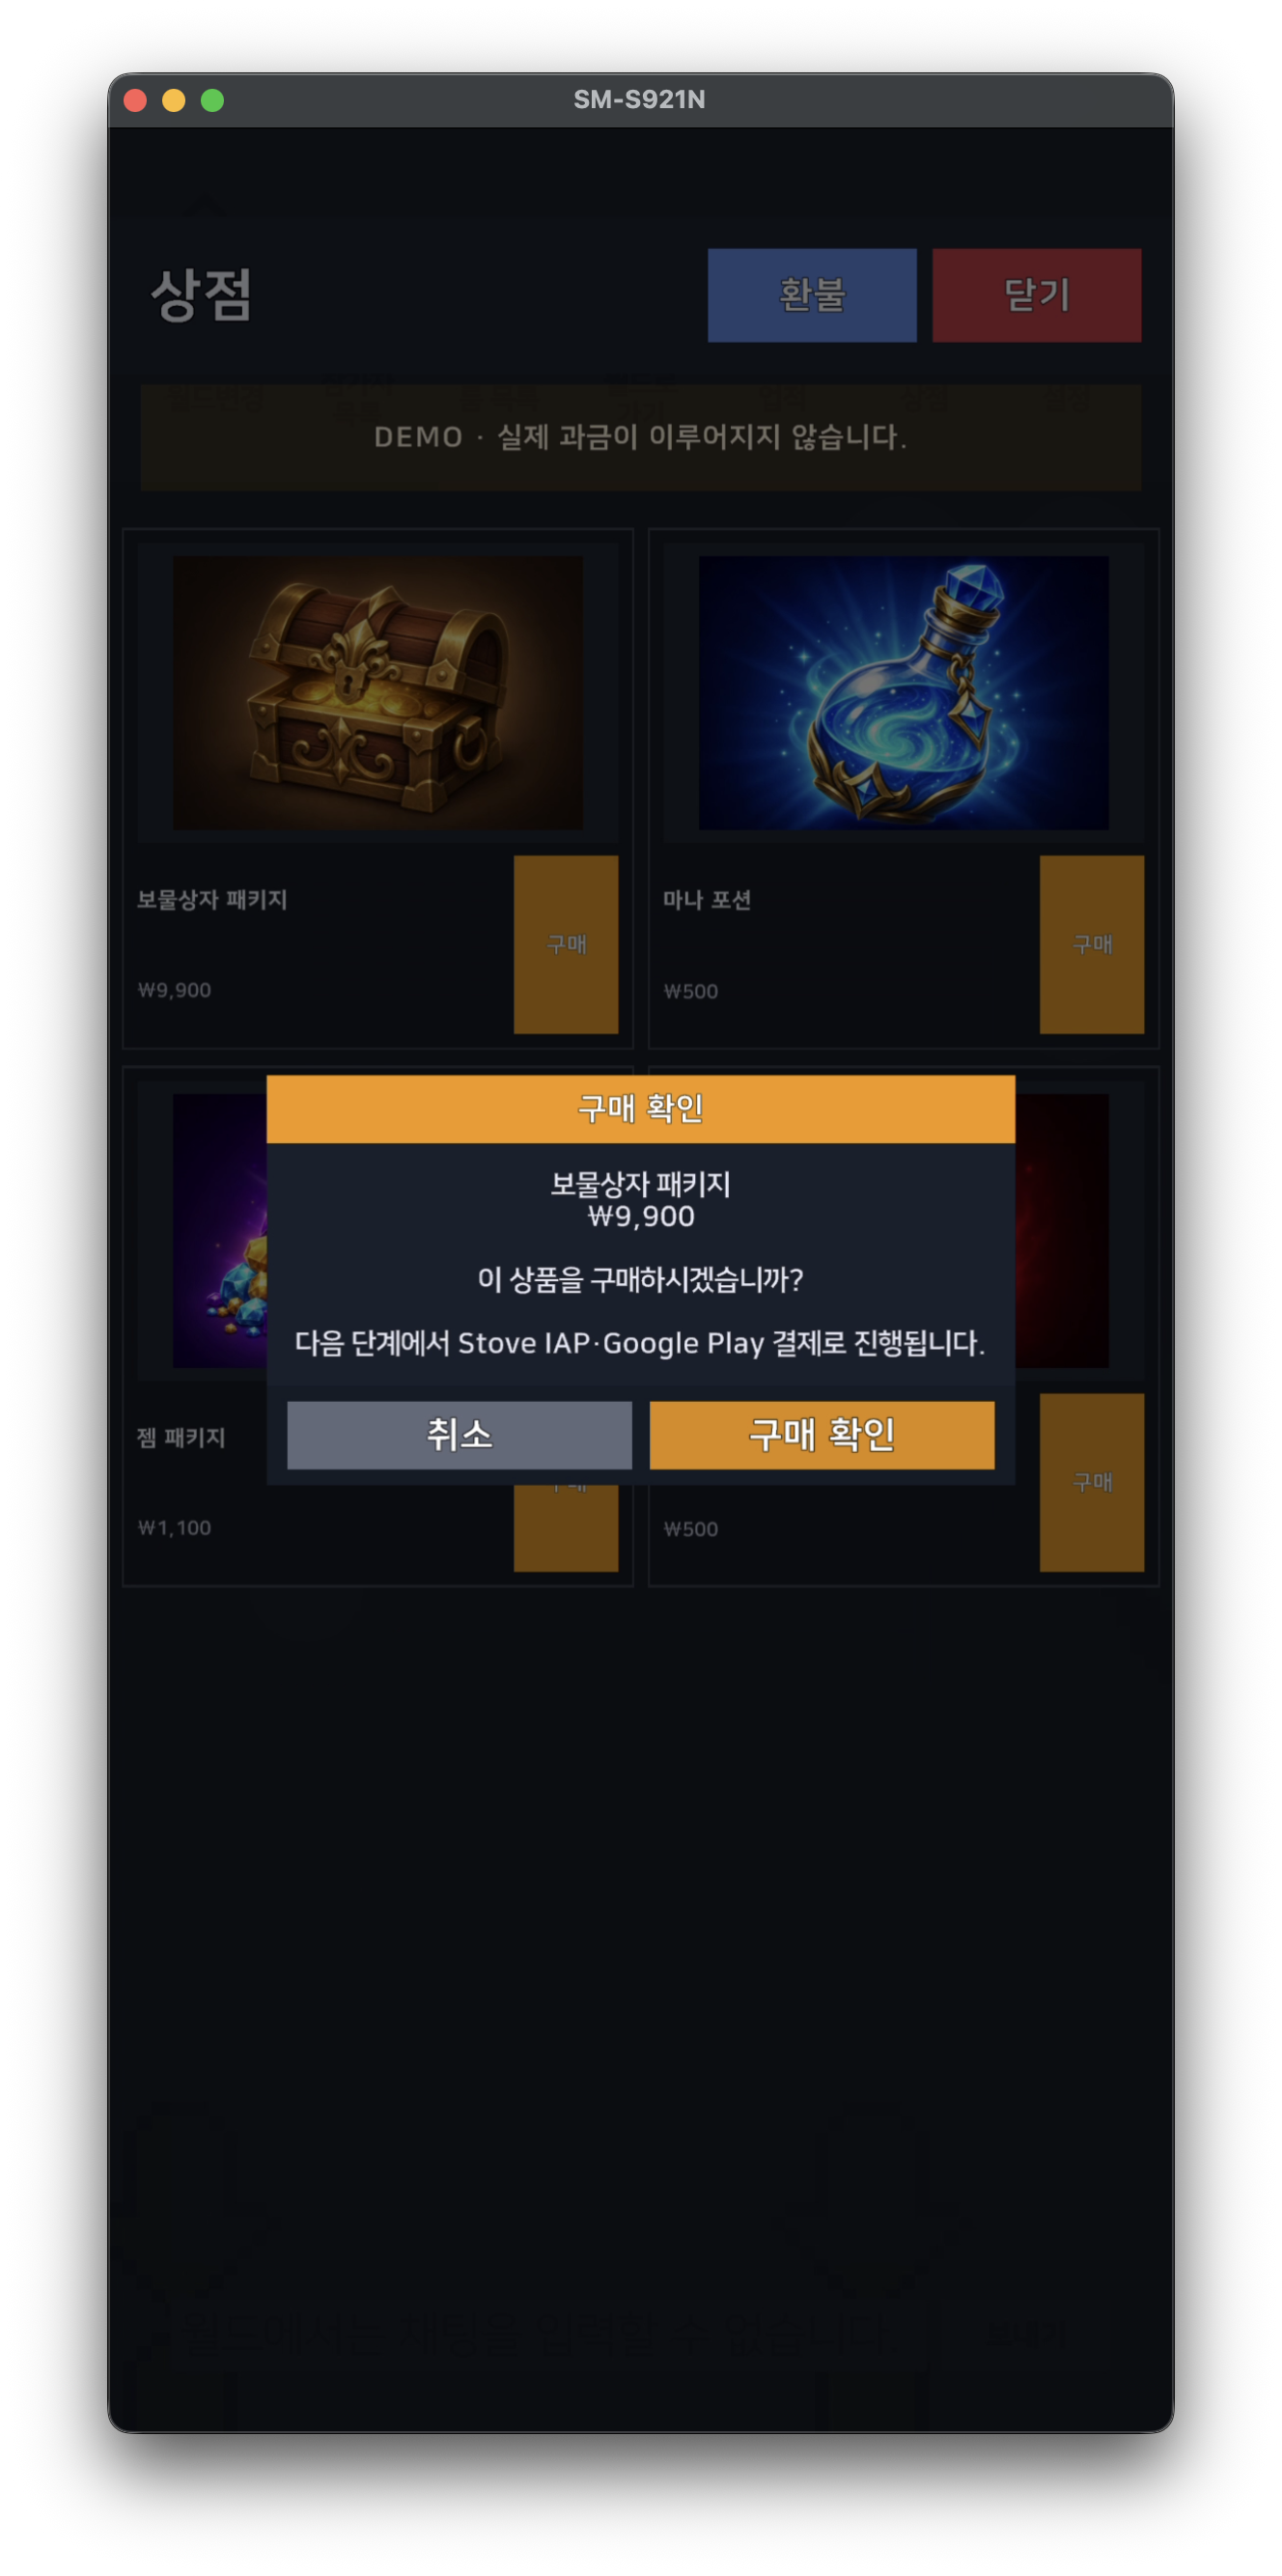
Purchase Confirmation
- Pressing the Purchase button for a product displays the purchase confirmation popup. Pressing Confirm Purchase initiates the
Stove IAPpayment flow.
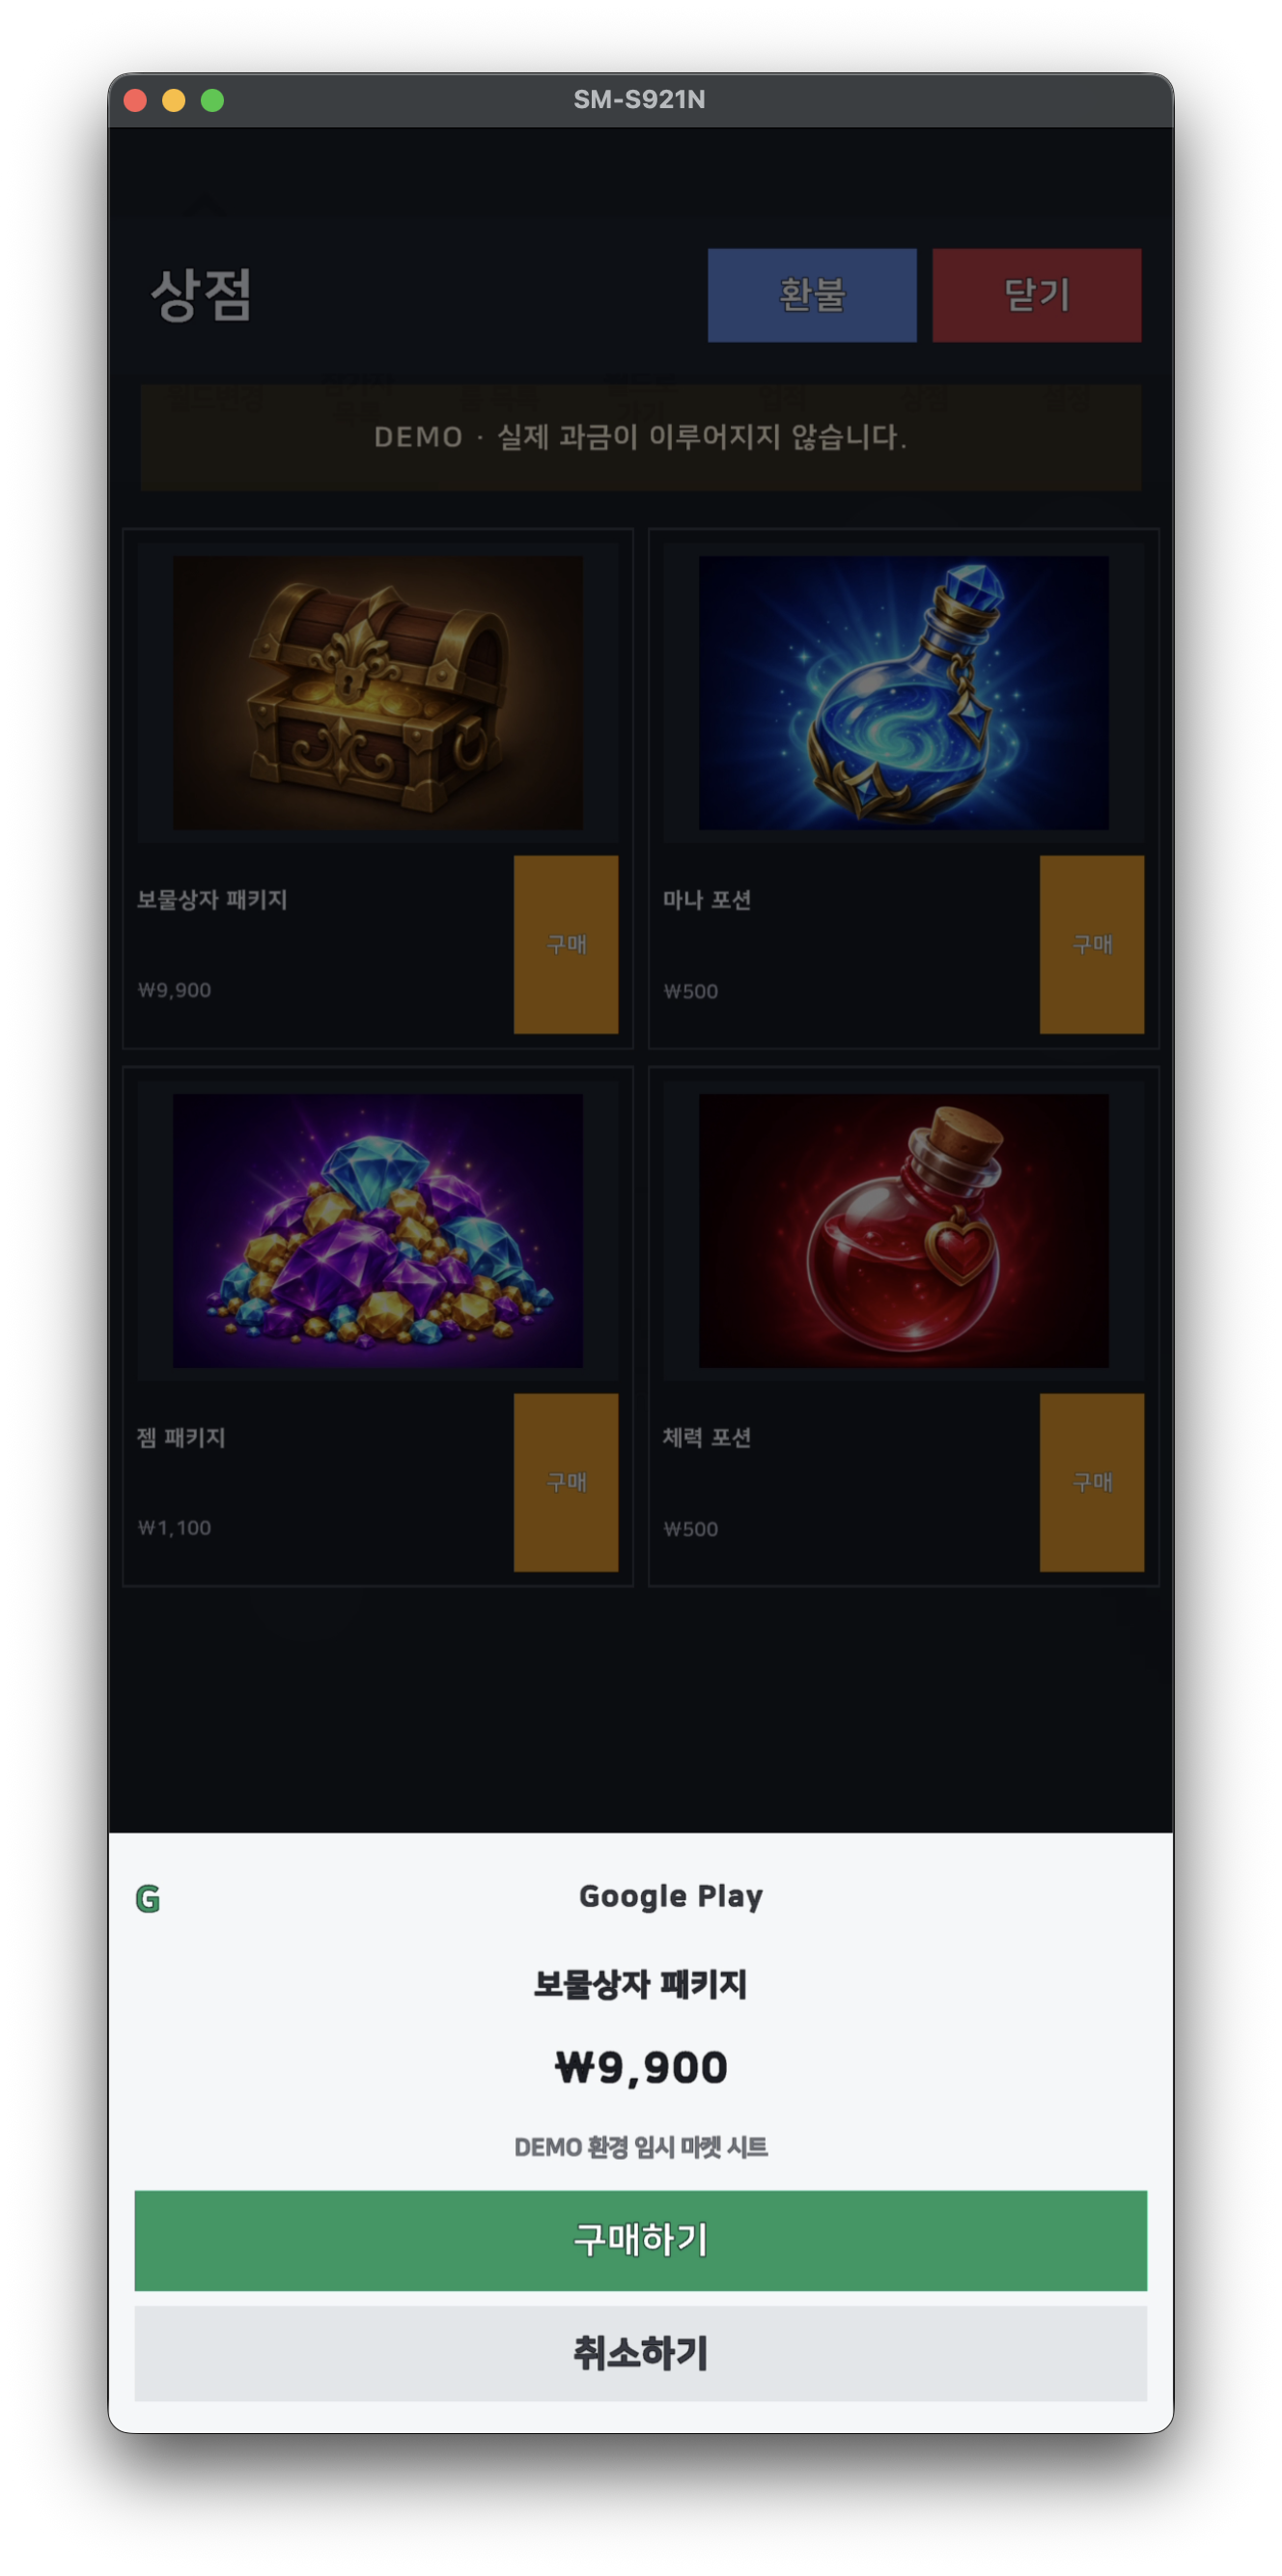
Demo Market Payment Sheet
- In the demo environment, a temporary market sheet is displayed instead of the actual market (e.g., Google Play). Press Purchase to proceed with the payment.
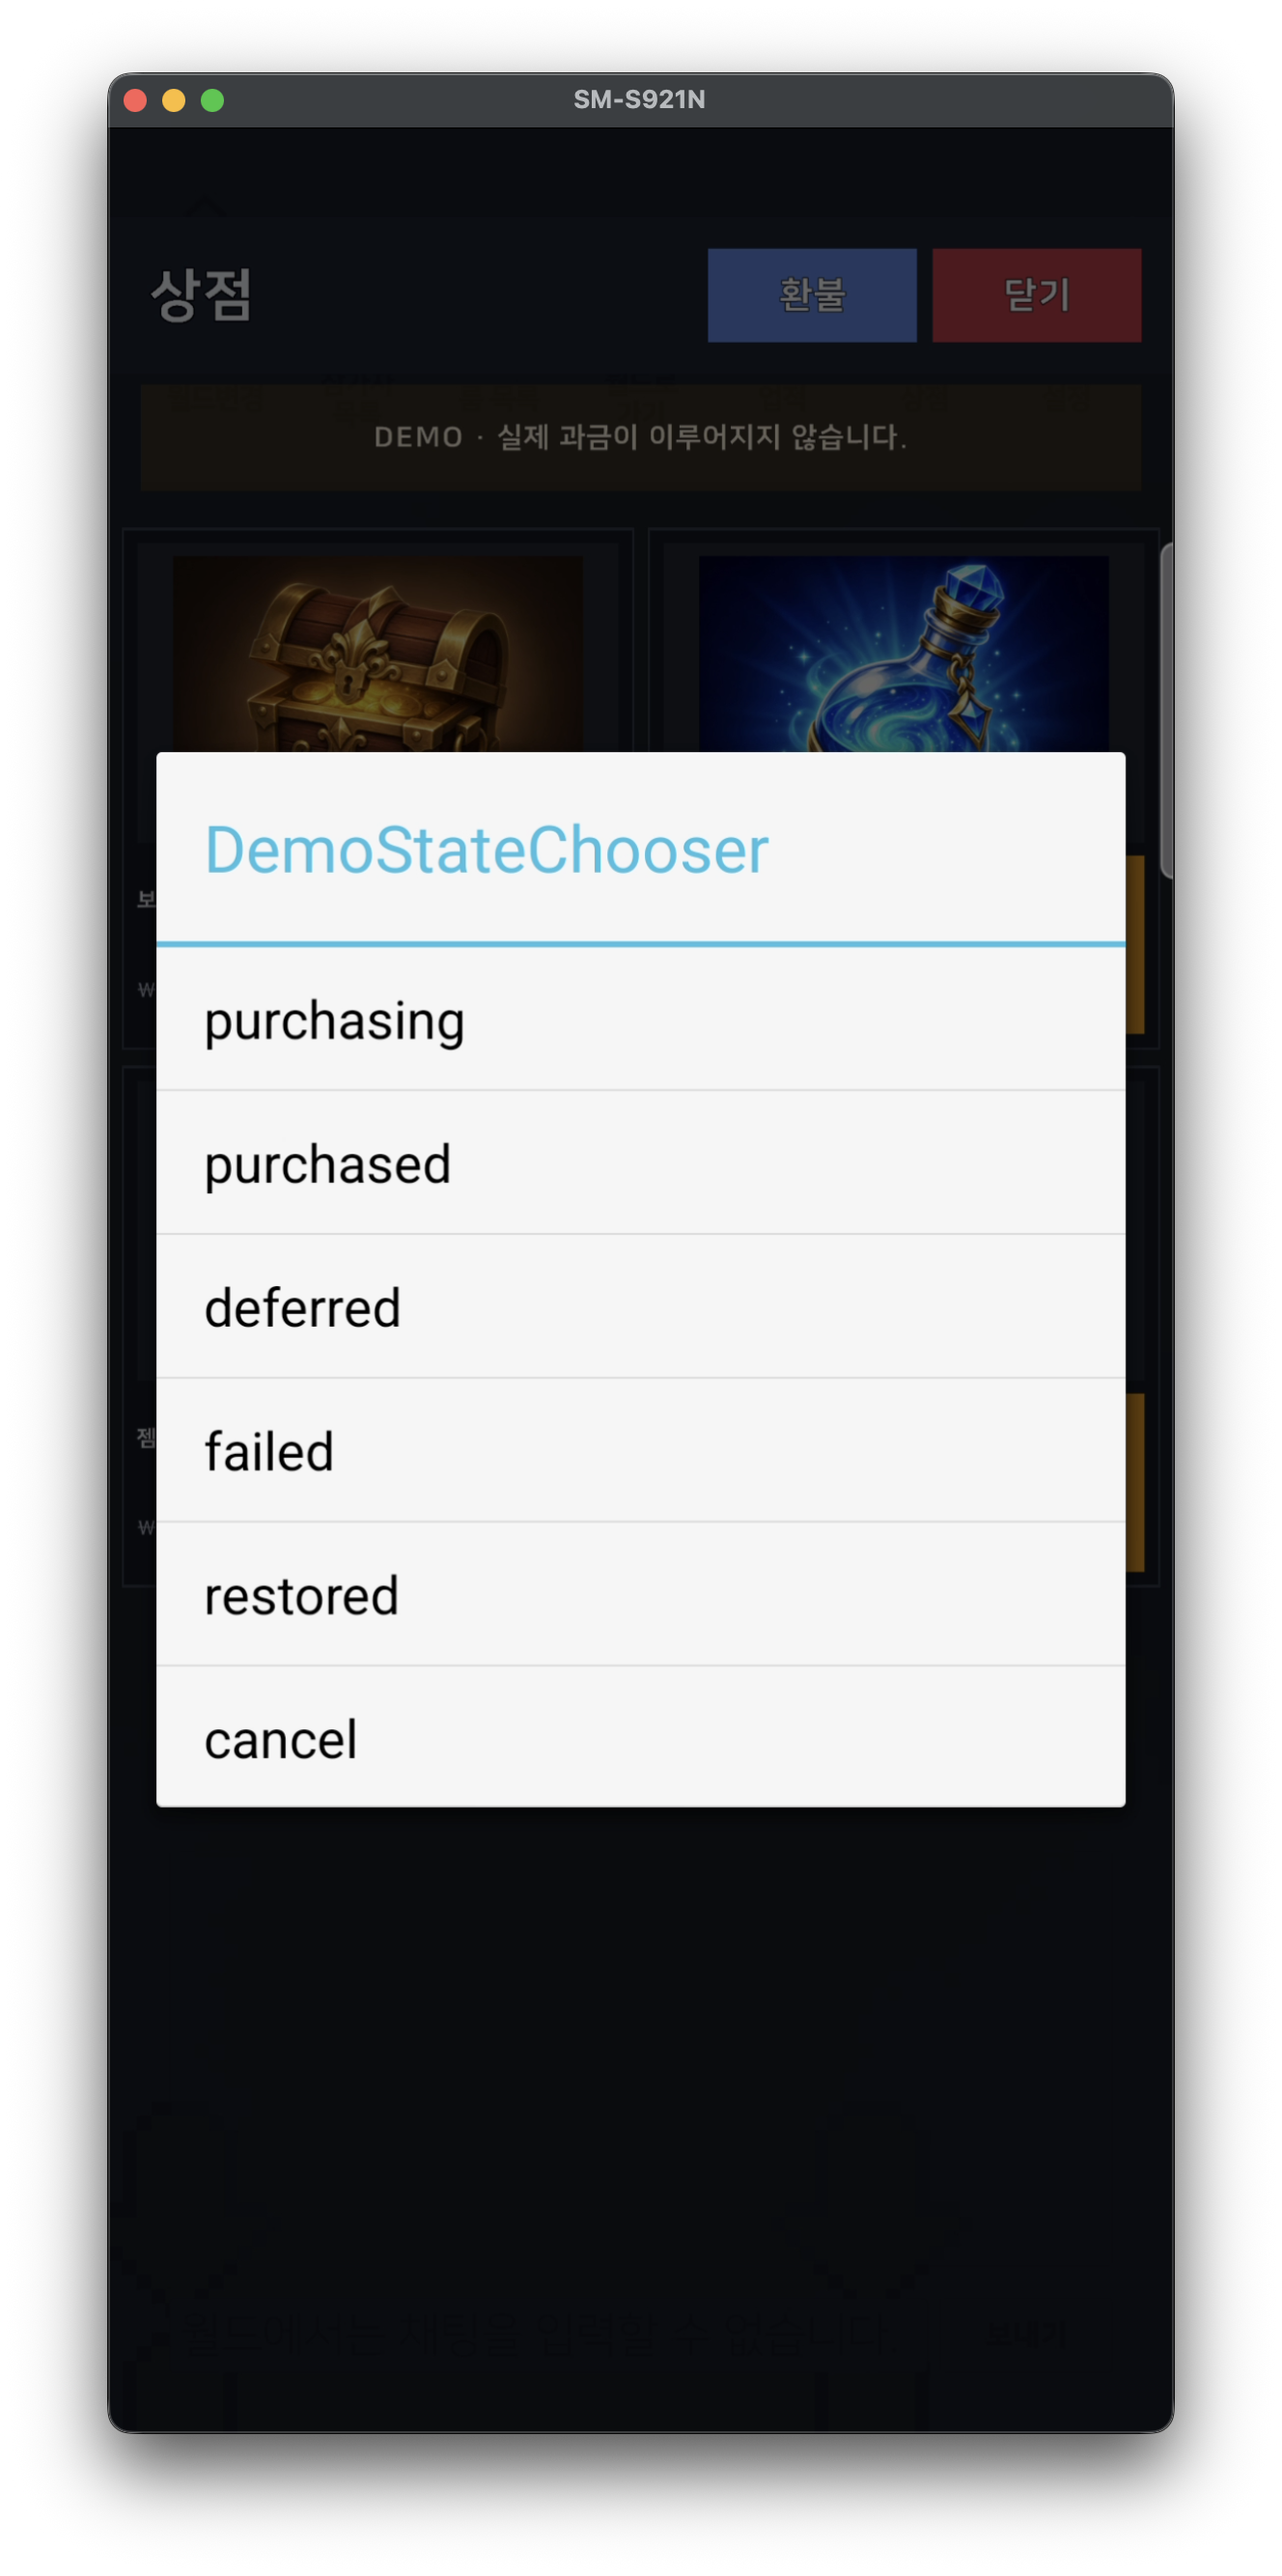
Select Market Response (DemoStateChooser)
- Subsequently,
DemoStateChooseris displayed, allowing you to manually select the market response status.purchasing·purchased·deferred·failed·restored·cancelYou can verify how the SDK callback is handled for each status. (Exclusive to the demo environment)
Purchase Complete
- Selecting
purchasedcompletes the payment, and the reward is delivered to the Mailbox.
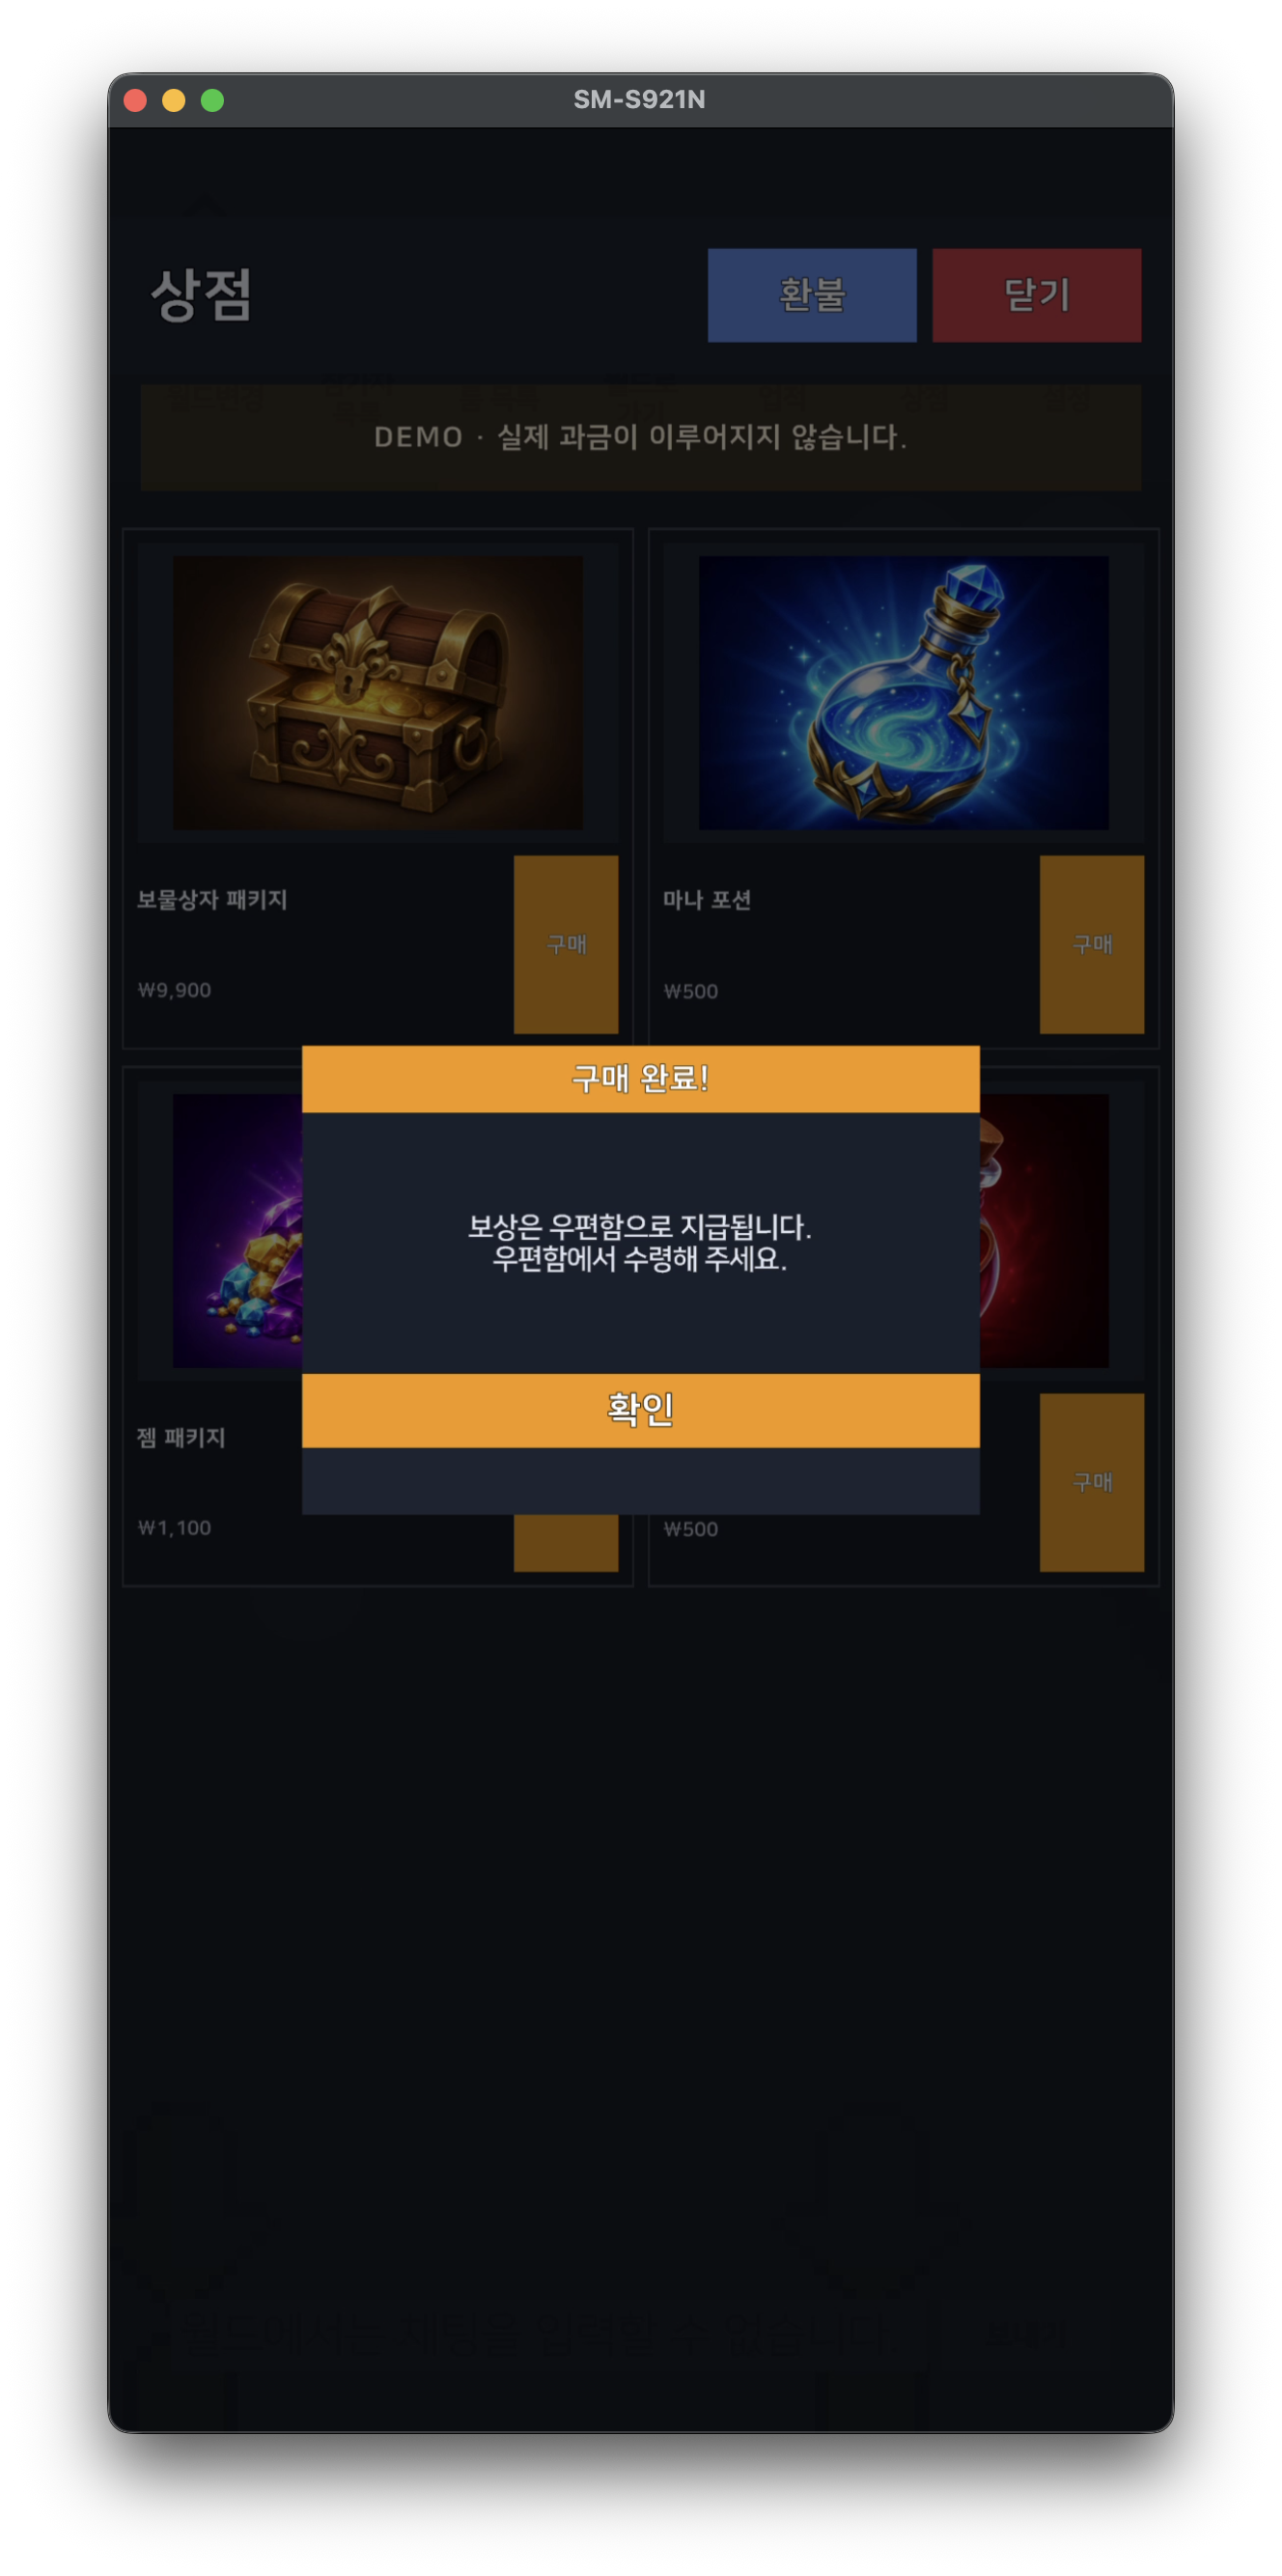
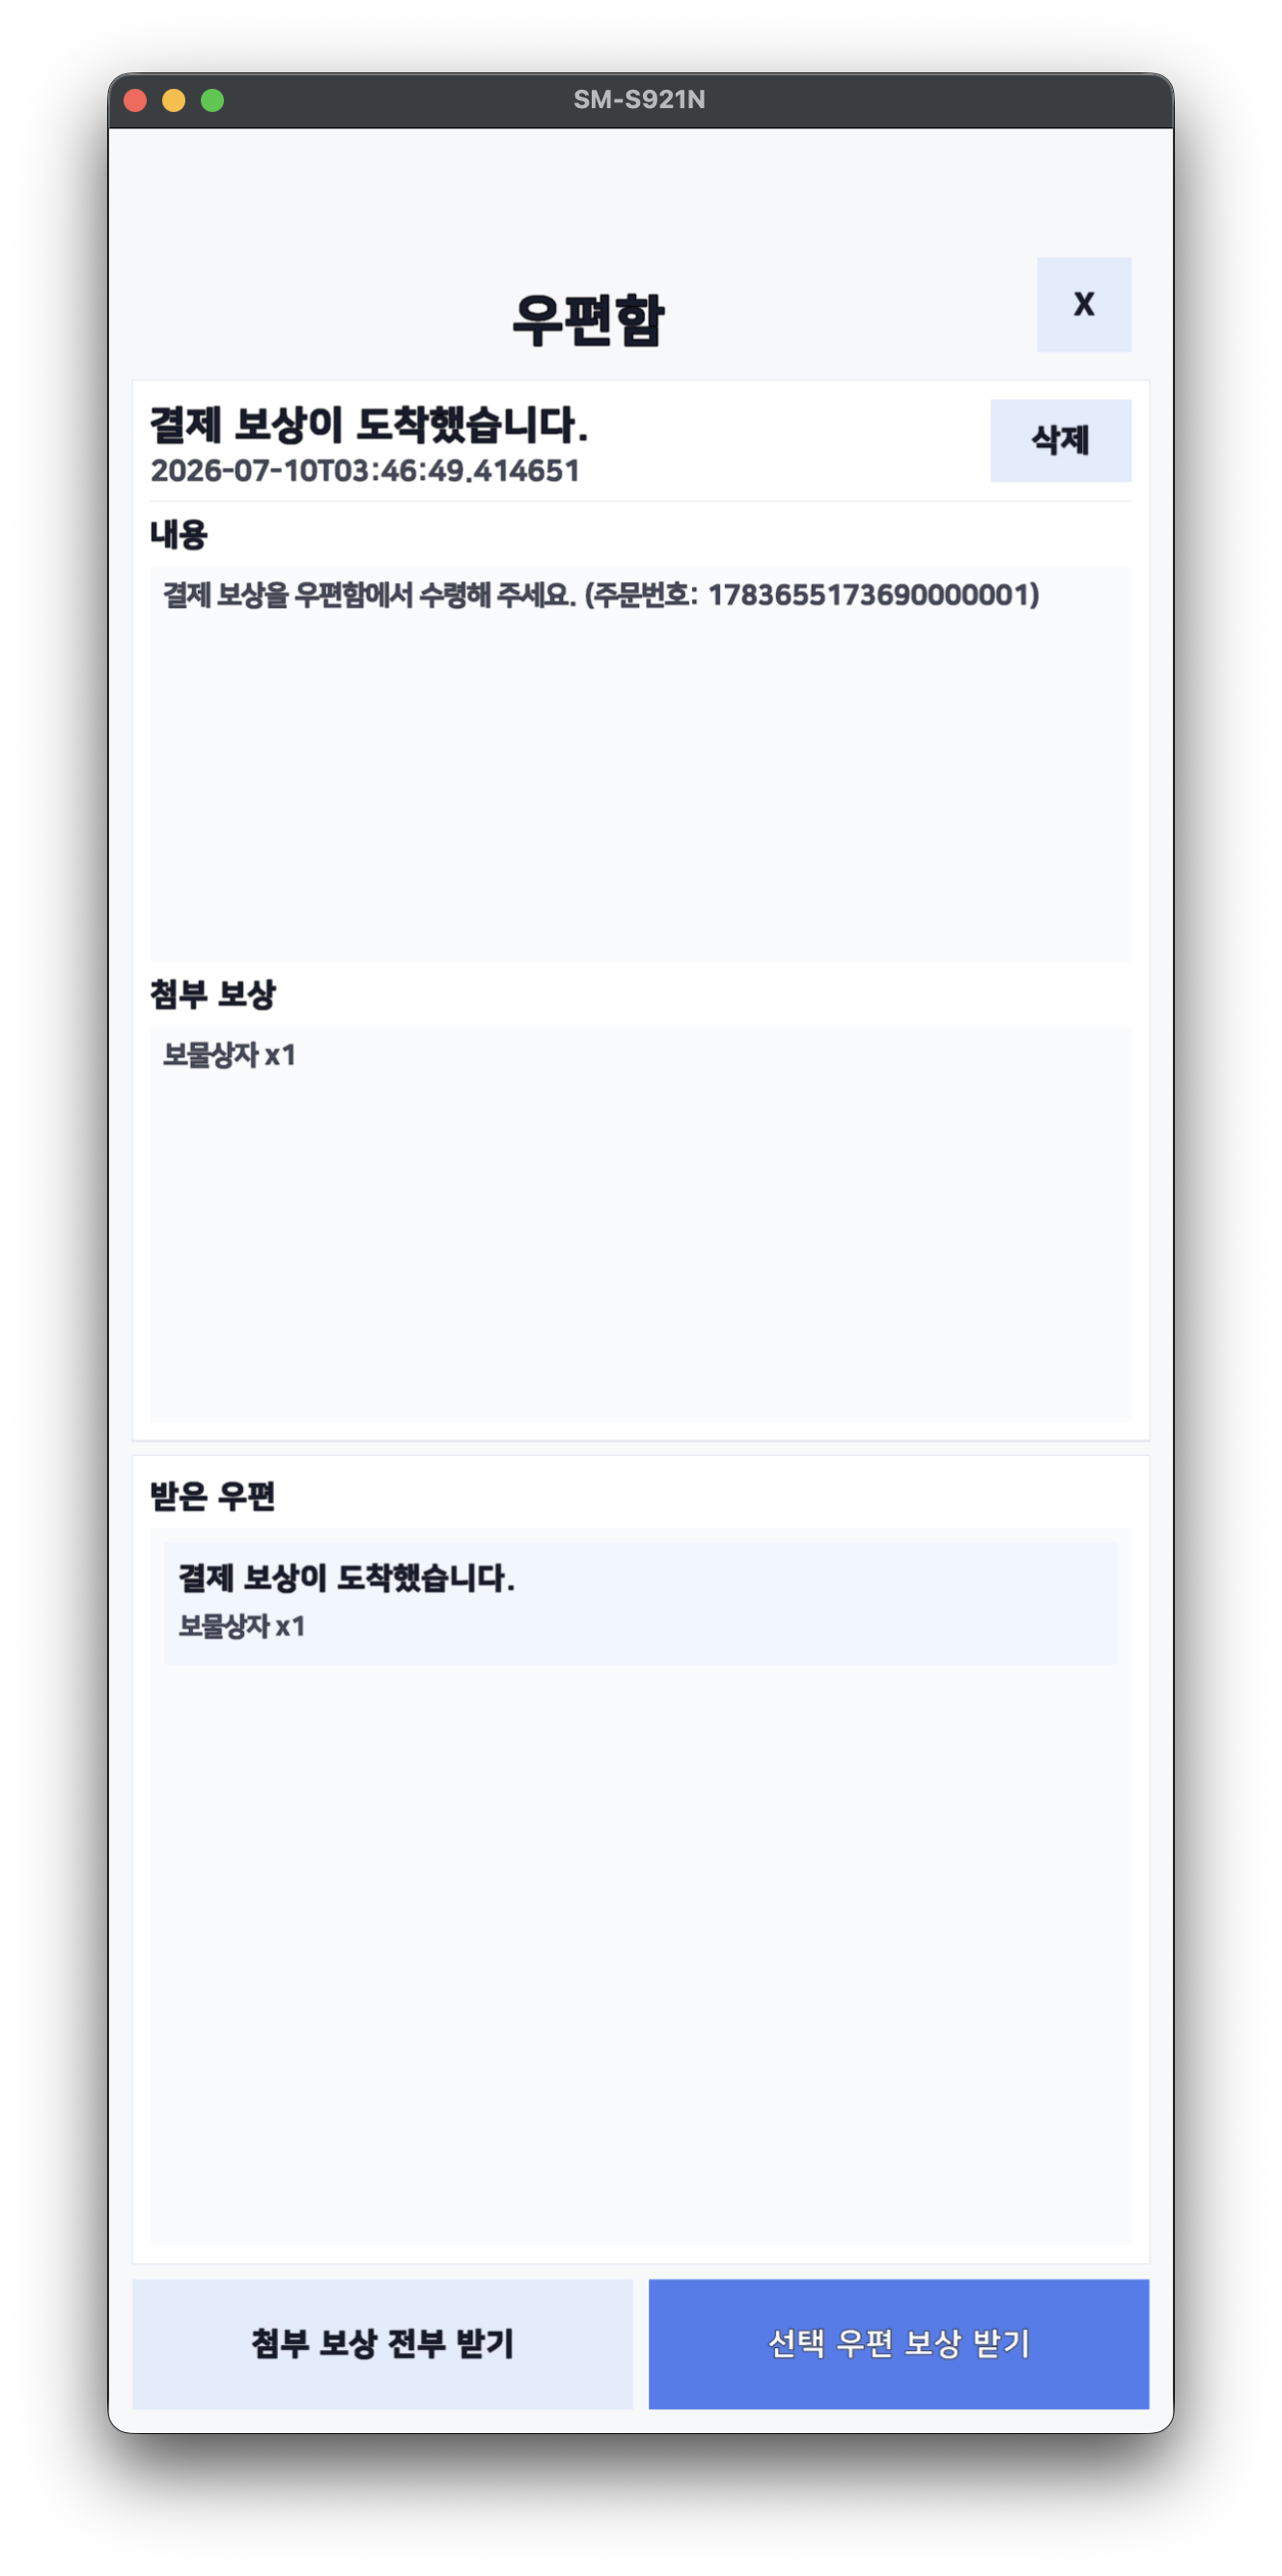
Mailbox, Inventory
- Once you claim the payment reward from the Mailbox, you can check the items in your Inventory. If you refund the payment using the Refund button at the top of the shop, you can verify the refund re-payment flow upon your next entry to the lobby.
Settings
- On the settings screen, you can call account and operation-related functions of the STOVE Mobile SDK in one place. The buttons and their corresponding SDK functions are as follows:
| Button | Called SDK Function |
|---|---|
| Customer Center · Community · News | Open ViewUI WebView (Customer Center/Community/News) |
| Enter Coupon | ViewUI Coupon Entry (Android only) |
| Auto Popup · Manual Popup | ViewUI Notice/Event Popup (Auto/Manual display) |
| Custom URL (Partial/Full) | Load the entered URL in a partial/full-screen WebView via ViewUI |
| Check Refund History | View refunded payment history |
| Refund Re-payment | Re-payment for refunded items |
| Device Registration | Device registration/management |
| Account Management | Account management/switching |
| Withdraw from Game | Call game server withdrawal API and process logout |
| Logout | Logout |
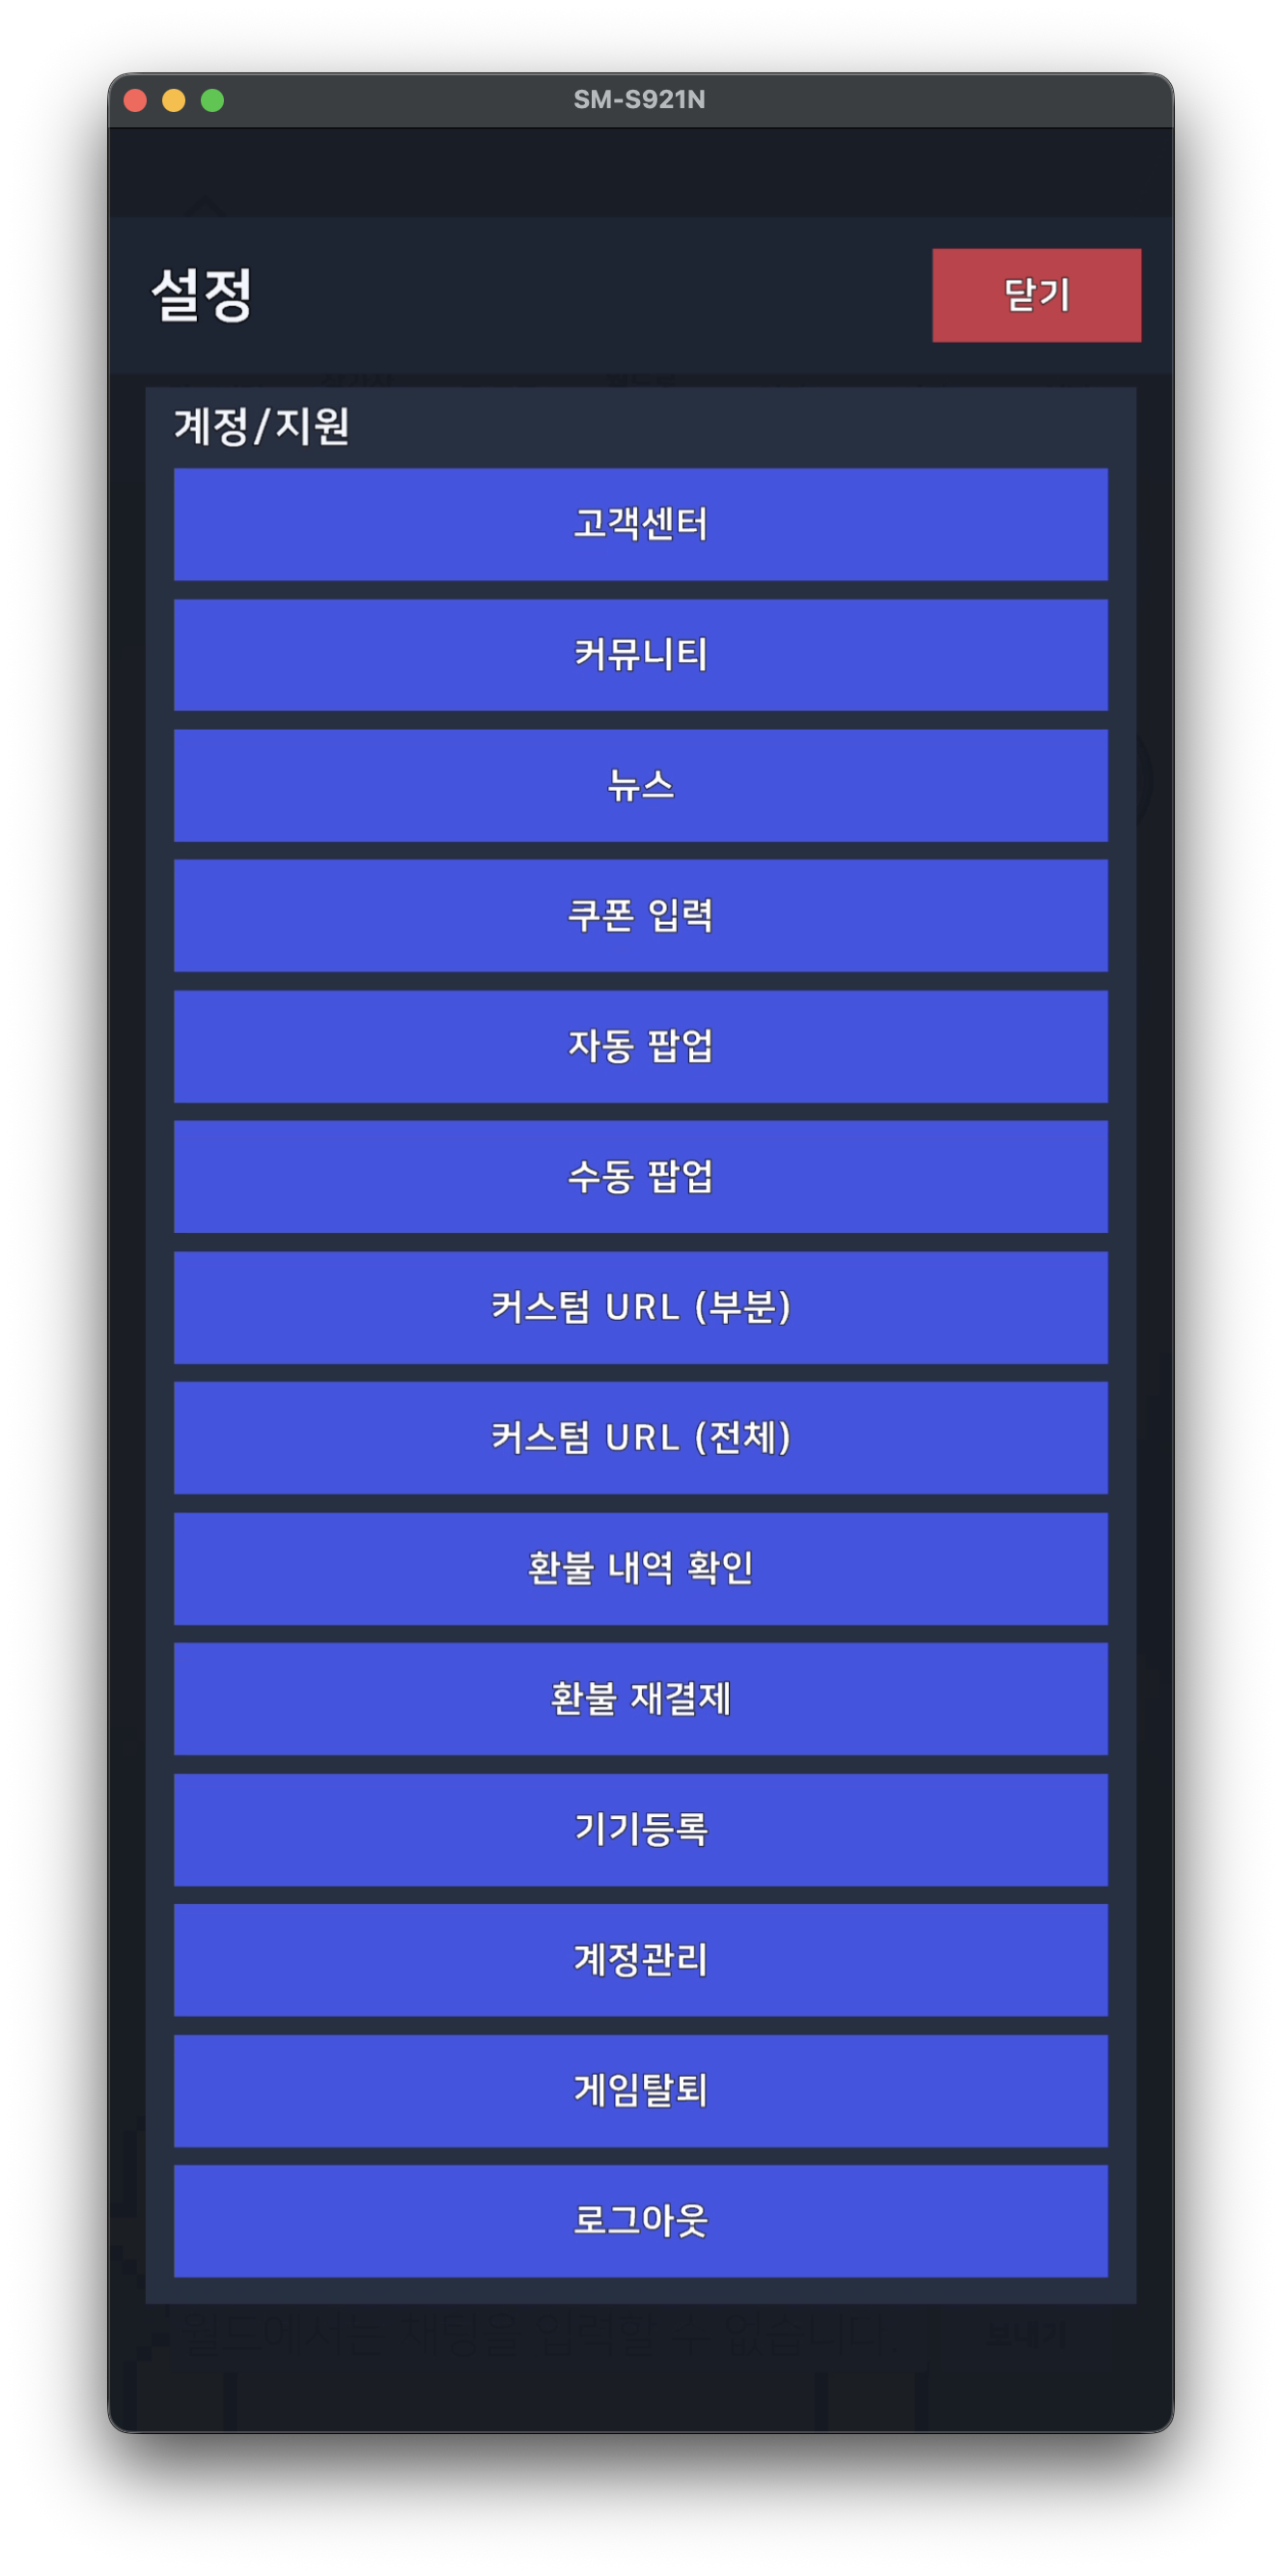
- The Notification Settings toggle (push notifications/nighttime push) at the top
Push.FetchPushSettingsloads the current settings with , and reflects changes with .Push.UpdatePushSettings(Push functionality is not active in the demo.)