- Last Updated
 This explains how to use GenTool, the PC install-build upload tool for STOVE-listed games, and GenToolUpdater, the dedicated updater for GenTool.
GenTool Product Family
GenToolUpdater
This explains how to use GenToolUpdater, the dedicated updater for GenTool.
GenToolUpdater Introduction
This explains the basic concepts of GenToolUpdater.
- It's a dedicated update tool for GenTool.
- You can install GenTool by version.
- Side-by-side installation is also possible.
- Updating between multiple GenTool versions is possible.
- Forward updates are possible.
- Backward updates are possible.
- It's a Win32 application developed in .NET, so .NET Framework 4.8.1 or higher is required to install it.
Getting Started
This explains the basic features worth checking when you first run GenToolUpdater.
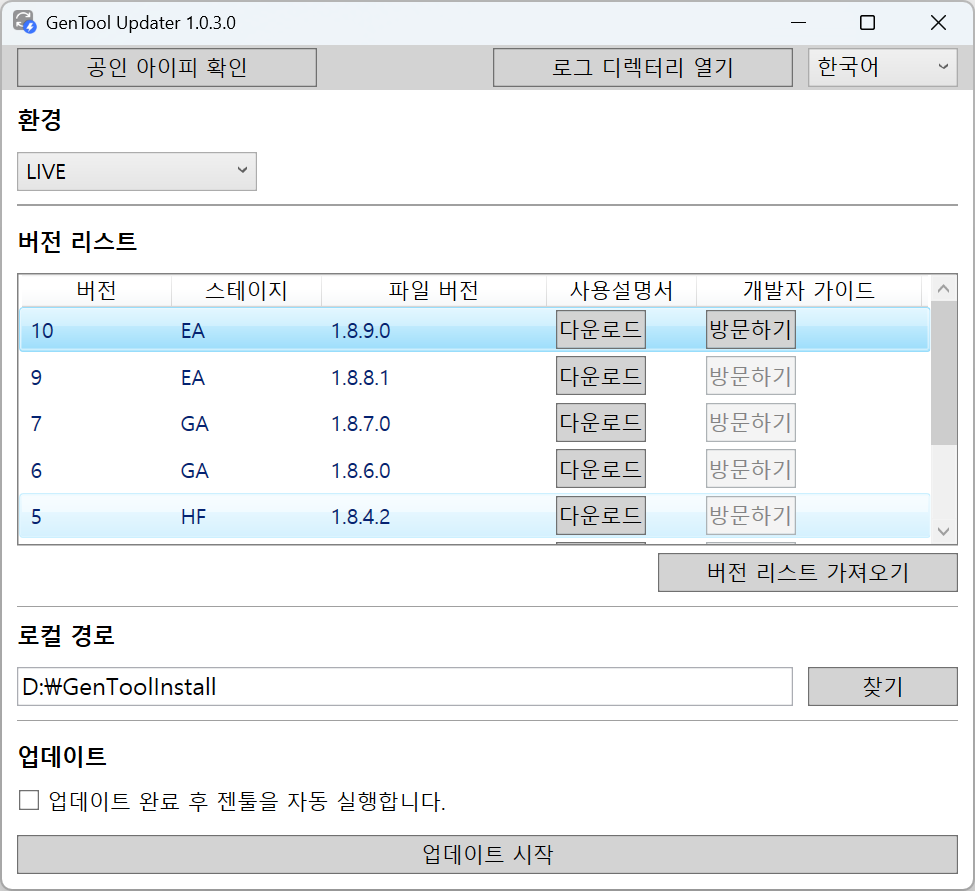
- Run GenToolUpdater.exe.
- GenToolUpdater is a single-page application.
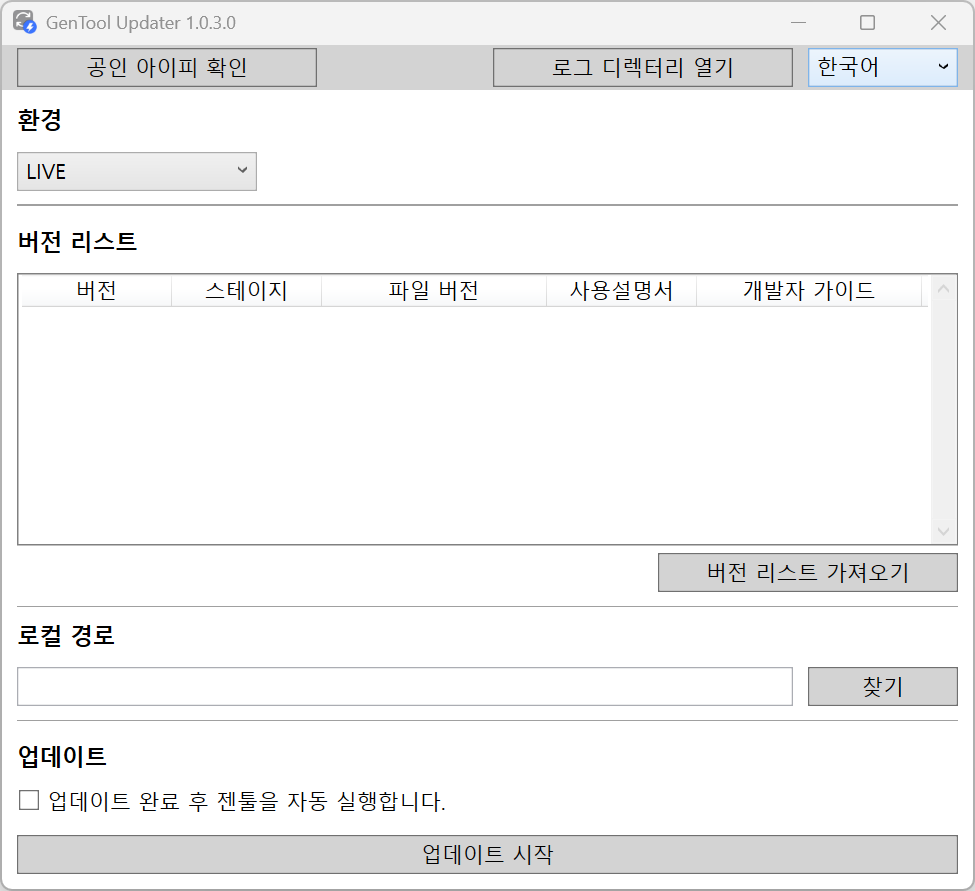
- Click the Check Public IP button to look up the public IP.
- Deliver the looked-up public IP to STOVE so it can be used for the White IP.
White IP registration
ㆍ Request White IP registration from the business team and technical PL.
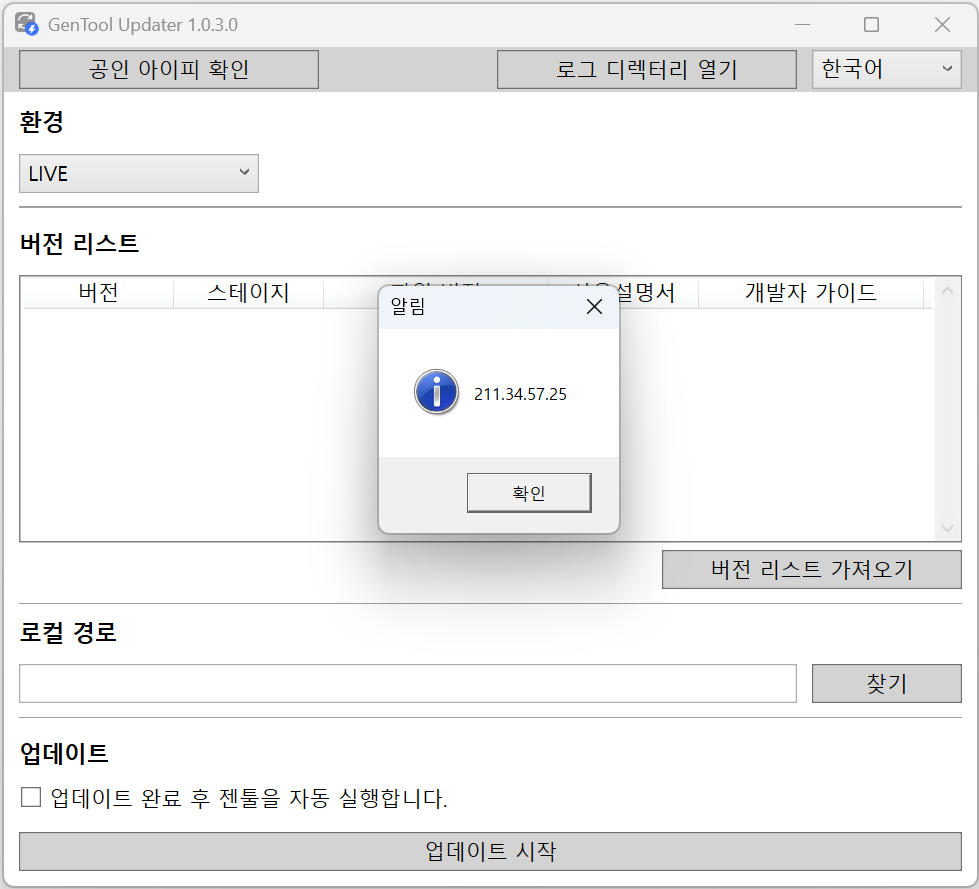
- Click the Open Log Directory button to open the local log directory.
- The local log directory is the same as the GenToolUpdater run path.
- You can check the contents by opening a file of the form GenToolUpdater_yyyyMMdd.log in a text editor such as Notepad.
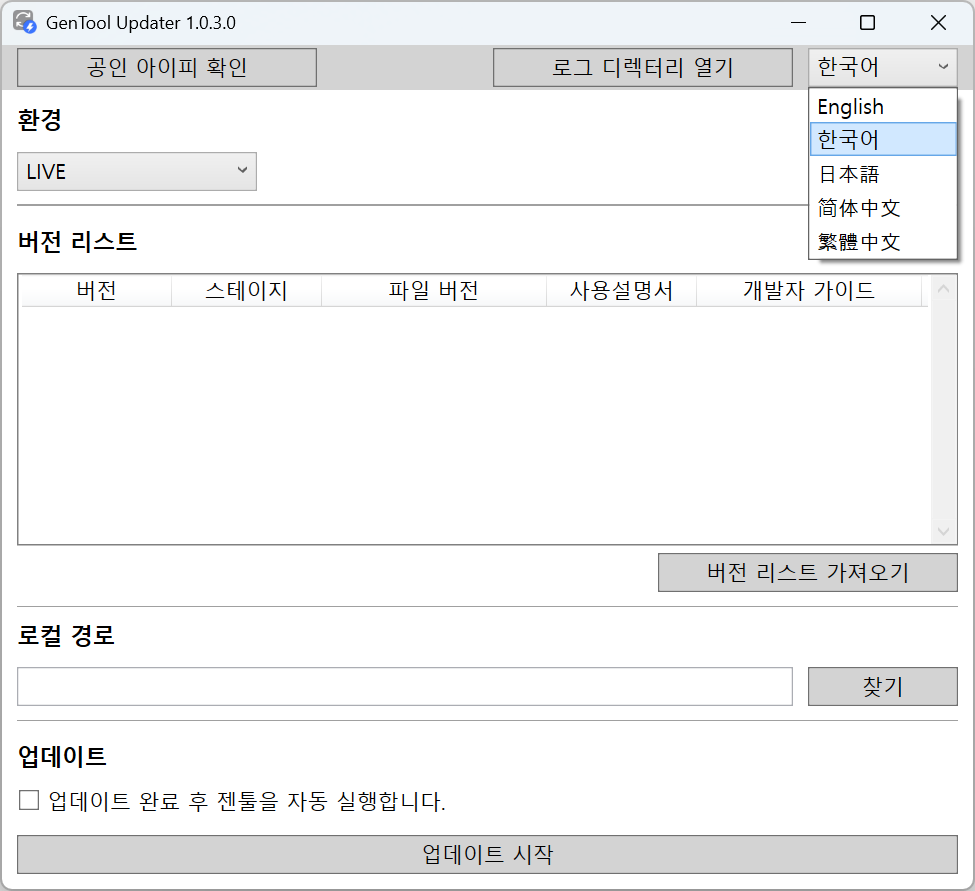
- GenToolUpdater supports English (default), Korean, Japanese, Simplified Chinese, and Traditional Chinese.
- You can change the display language by selecting a language in the multilingual-settings combo box.
Installation and Update
This explains how to install or update GenTool.
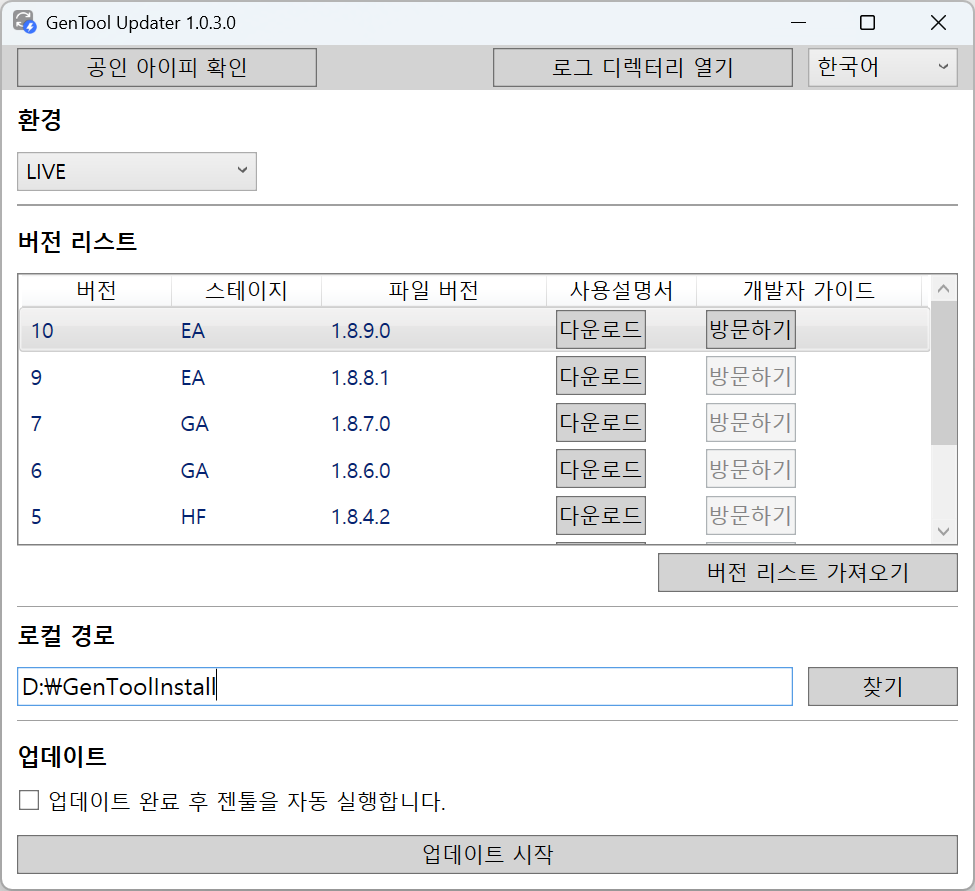
- Open Explorer and create a folder at the path where you want to install.
- Click the Get Version List button to load the version list.
- Select the version to install from the version list.
- Clicking the Browse button opens the folder-browse dialog; specify the folder you prepared earlier.
- You can also enter the path directly in Local path.
- Click the Start Update button to proceed with the installation.
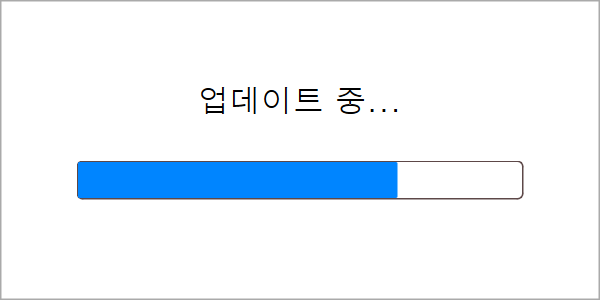
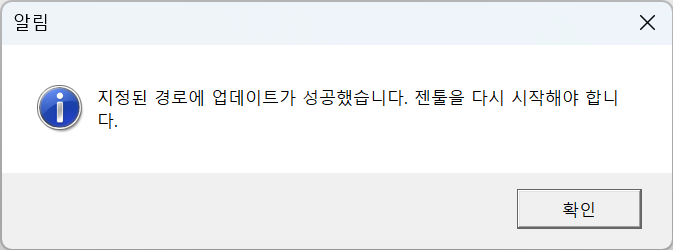
- The specified GenTool version is installed, and the result is shown.
- Click the Get Version List button to load the version list.
- Select the version to update to from the version list.
- You can install both lower and higher versions than the currently installed one.
- Clicking the Browse button opens the folder-browse dialog; specify the folder where GenTool is already installed.
- Click the Start Update button to proceed with the installation.
- Even if GenTool is already installed, you can create a new folder and install GenTool fresh.
- When a feature is added to or changed in GenTool, the stage is released first in a state other than
GA (General Availability).EA(Early Access),RC(Release Candidate),HF(Hot Fix)
- If you want to try a new GenTool version experimentally, you can install the new version at a new local path and try it out.
GenTool Run Options
- If you install/update GenTool by clicking the Start Update button with the Auto-run GenTool after the update completes. checkbox checked, the currently installed/updated GenTool runs automatically only when the install/update succeeds.
GenTool User Manual
- You can download the user manual for each GenTool version. Clicking the Download button on a version-list item downloads the user manual.
- The user manual is an MS Word (.docx) file, and on a successful download it automatically tries to open the file. If an associated program is set on the local computer, the user-manual document opens in that program.
GenTool Developer Guide
- You can open the Developer Center guide for each GenTool version. Clicking the Visit button on each version-list item opens the Developer Center page in a browser.
GenTool
This explains how to use GenTool, the tool that uploads PC install builds for STOVE-listed games.
GenTool Introduction
This explains the basic concepts of GenTool and the STOVE patch system (DFS) that GenTool integrates with.
- It's a build and version-management tool for files that can integrate with DFS.
- It builds a game's full files or patches.
- It can record the info needed when installing and patching a game.
- e.g., DirectX version info, VS redistributable packages, etc.
- It's a Win32 application developed in .NET, so .NET Framework 4.8.1 or higher is required to install it.
- It's STOVE's patch system.
- It puts all file info included in a patch into a JSON file (project.json), mapping each file's version, size, Path, and MD5 hash info.
- It puts the differences between patch versions into a JSON file (plist.json), storing it so only the data needed for a version patch can be downloaded.
- Each file is in raw format, using the original file as-is.
- The patch proceeds as the DFS Client module downloads the patch files.
- It's currently integrated in the STOVE launcher.
// project.json sample – stores full file info.
{
  "service_code": "10",
  "service_name": "CrossFire",
  "version_no": 7,
  "root_folder": "CrossFire",
  "execution": "CFFS.exe",
  "extract_size": "4562342",
  "packed_size": "1866564",
  "directx": "",
  "vcredist": "",
  "addons": "",
  "dotnet": "",
  "eula": "",
  "migration_reg": [],
  "migration_path": "",
  "startpos": "0",
  "files": [
    "1 | D | /data",
    "2 | X | /data.txt | 7 | 1 | xd | 5186 | 1123 | 323da7ce81c9069659c01a8107bec29d | 5cb98d6ec4dffdddfd931e5d5c83c80a | 1 | 645 |",
    "3 | F | /added.txt | 3 | 2 | gz | 3400 | 1614 | 849c2fd4a6b45fe067e979e457c604ef | 86207a5a3acc16f7920a3507f954ee90 | 1 | 0 |",
    "4 | F | /HDAudio.nvi | 3 | 3 | gz | 10416 | 2349 | 24f02578adac48aaa155607e0ff2d3a0 | 68e5ee51ce37ec98991e8196473e38f3 | 2 | 0 |",
    "5 | F | /HDAudioExt.dll | 3 | 4 | gz | 892864 | 389627 | f6c608256d7e2275e64019f0f0c3596f | b06177ab8055b1429b53eacfeb4e12ba | 1 | 0 |"
  ]
}
// plist.json sample – stores only the differences from the previous version.
{
  "files": [
    "2 | X | /data.txt | 7 | 1 | xd | 5186 | 1123 | 323da7ce81c9069659c01a8107bec29d | 5cb98d6ec4dffdddfd931e5d5c83c80a | 1 | 645 |"
  ]
}
Getting Started
This explains the steps you go through before entering the GenTool main screen.
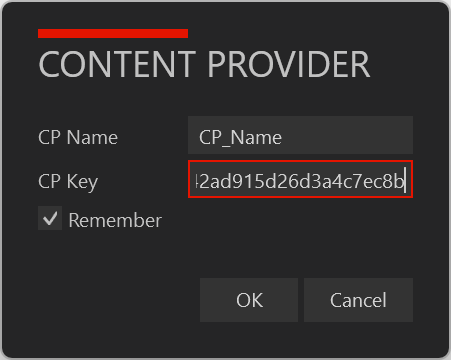
- Enter the CP info (CP Name, CP Key) you were assigned.
- The CP info is delivered from Smilegate to the CP through prior consultation.
- The Remember feature works when the main screen has opened and closed normally.
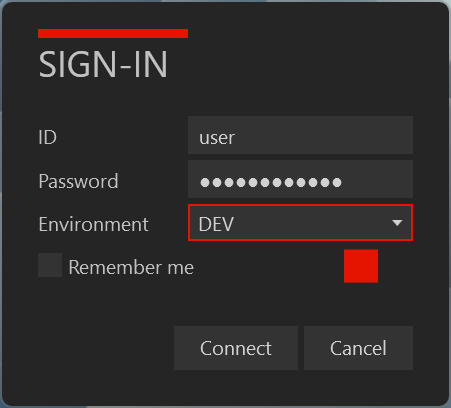
- Enter the account info you were assigned.
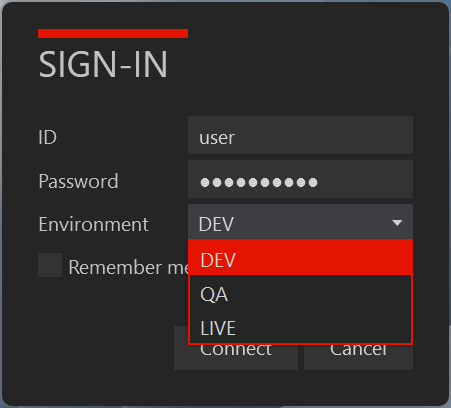
- You can connect by selecting a configured environment such as GATE8 (Sandbox) or LIVE, and environment info may be filtered by the game's or account's permissions.
GenTool login account info
ㆍ Request GenTool login account info from the business team and technical PL.
- Using the entered CP info (CP Name, CP Key), GenTool performs preparatory work.
- As one of these, it checks whether the public IP of the device running GenTool is an IP designated as a White IP.
- The CP must deliver the public IP of the device that will use GenTool to Smilegate in advance through prior consultation.
- You can use the Public-IP Lookup feature in GenToolUpdater.
- If the White IP check doesn't pass, the GenTool application exits.
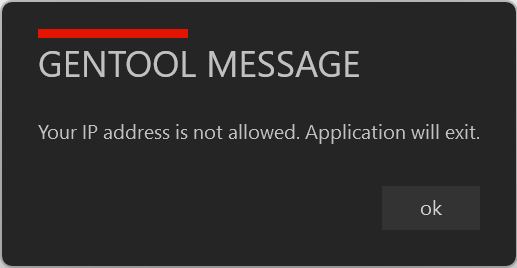
White IP registration
ㆍ If White IP registration is needed, request it from the business team and technical PL.
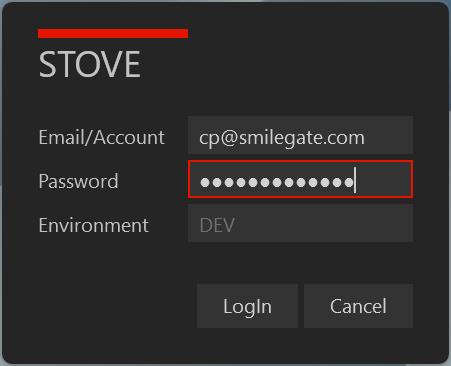
- Log in with a per-environment STOVE (onstove.com) regular-member (email) account.
Login precautions
ㆍ Third-party accounts (Google, Facebook, Apple, X, Naver) aren't supported.
ㆍ Two-factor authentication (OTP or a designated PC) must not be set.
- Select the game to build the patch for.
- Game info may be filtered by the environment's and account's permissions.
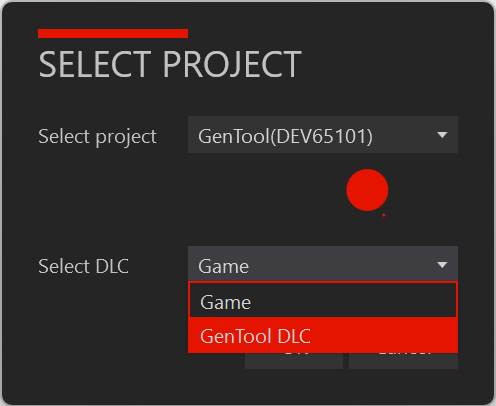
- For a game (package) that includes DLC, a Select DLC menu is created.
- It's split into Game (the main game) and DLC.
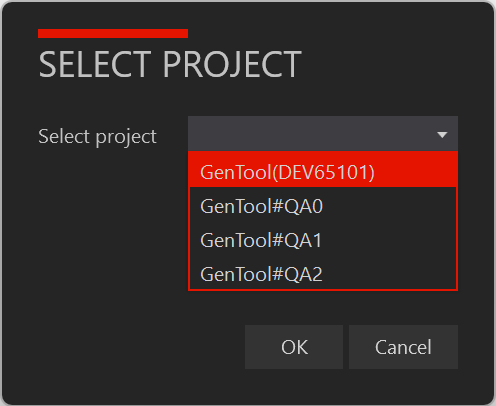
- You can choose between the base game and a branch game.
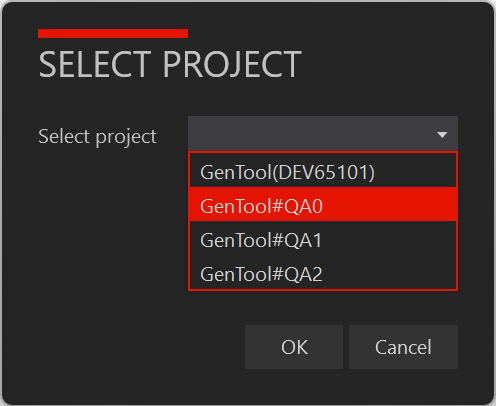
What is a branch?
ㆍ You can set a branch for each per-game target build and upload it.
ㆍ If you select a branch and upload, the branch set in the launcher is shown, and users can install that branch to play the game.
ㆍ The branch feature is provided for developers and validation (the QA team) to test a specific build in parallel.
ㆍ The branch feature is provided only in the Sandbox environment, not in Live.
How to add a branch to GenTool?
ㆍ Request branch setup from your technical PL.
ㆍ A branch name is usually set in the form "GAME_ID" + "#{branch name}".
ㆍ e.g., GAME_ID#QA0, GAME_ID#QA1, GAME_ID#QA2, etc.
Main Screen
This explains the layout of the GenTool main screen and the features available on each screen.
- Selecting a game name from the top menu enters the main screen.
- It's displayed in the form game name (selected server).
- The menu below the game name lets you switch to the screen for each feature.
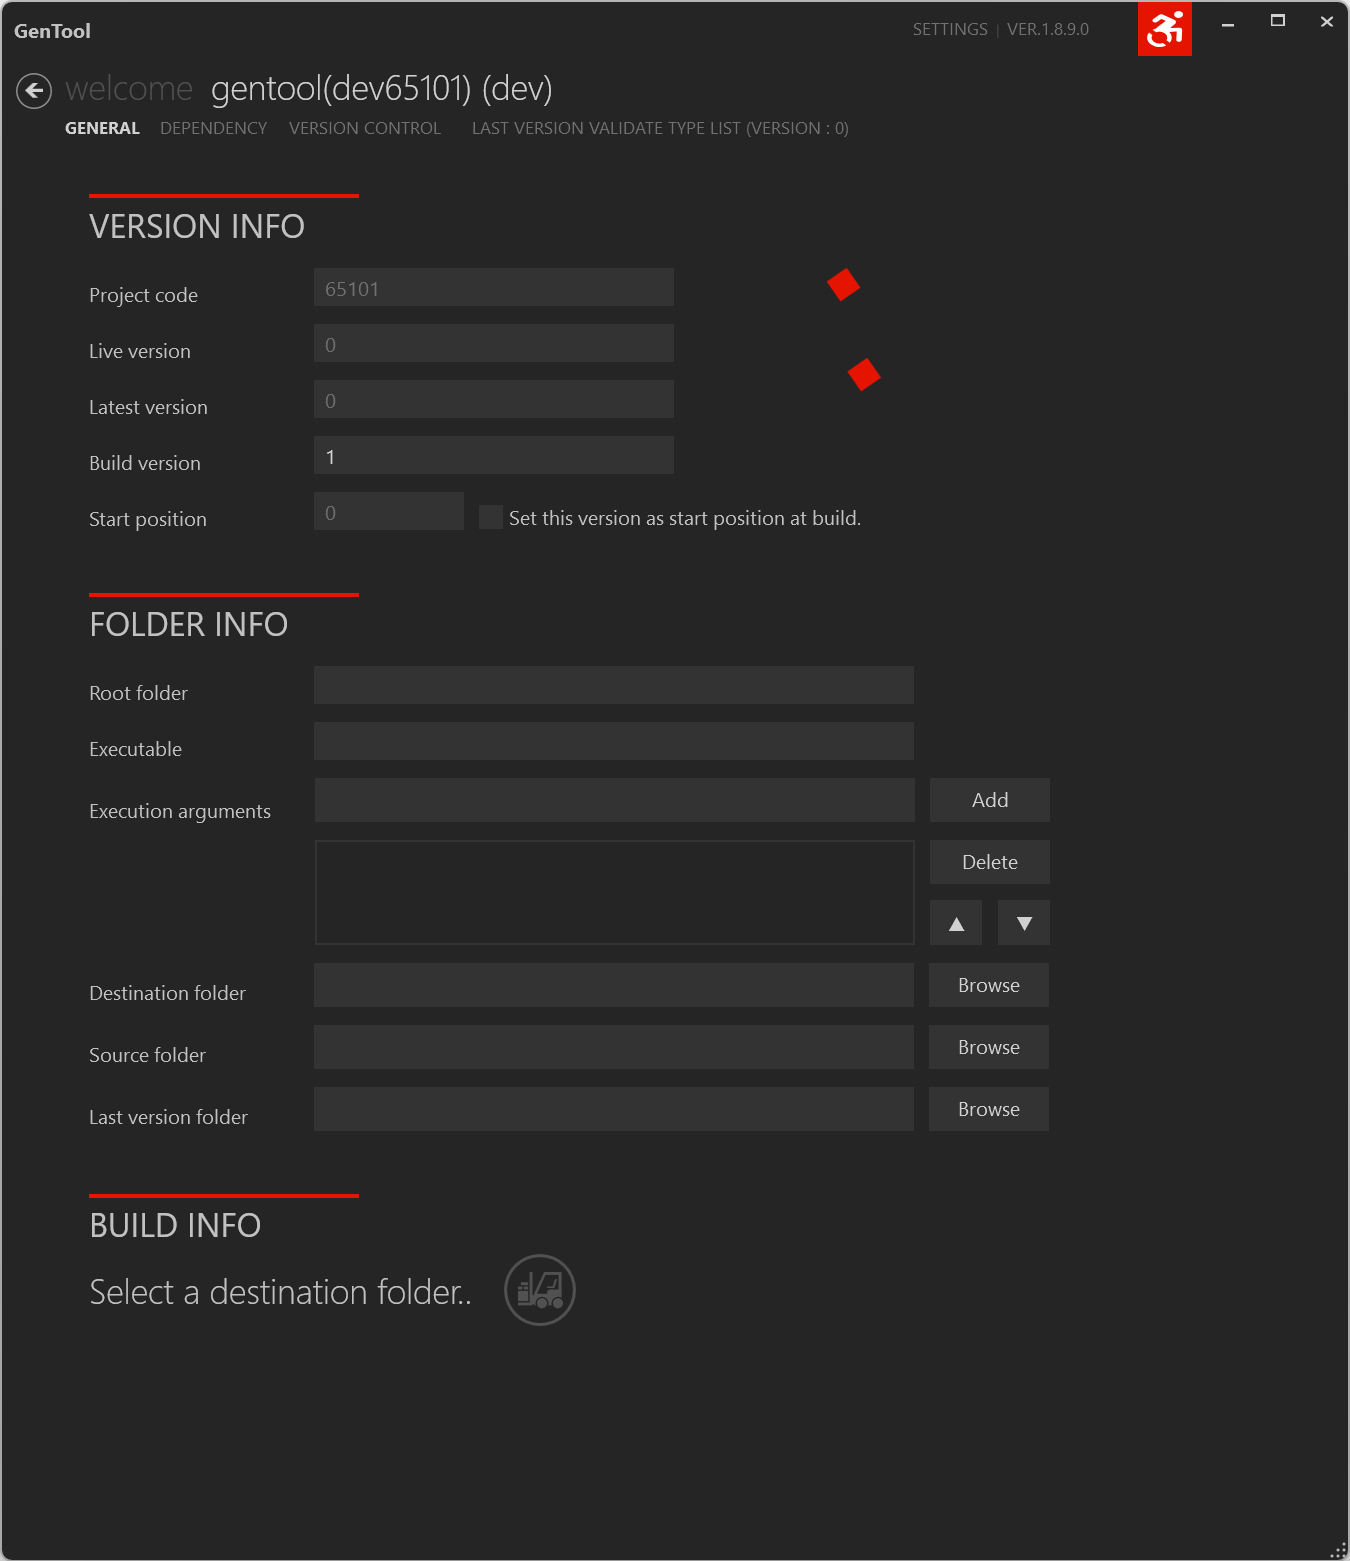
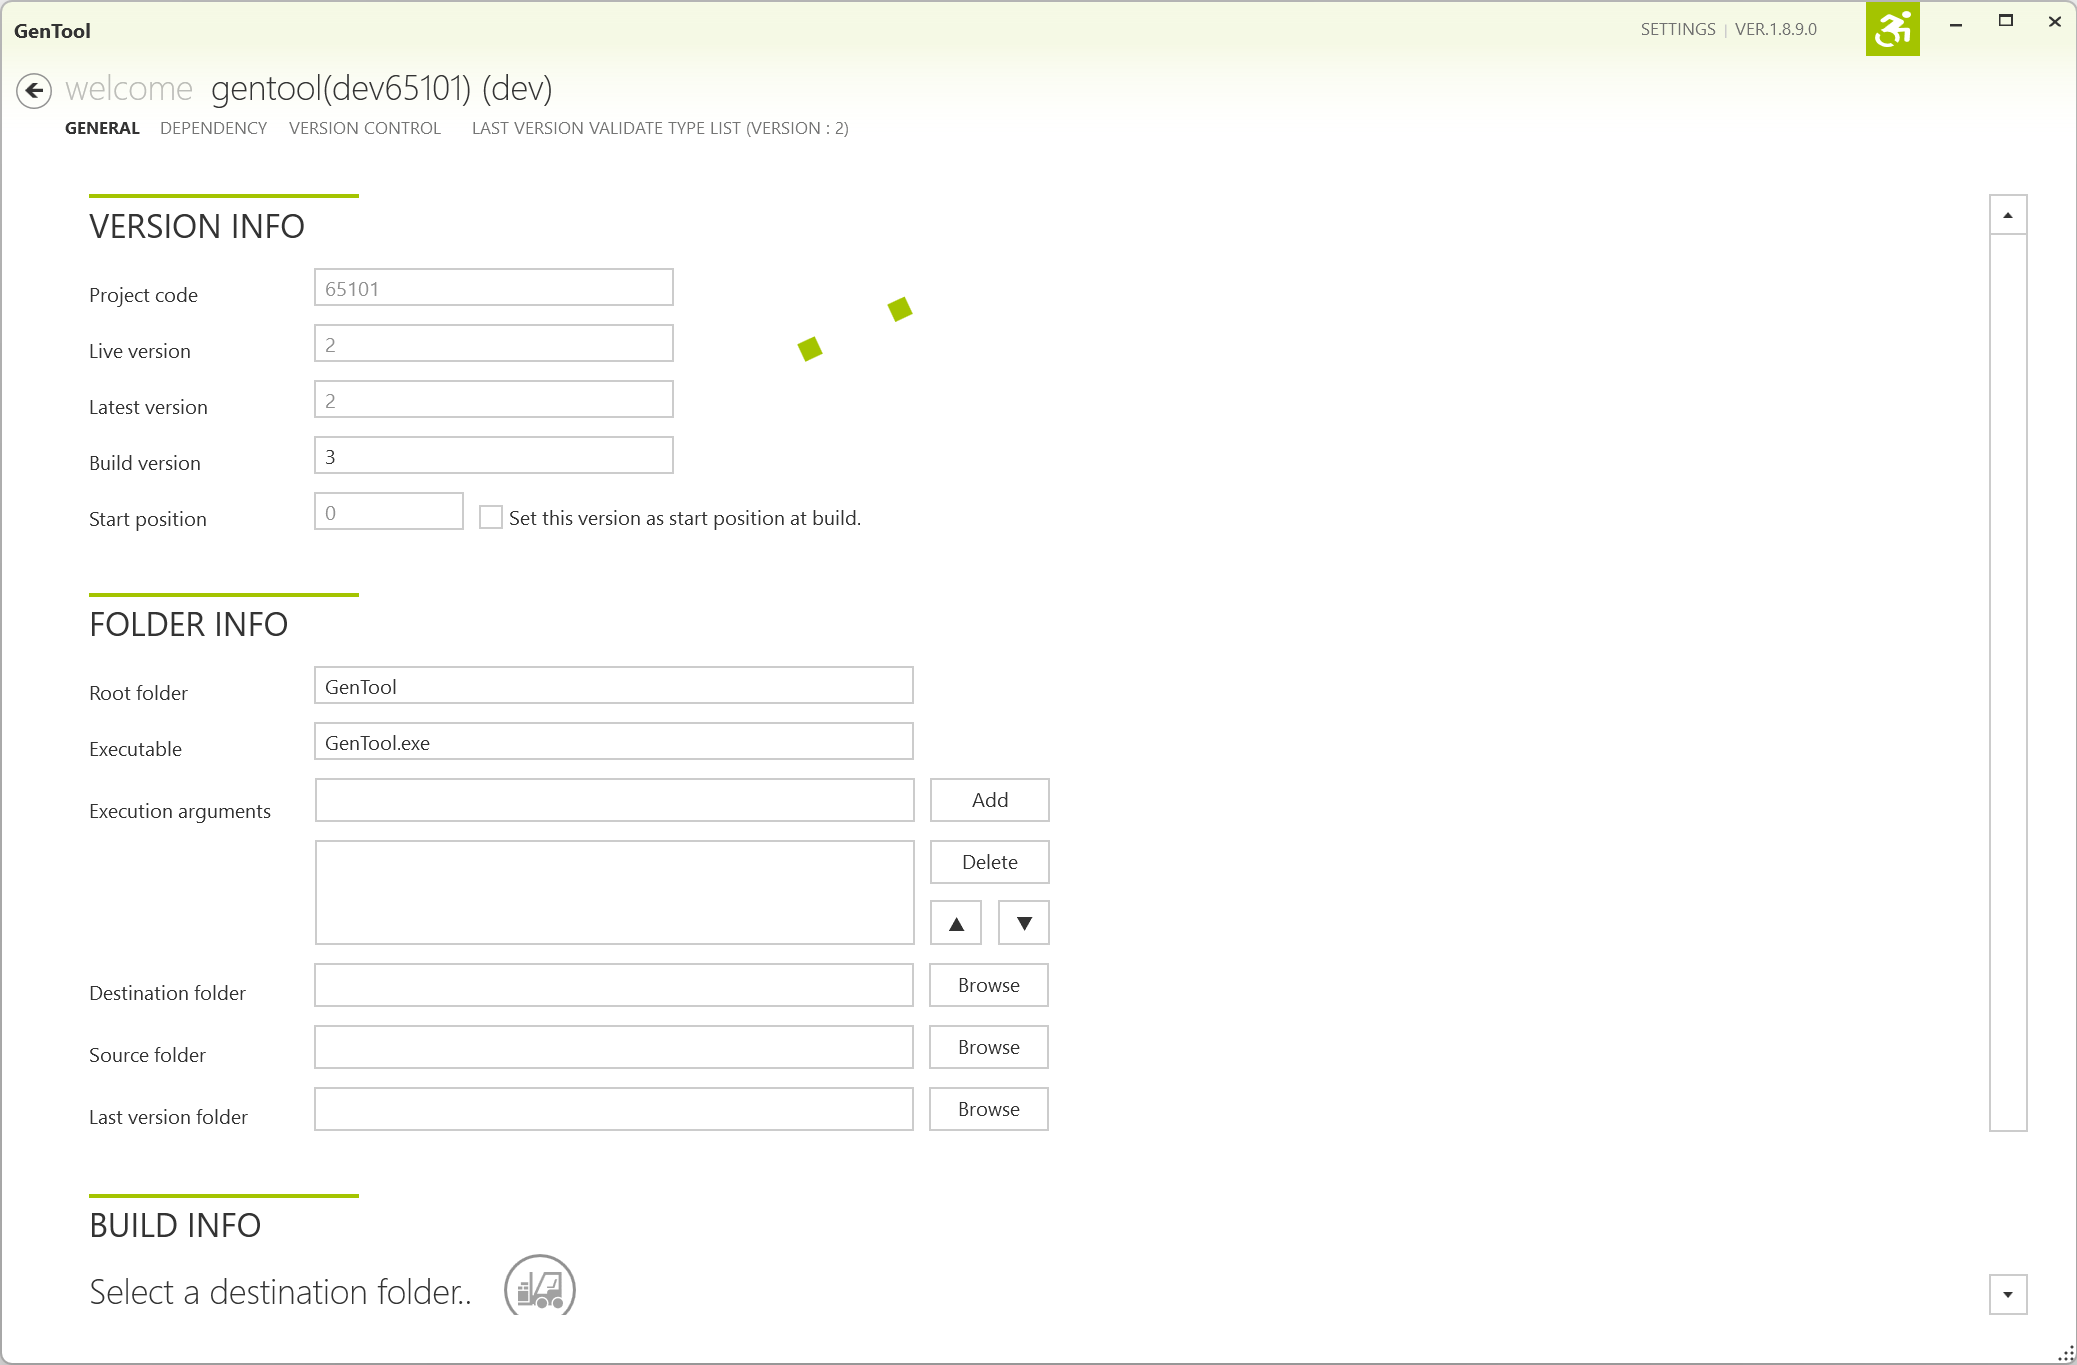
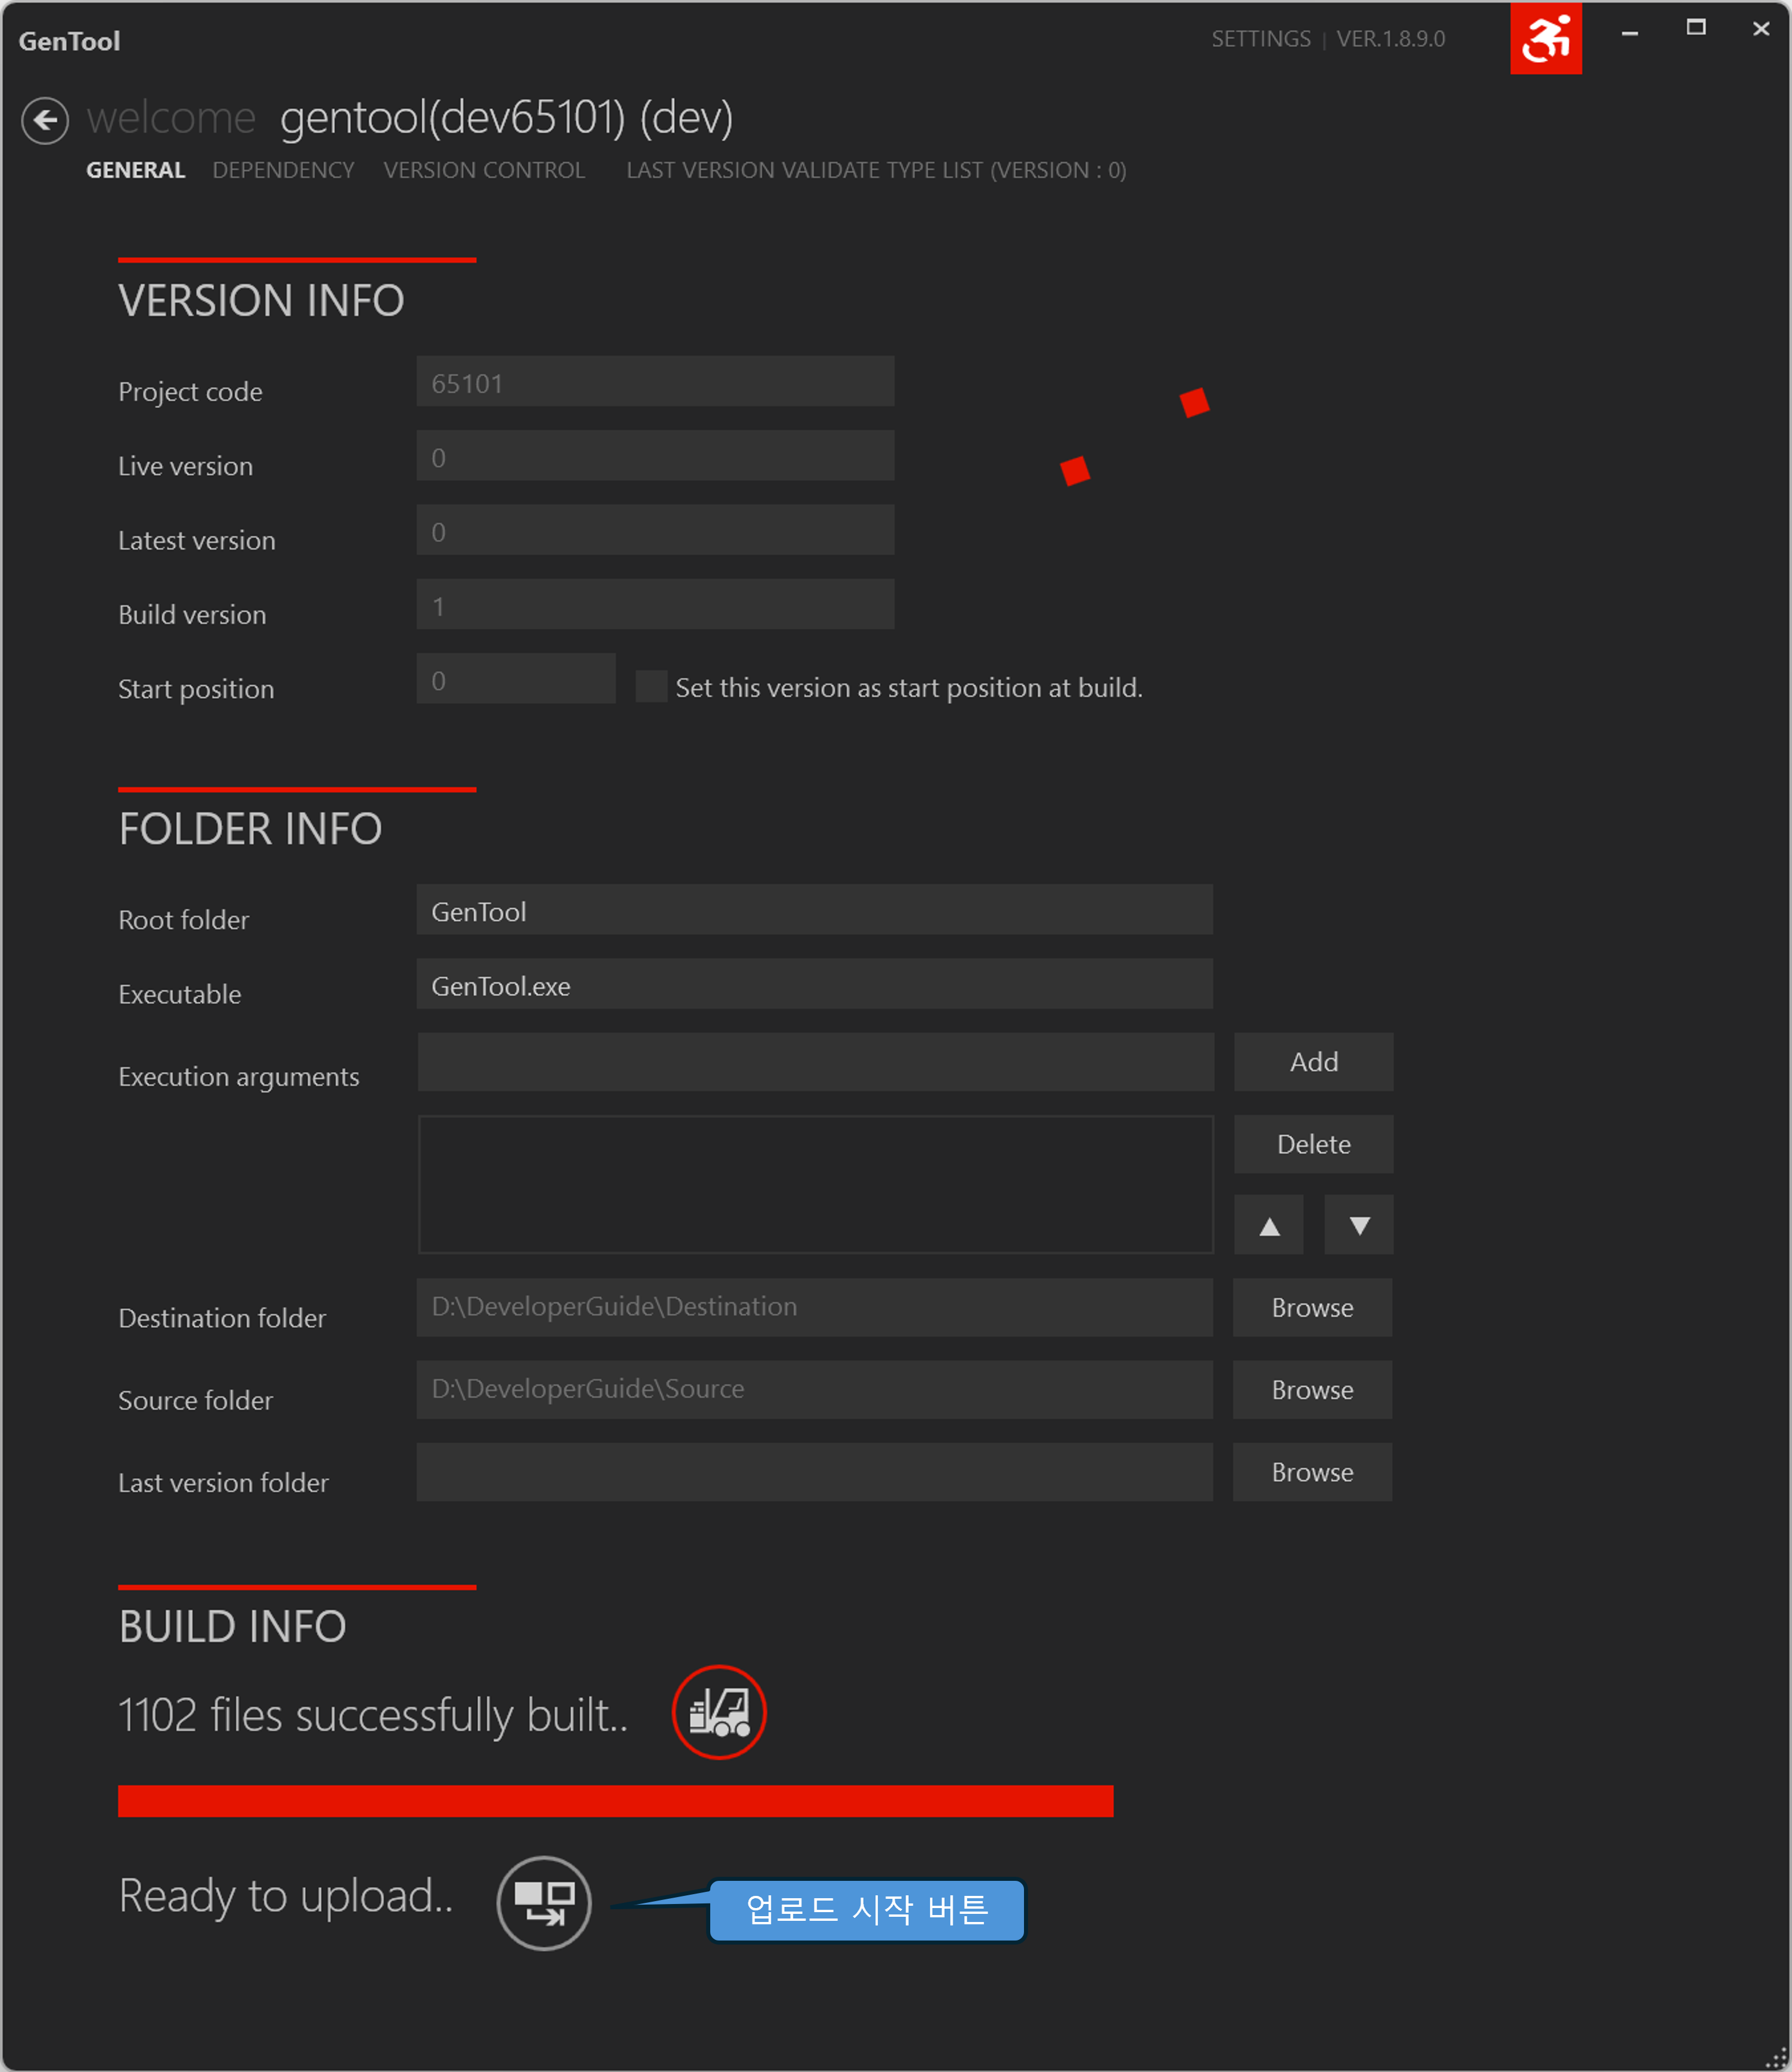
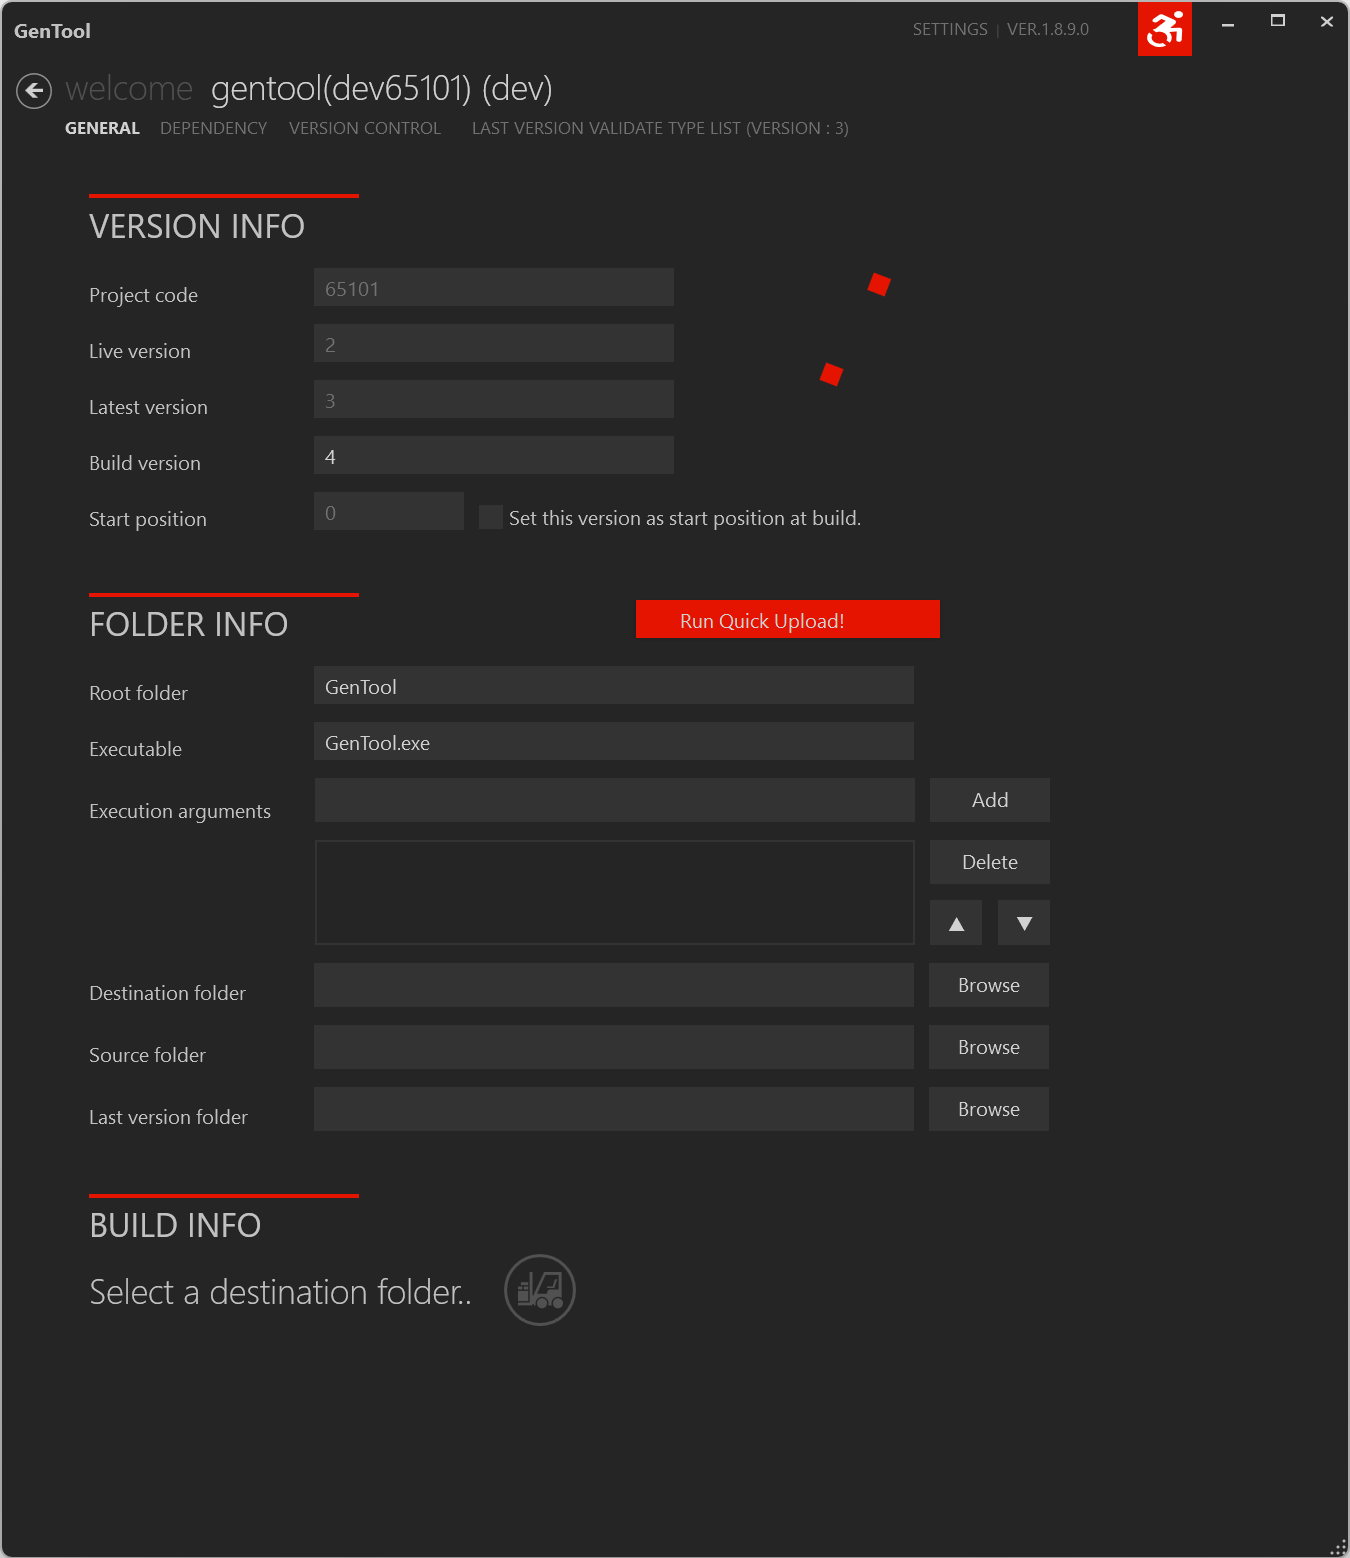
This screen is where you enter the basic info for building the game and handle basic features such as building and uploading.
The game's project code and version info are displayed, and the Build version can be edited.
| Item | Description |
|---|---|
| Project code | The project code. (same as the game ID.) |
| Live version | The version currently set as Live. |
| Latest version | The last uploaded version. |
| Build version | The version value assigned if you build now. (must always be an integer greater than the Latest version.) |
| Start position | Enabled when you check the "Set this version as start position at build" checkbox. Checking it makes the built version be recognized as the first version of the patch, used to reset when patch builds have accumulated over a long period. |

When using the Start position feature, please consult the STOVE representative before using it.
The folder paths and additional info used in a GenTool build.
| Item | Description |
|---|---|
| Root folder | Specifies the name of the Root folder where the game will be installed. For example, if the Root folder is CrossFire and the default install path is C:\Smilegate, the full install path is C:\Smilegate\CrossFire. (can be specified only on the first build.) |
| Executable | Specifies the executable file name of the game the launcher will run. |
| Execution arguments | Specifies the game-launch parameters. Arguments are passed in the order they were added to the list. |
| Destination folder | Specifies the folder where build-result files are saved. |
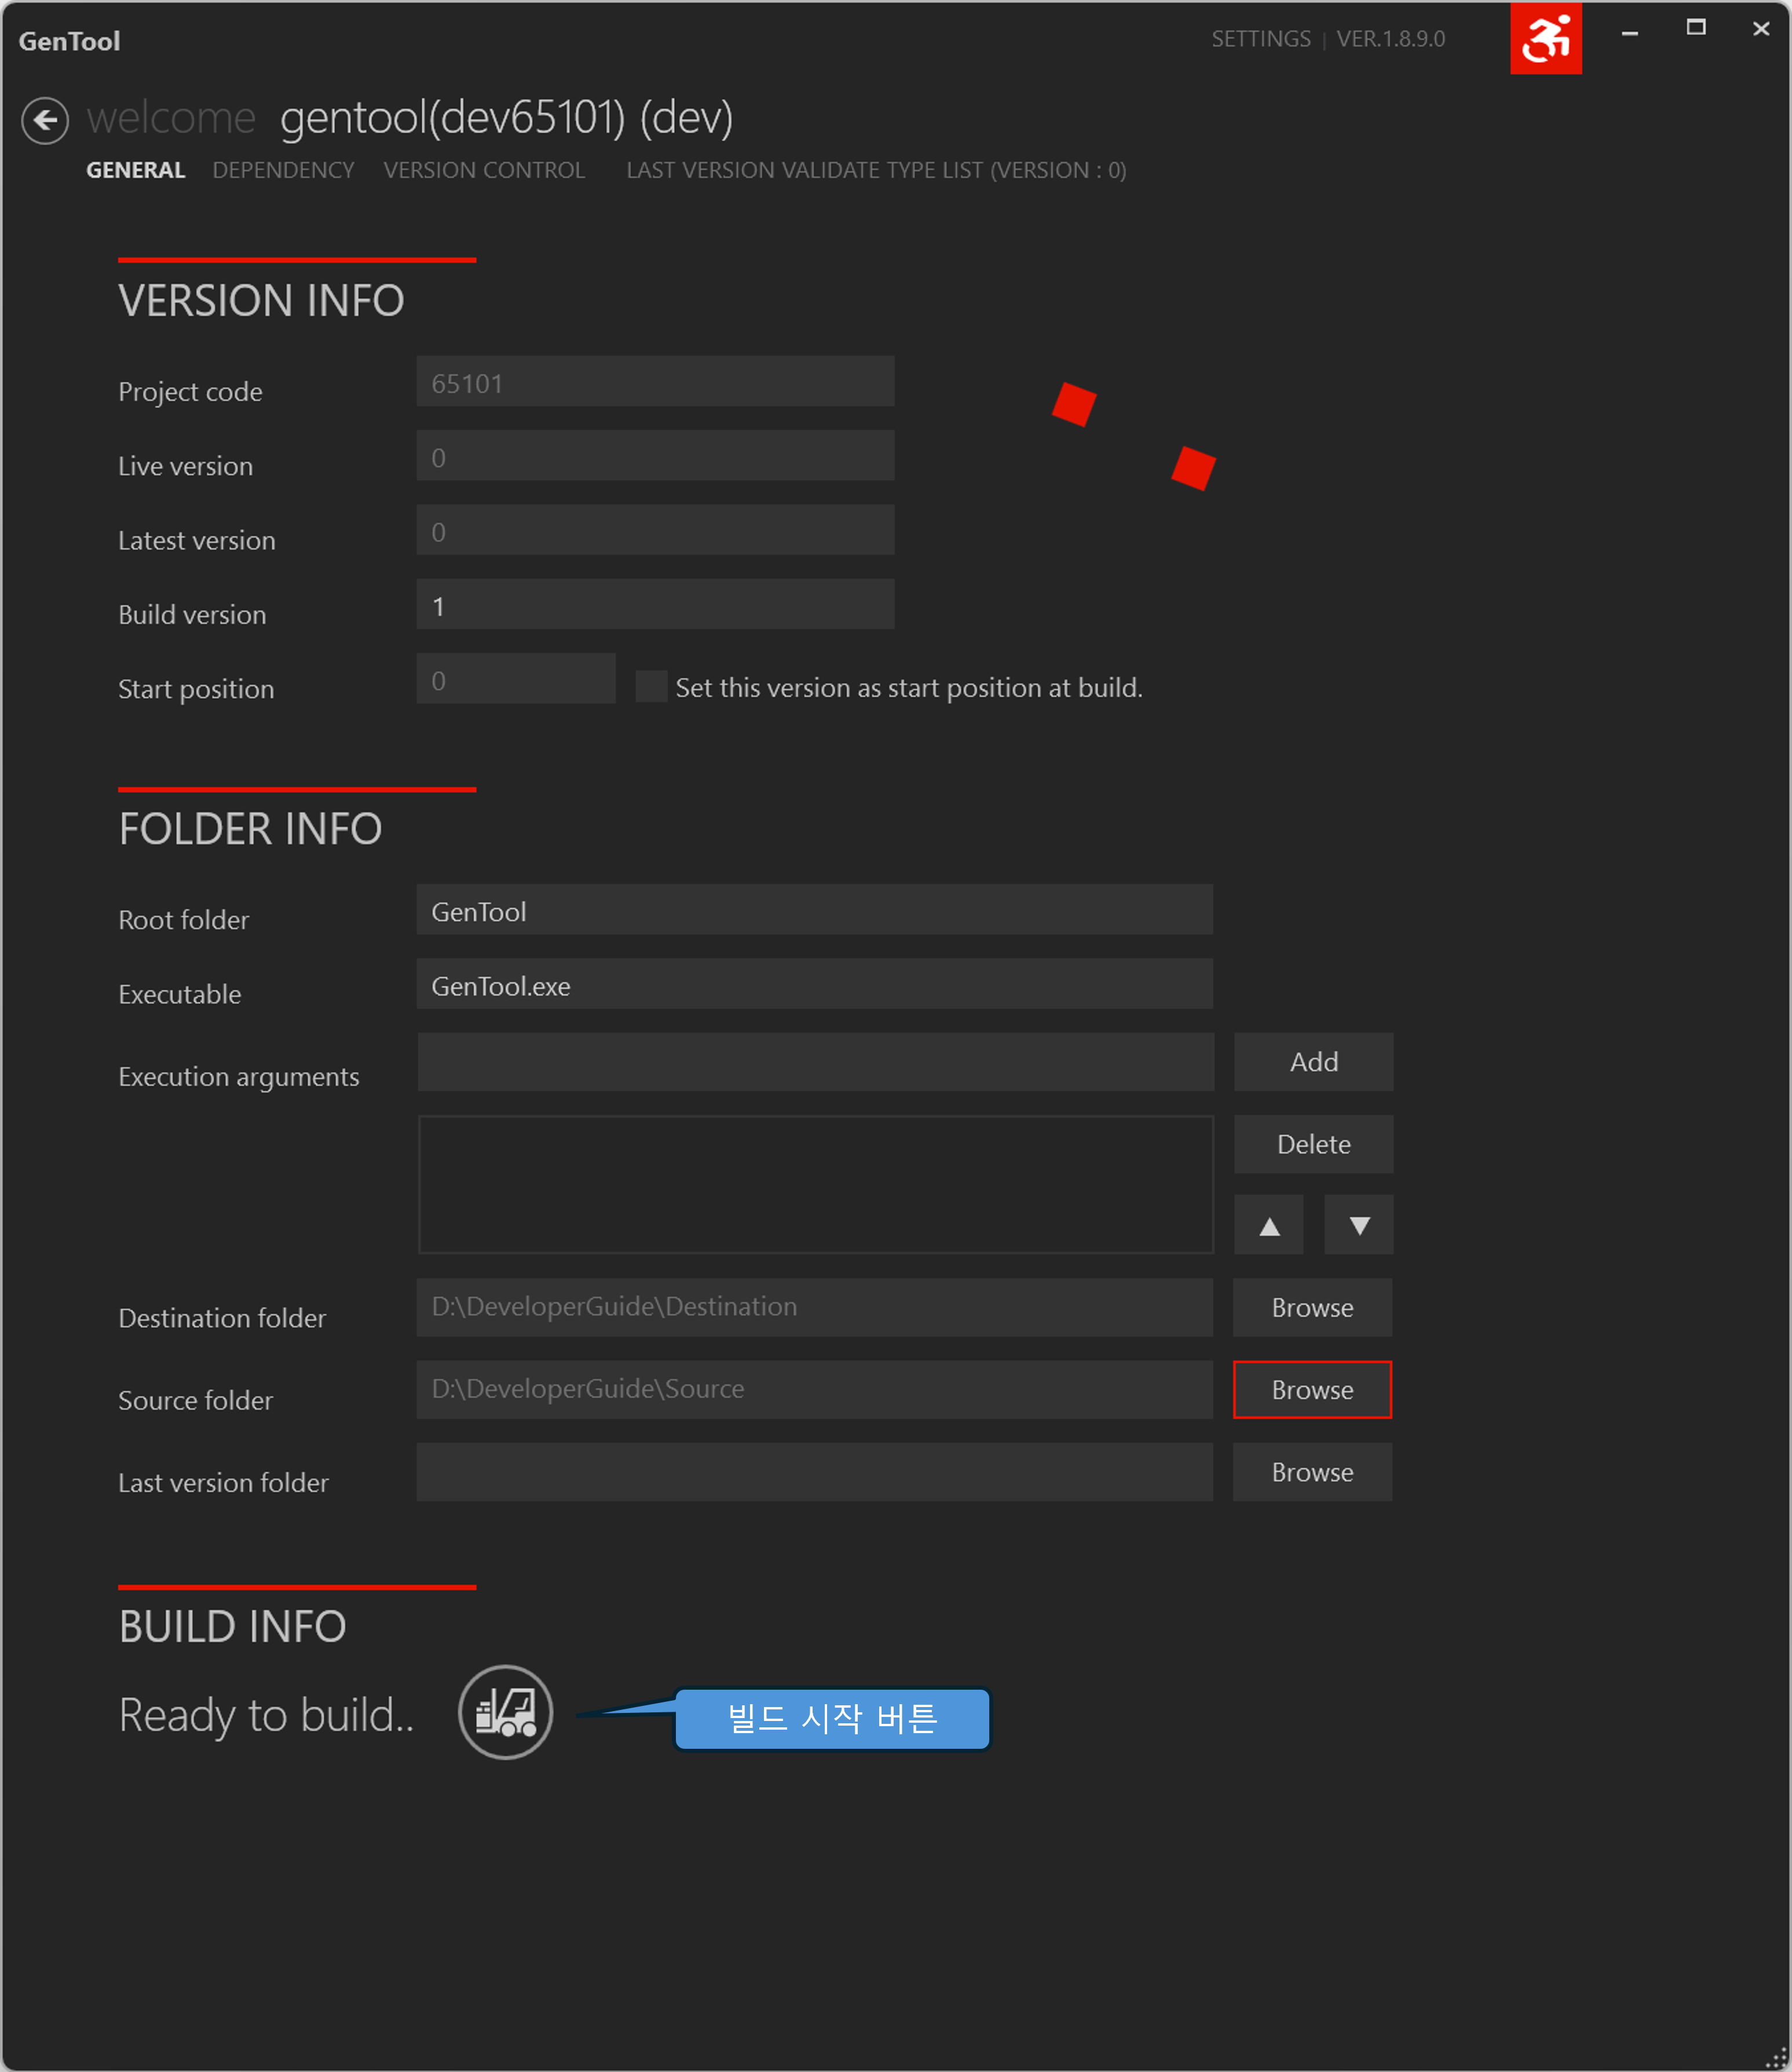
| Source folder | Specifies the build-target game folder for the current version. When you select the Source folder, it compares the file list with the previous version and shows the list of missing files in a dialog. |
| Last Version folder | Specifies the build-target game folder of the previous version to compare with the current version. (if there's no previous version, you don't need to specify it.) |
The Root folder and Executable field values must not be left empty.
Before the build starts, all contents of the Destination folder are deleted.
ㆍ Please specify an empty folder or a folder that contains no important files.
Info related to building and uploading is displayed.
| Item | Description |
|---|---|
| Start Build button | Builds with the values set above and saves the output. |
| Start Upload button | Uploads the built output to the server. Shown after the build completes. |
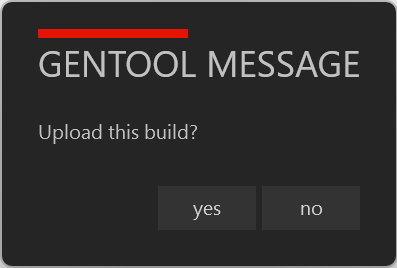
| Upload-confirmation message box | Choose whether to run the upload. |
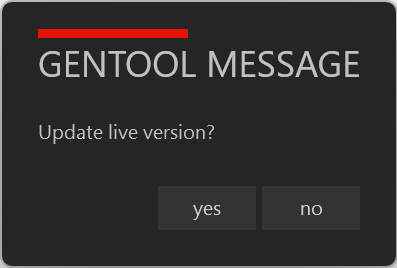
| Live-version update message box | Choose whether to update the uploaded build to the Live version. If not updated, the existing Live version is kept. |
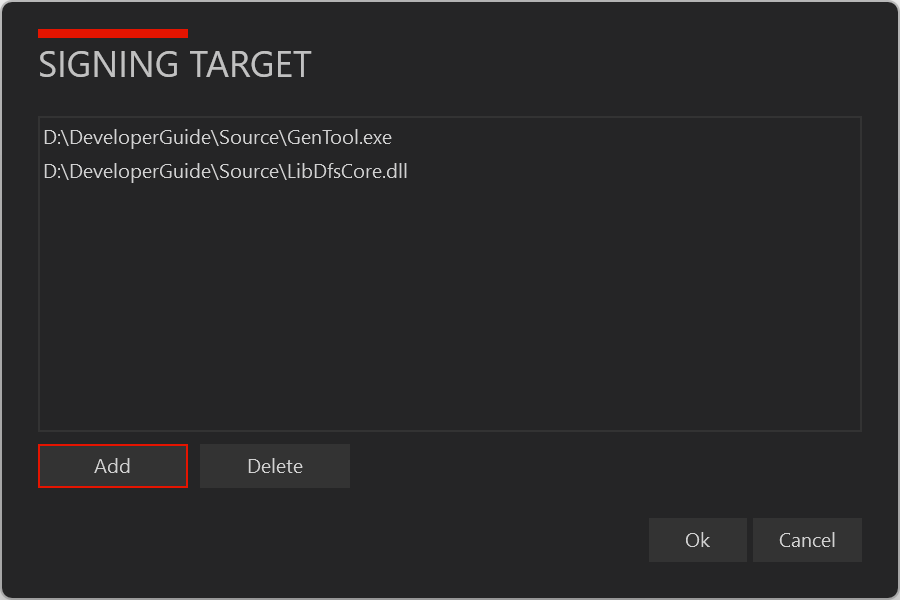
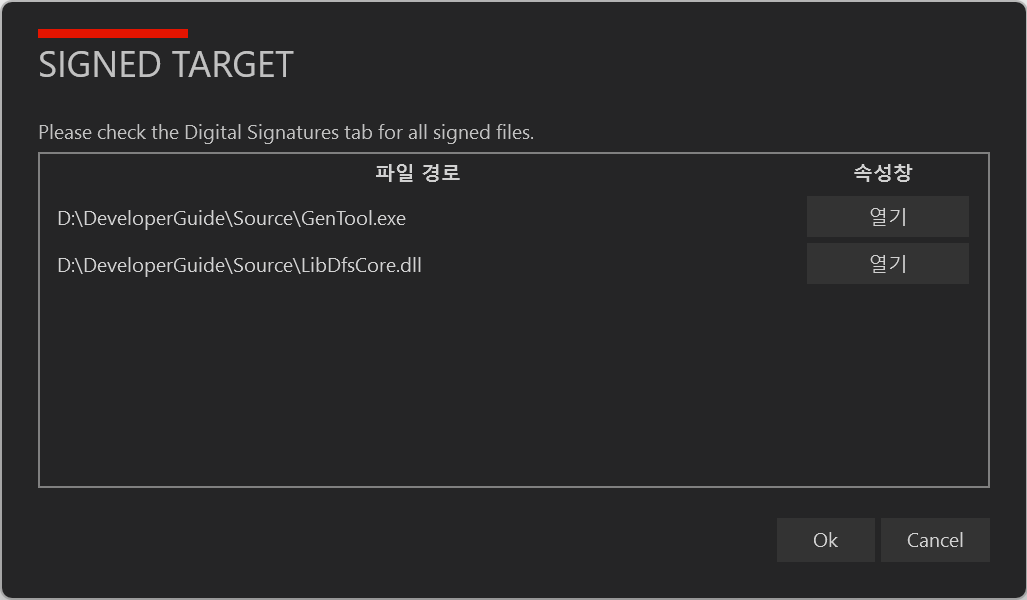
When the build starts, code signing is done first, and once code signing completes you can check it in the file-properties window.
ㆍ Code signing is required, and you must sign at least one executable file (.exe, .dll).
You can freely repeat the build multiple times, but an upload is hard to undo once done, so proceed carefully.
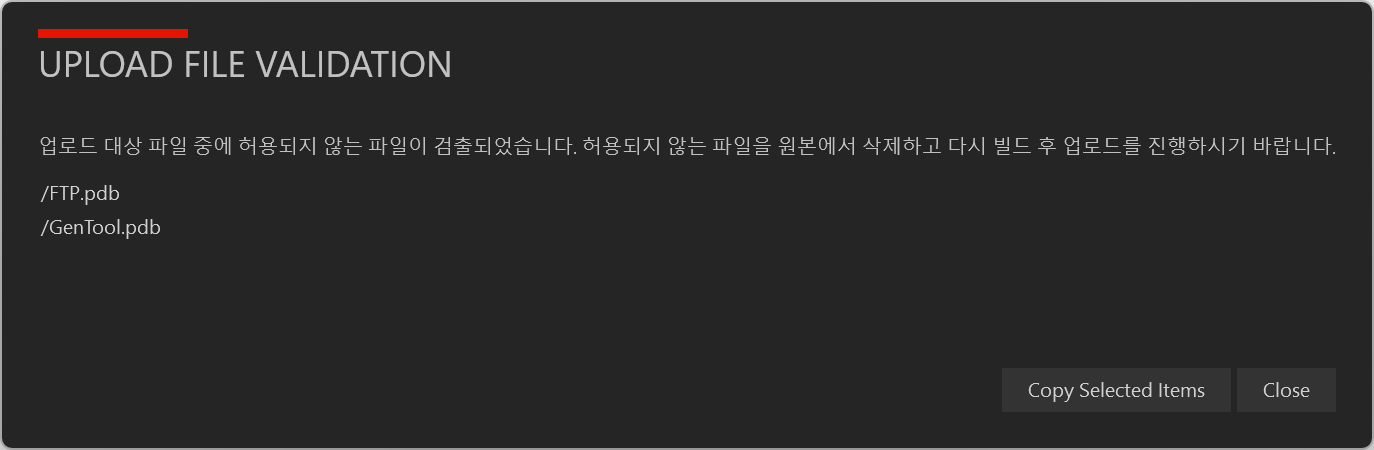
When you upload, it checks whether there's a .pdb file among the built files and notifies you.
ㆍ If a .pdb file is found, delete it, rebuild, and upload again.
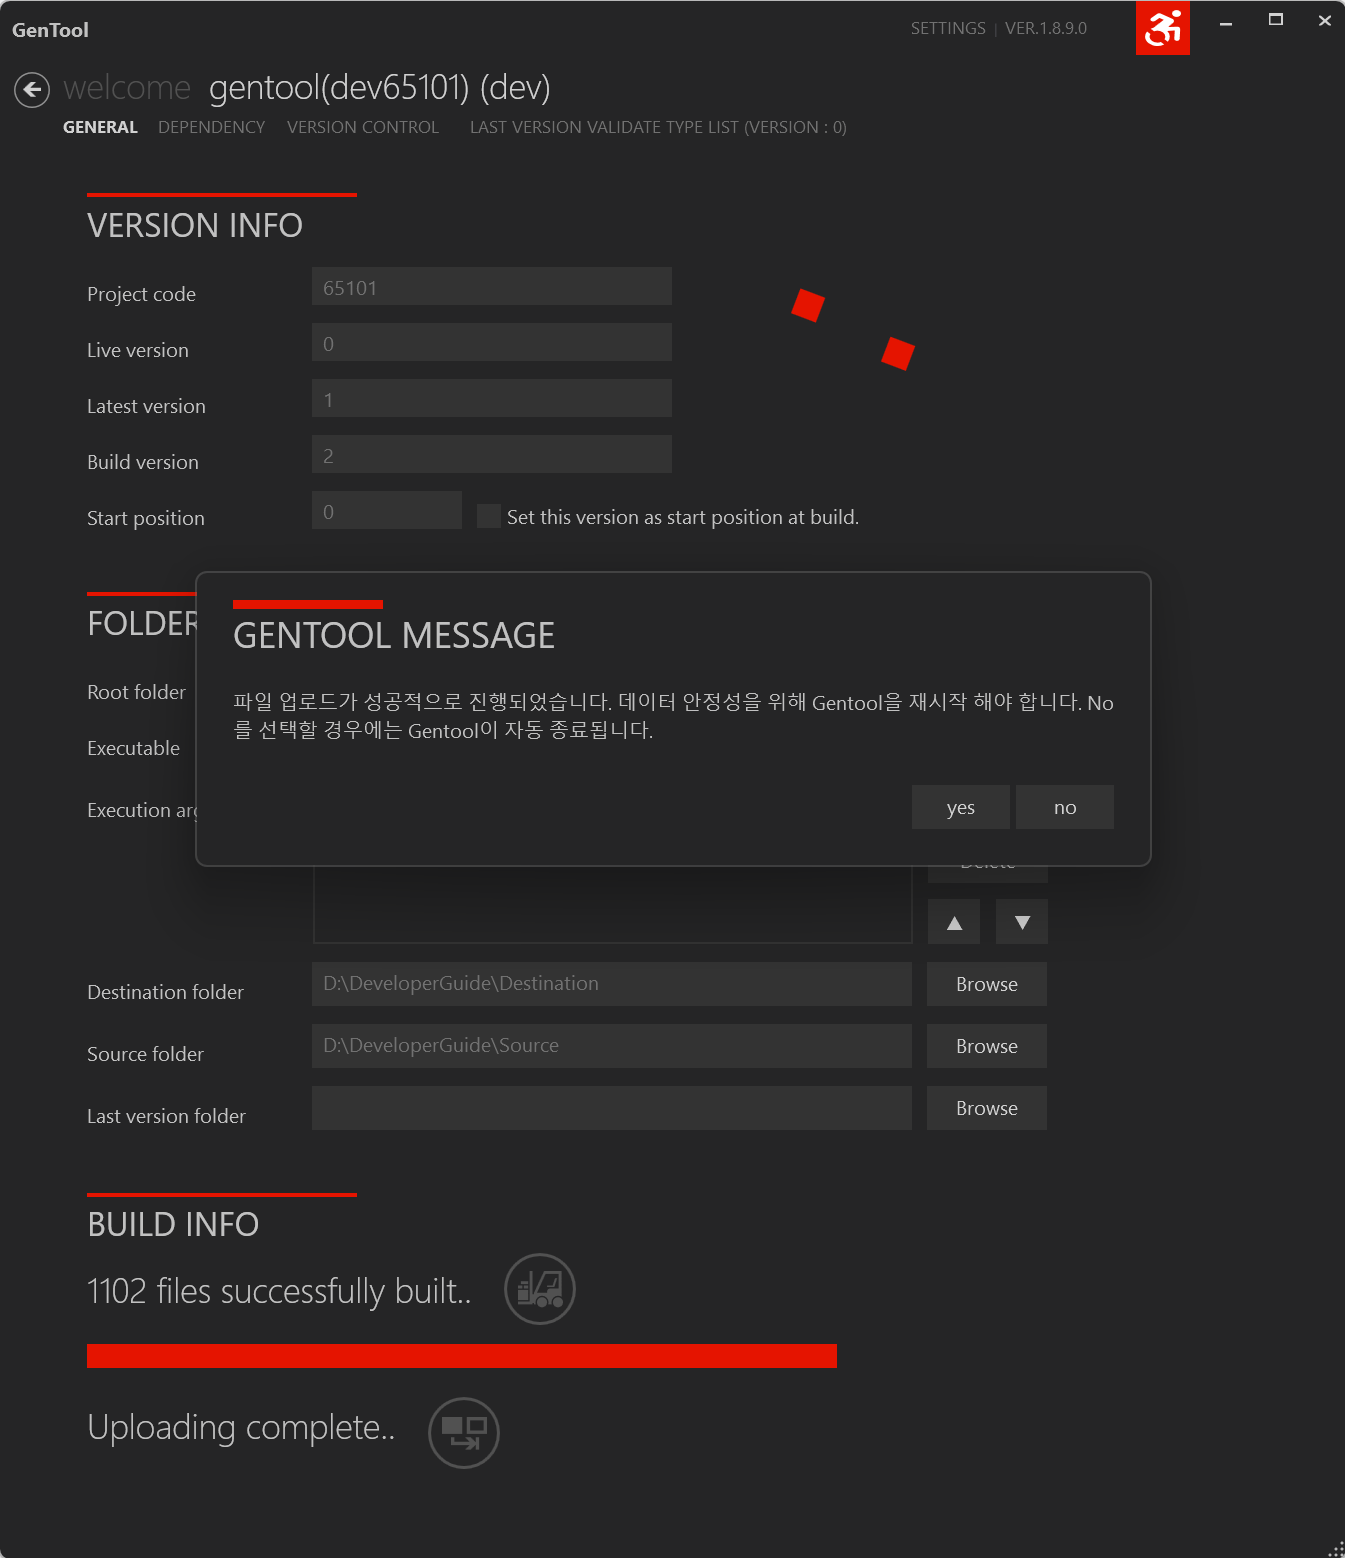
When the upload completes, a GenTool restart dialog for data stability appears right away.
- Tuning applies only when you specify the Last Version folder in FOLDER INFO and generate an xd file during the build.
- Generating the xd file during a build can take a long time depending on the situation. However, tuning that shortens the build time is possible depending on the system memory capacity.
- Adjusting the memory capacity allocated to the build can reduce the build time.
- GenTool reads the value set in the %AppData%\Local\GenTool\gentool_config.json file to set the buffer capacity when generating the xd file.
- The configurable values are
64MB,128MB,256MB, and512MB, and thedefault is 64MB. - A total of 4 units each use memory to generate the xd file, so it uses 4 times the set value in memory.
- The configurable values are
- GenTool doesn't create the gentool_config.json file itself.
- If needed, the user must create the file at that path themselves. If the file is missing or has an invalid value set, the default of 64MB is used.
- The contents of the gentool_config.json file are as follows.
{
    "xdelta_buff_size_mb": 512
}
- We recommend setting the buffer size so the total usage is about 1/4 of the system memory capacity.
| Category | System 1GB | System 2GB | System 4GB | System 8GB |
|---|---|---|---|---|
| Unit buffer size | 64MB | 128MB | 256MB | 512MB |
| Total buffer usage | 64 x 4 = 256MB | 128 x 4 = 512MB | 256 x 4 = 1024MB | 512 x 4 = 2048MB |
- On the GENERAL screen, you can use the Quick Upload menu by right-clicking.
- Clicking the Quick Upload menu shows a folder-selection dialog. If you select the folder where existing build output is saved in this dialog, you can upload directly without the build process.
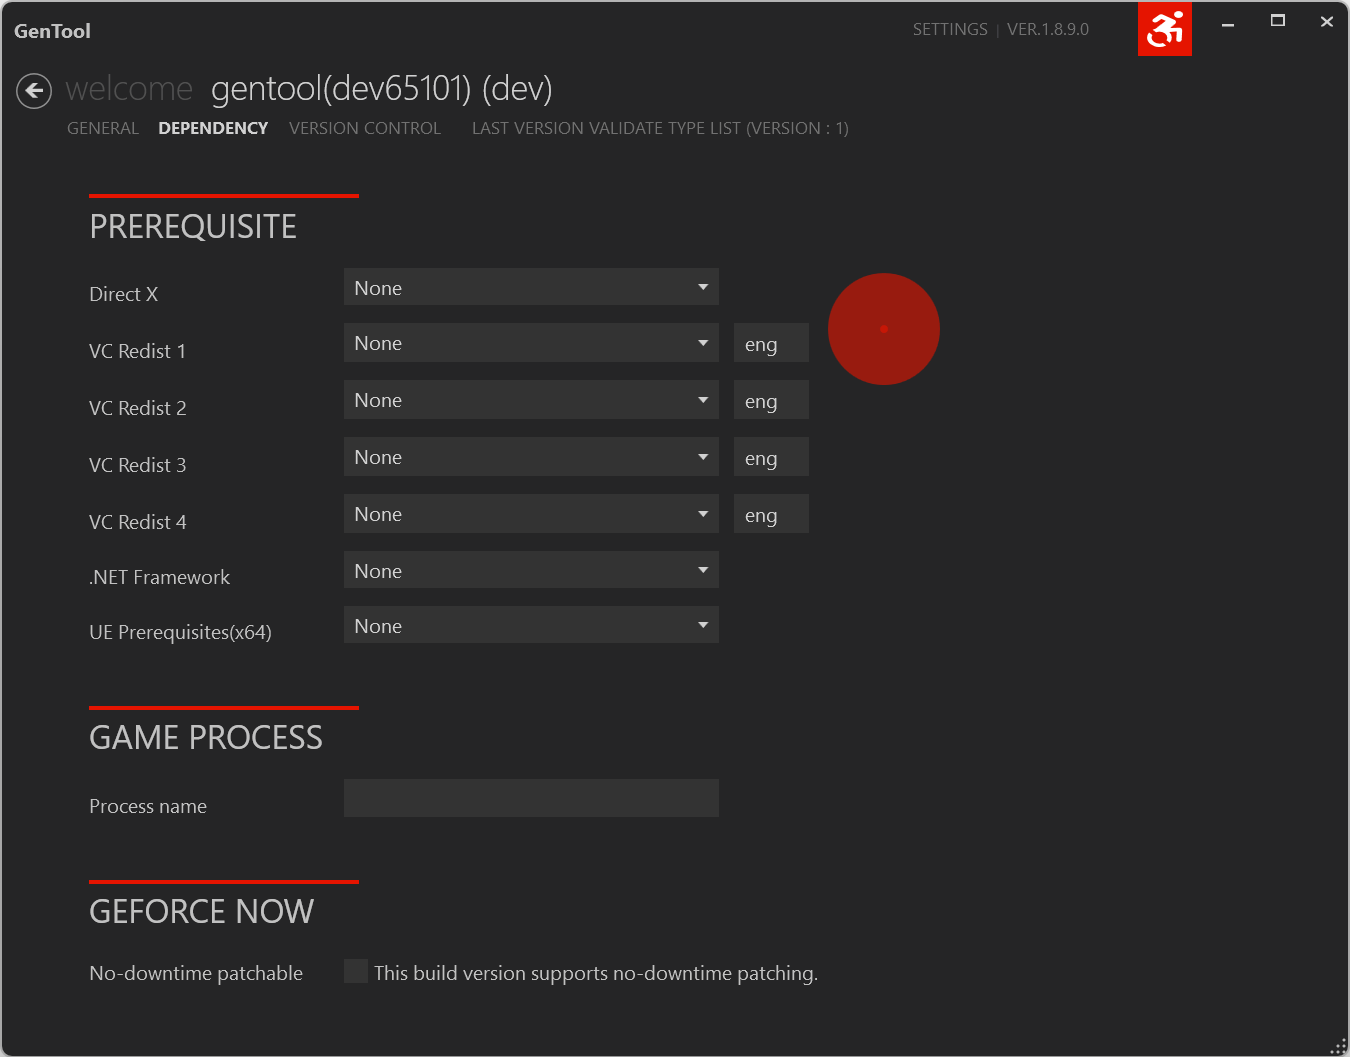
Set the game's dependencies for the version currently being built.
| Item | Description |
|---|---|
| DirectX | Sets the DirectX version. |
| VC Redist | Sets the VC++ redistributable package. |
| .NET Framework | Sets the .NET Framework version. |
| Unreal Engine Prerequisites | Sets the Unreal Engine prerequisites setup version. |
| Process name | Sets the name of the process that actually runs when the game launches. If the entry-point EXE and the EXE that actually runs the game are separate, enter the process name of the EXE that actually runs the game. |
| No-downtime patchable | The gfn.json file is created regardless of whether the "This build version supports no-downtime patching" checkbox is checked, and the uploaded gfn.json file is referenced by the GFN server. Depending on whether it's checked, the no_downtime_patchable property value in the gfn.json file is set to true/false. |
As an example for the Process name item,
ㆍ if a game developed with Unreal Engine enters the program via /UnrealSample.exe,
ㆍ and internally runs /UnrealSample/Binaries/Win64/UnrealSample-Win64-Shipping.exe to launch the game,
ㆍ you must enter UnrealSample-Win64-Shipping.exe in Process Name.
The No-downtime patchable item is used only for games integrated with GEFORCE NOW.
This screen controls the game's version.
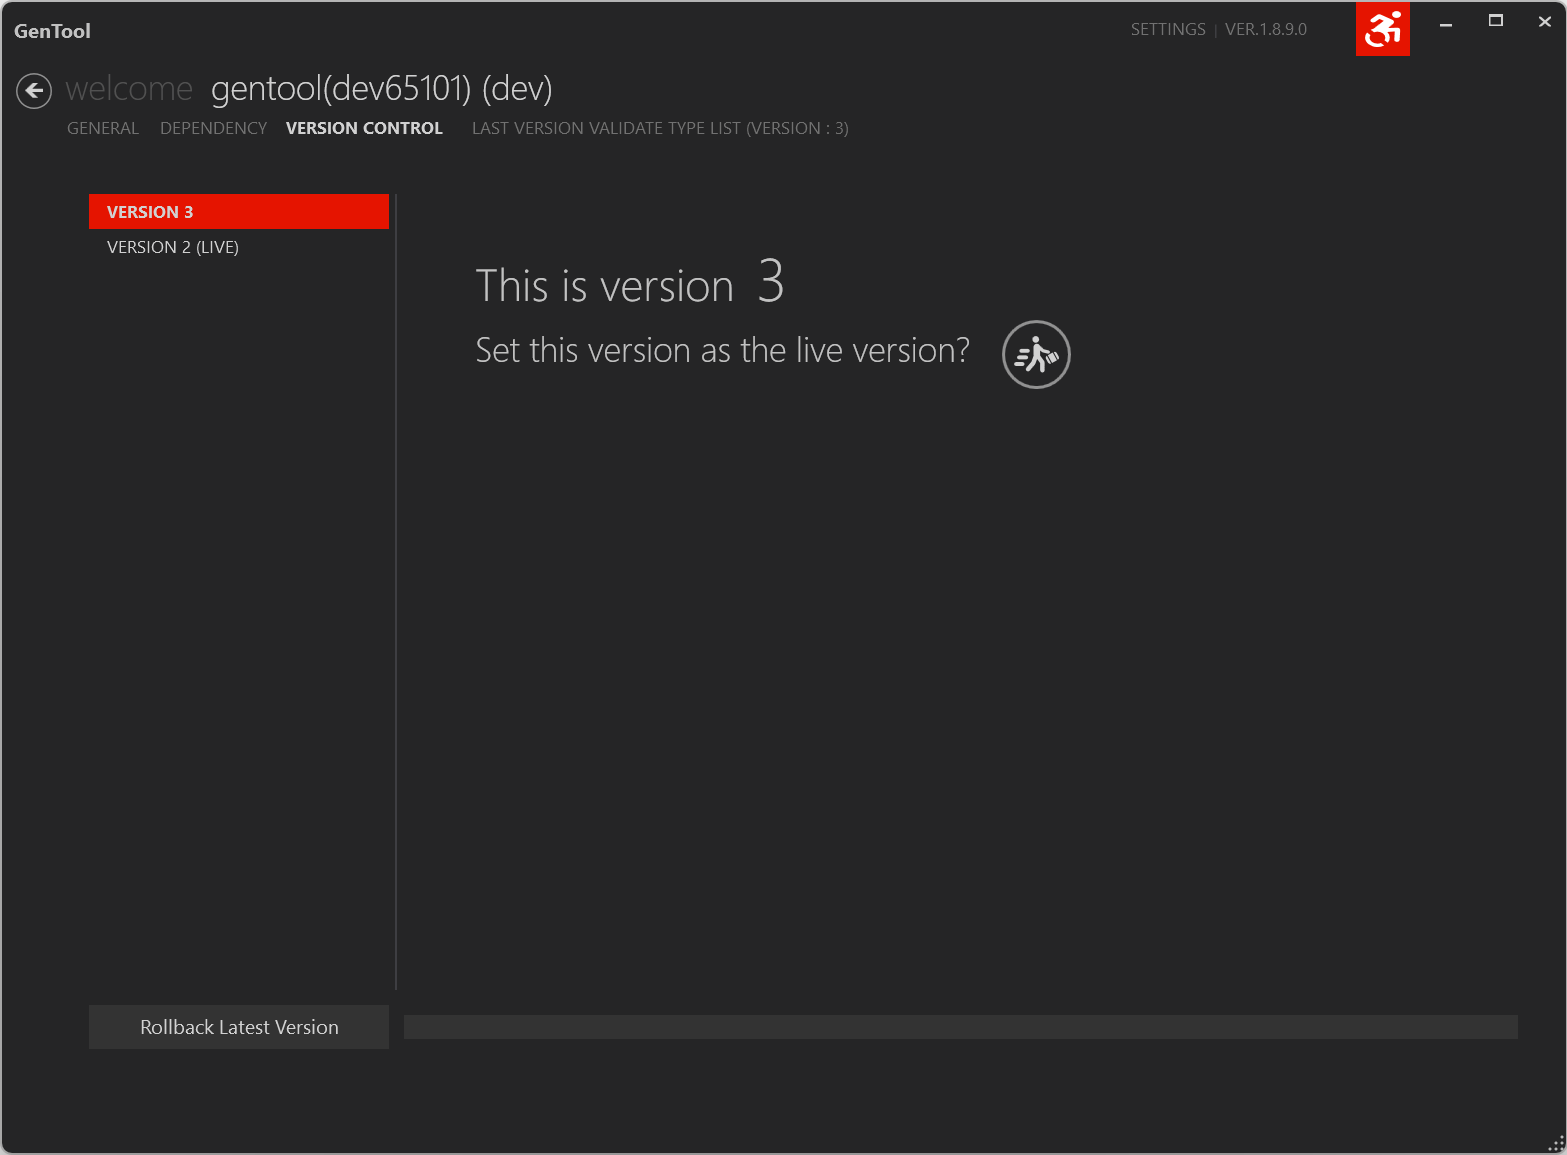
- You can set the Live version.
- The left version list shows from the Live version to the last uploaded version.
- You can designate one among the versions uploaded after the Live version.
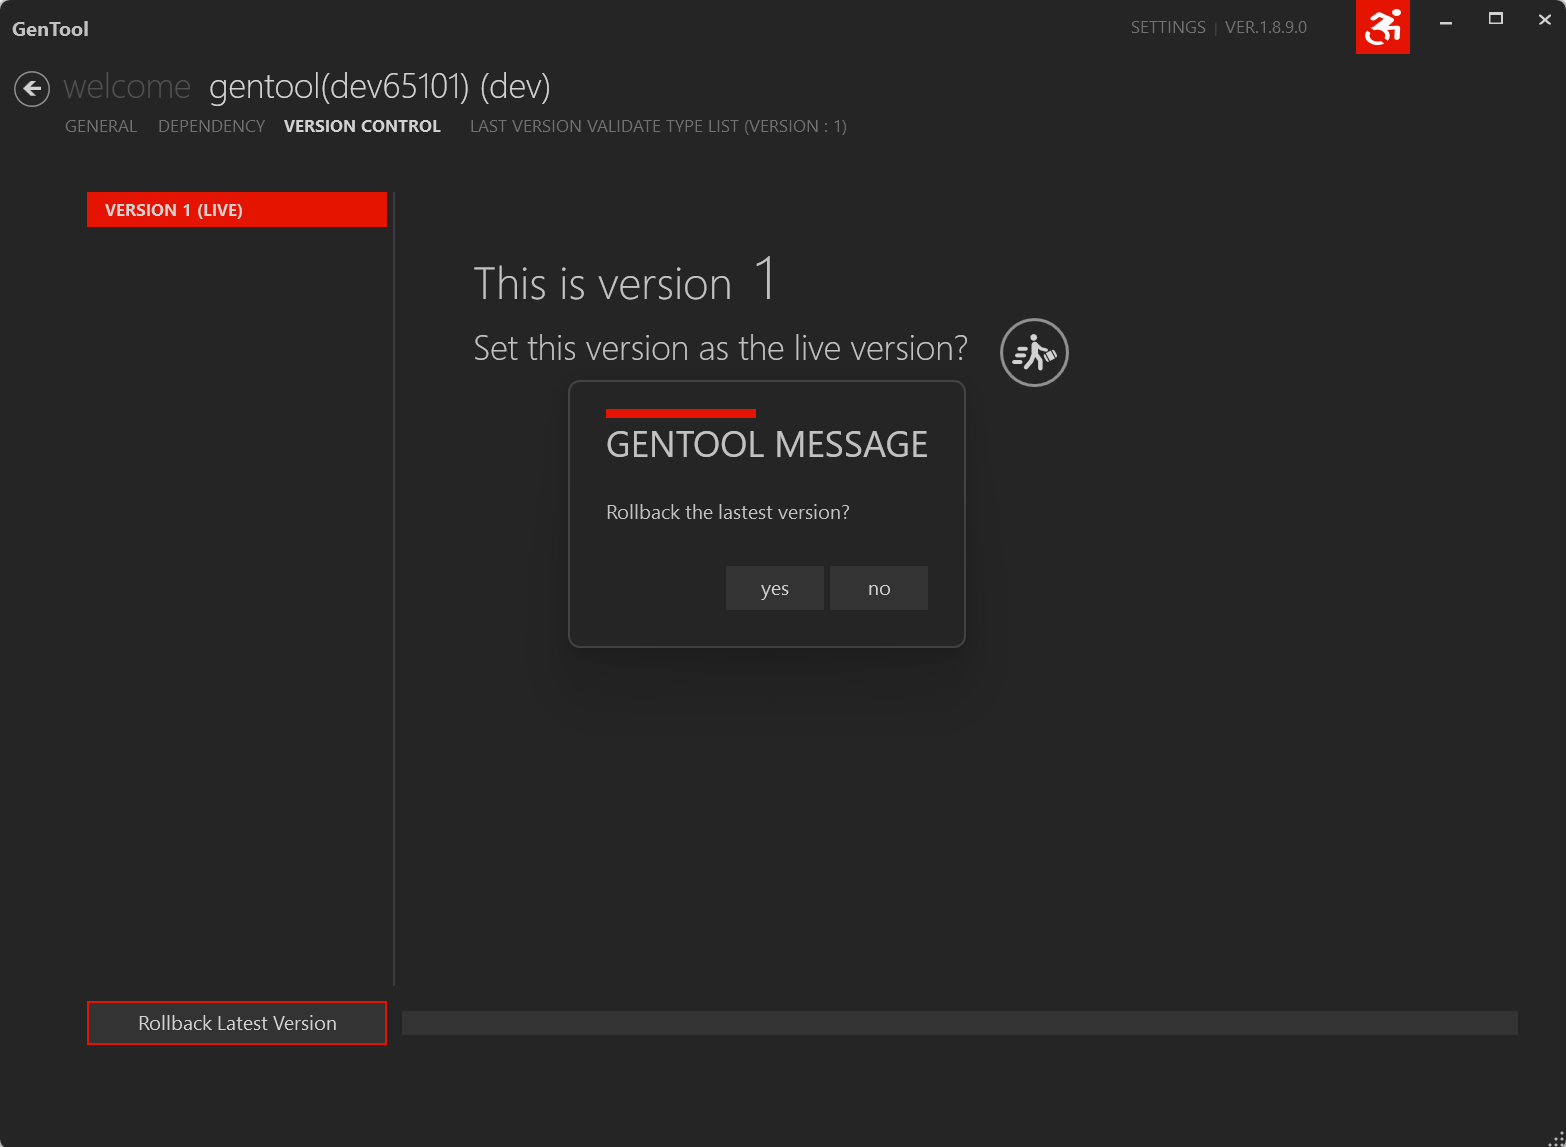
- You can roll back the last build version.
- It can be used only in environments other than the Live environment.
- It rolls back the very last build version by one step.
- If the Live version is set on the very last build version, the Live version is also rolled back to the previous Live version.
- The rollback feature supports rollback to the immediately previous step only.
- Repeating this process makes multi-step rollback possible too.
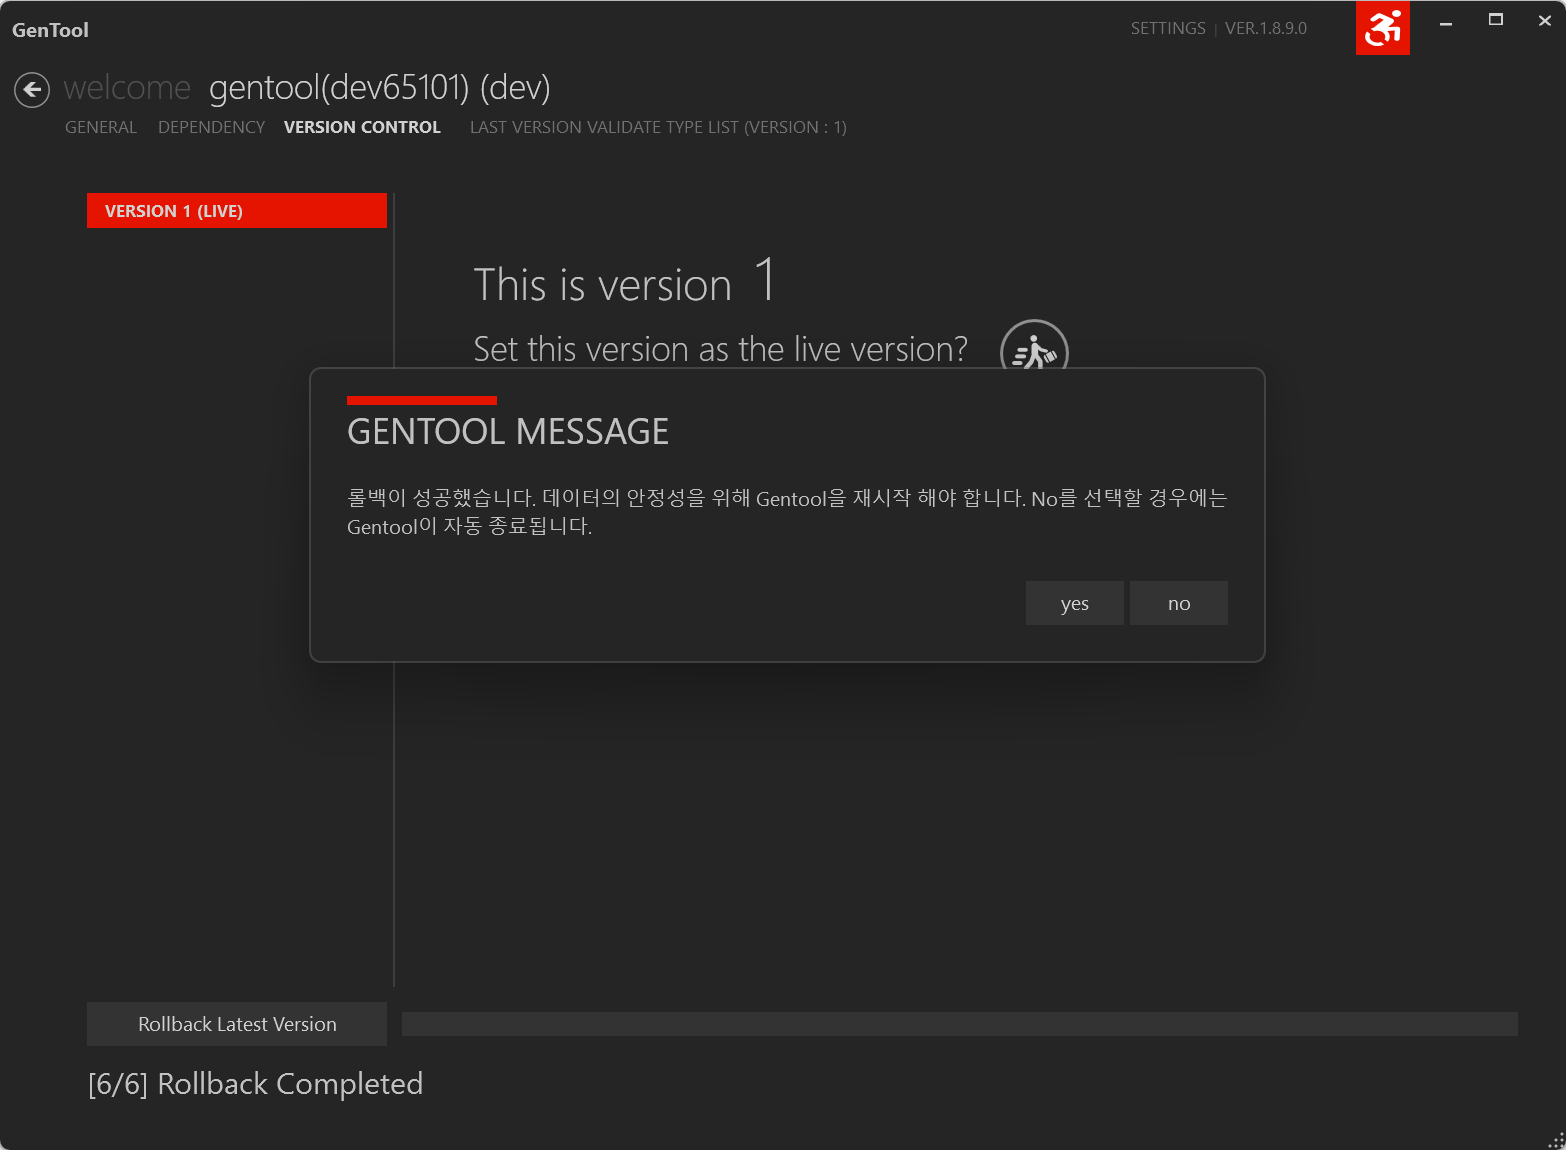
- As with uploading, a GenTool restart dialog for data stability appears right after a rollback.
If a CDN purge is needed after completing a rollback, request it from the STOVE representative.
When the Live version changes (setting it as the Live version on upload, setting the Live version in Version Control, or rolling back),
ㆍ follow-up processing is done to prevent antivirus false positives.
ㆍ During follow-up processing, a slight delay in feature processing can occur due to retries on failure, etc.
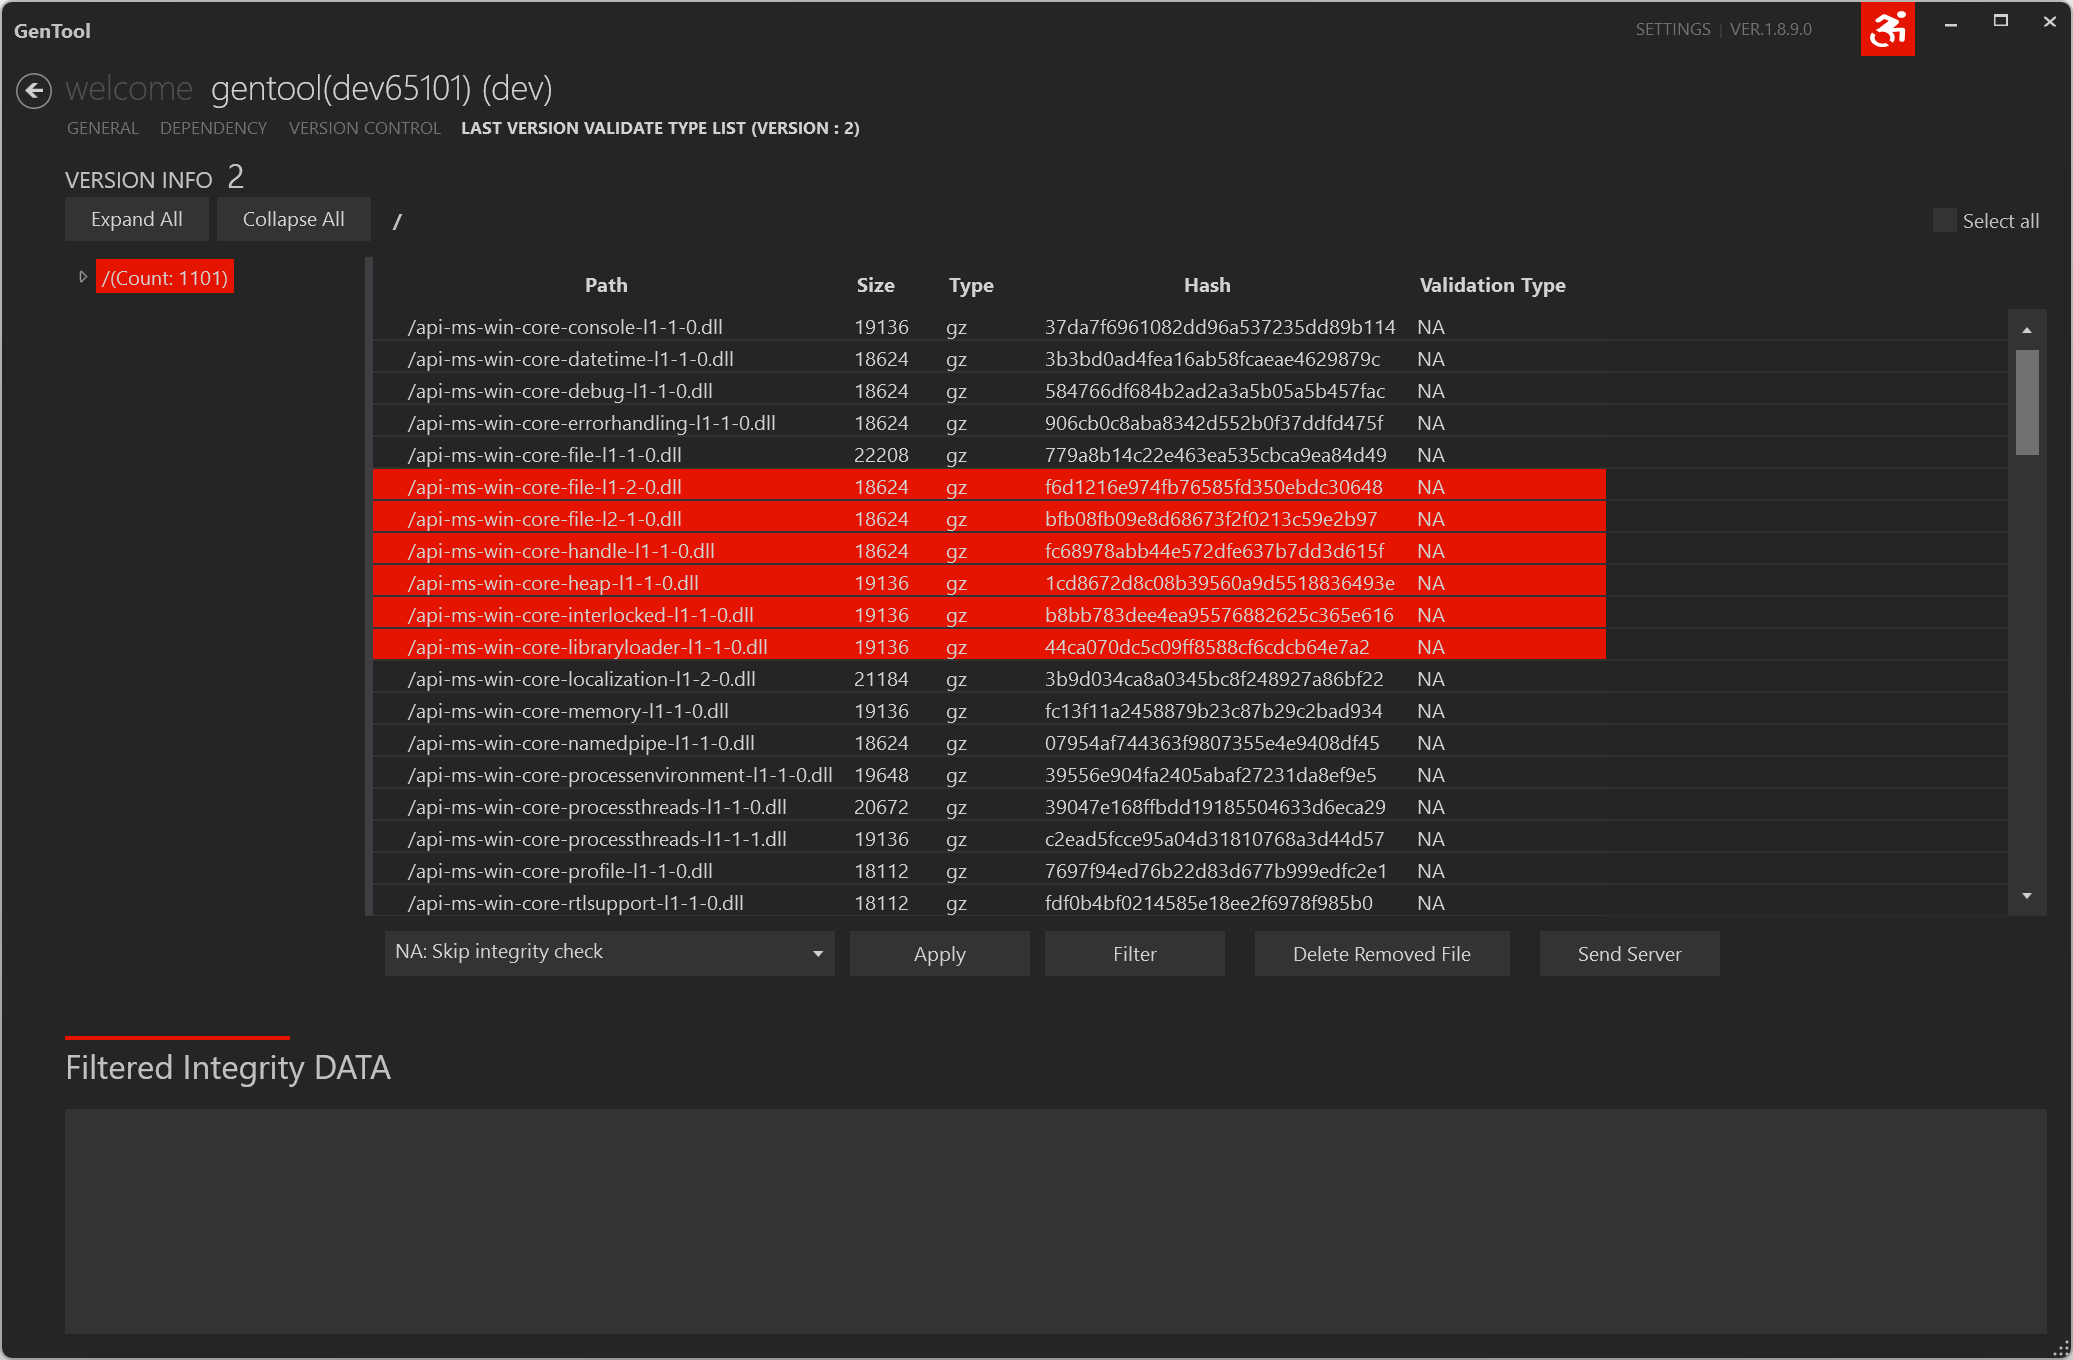
This screen lets you set integrity check on/off and set/check the integrity-validation type list of the last uploaded version.
| Validation type | Description |
|---|---|
| 0 (N/A) | Doesn't validate. |
| 1 (EXIST_HASH) | Compares file existence and hash, and patches if different. |
| 2 (EXIST) | Checks whether the file exists, and patches if it doesn't. |
- It stores the current version's integrity-validation type per file, so the launcher checks the validity of the designated files when running the game.
- You can edit the integrity-validation-type target files regardless of build deployment.
- The current version's integrity info is first uploaded when you upload the build.
- If a Manifest file containing integrity info for a previous version exists on the server, the same integrity info applies to game files that exist identically in the previous version and the current build.
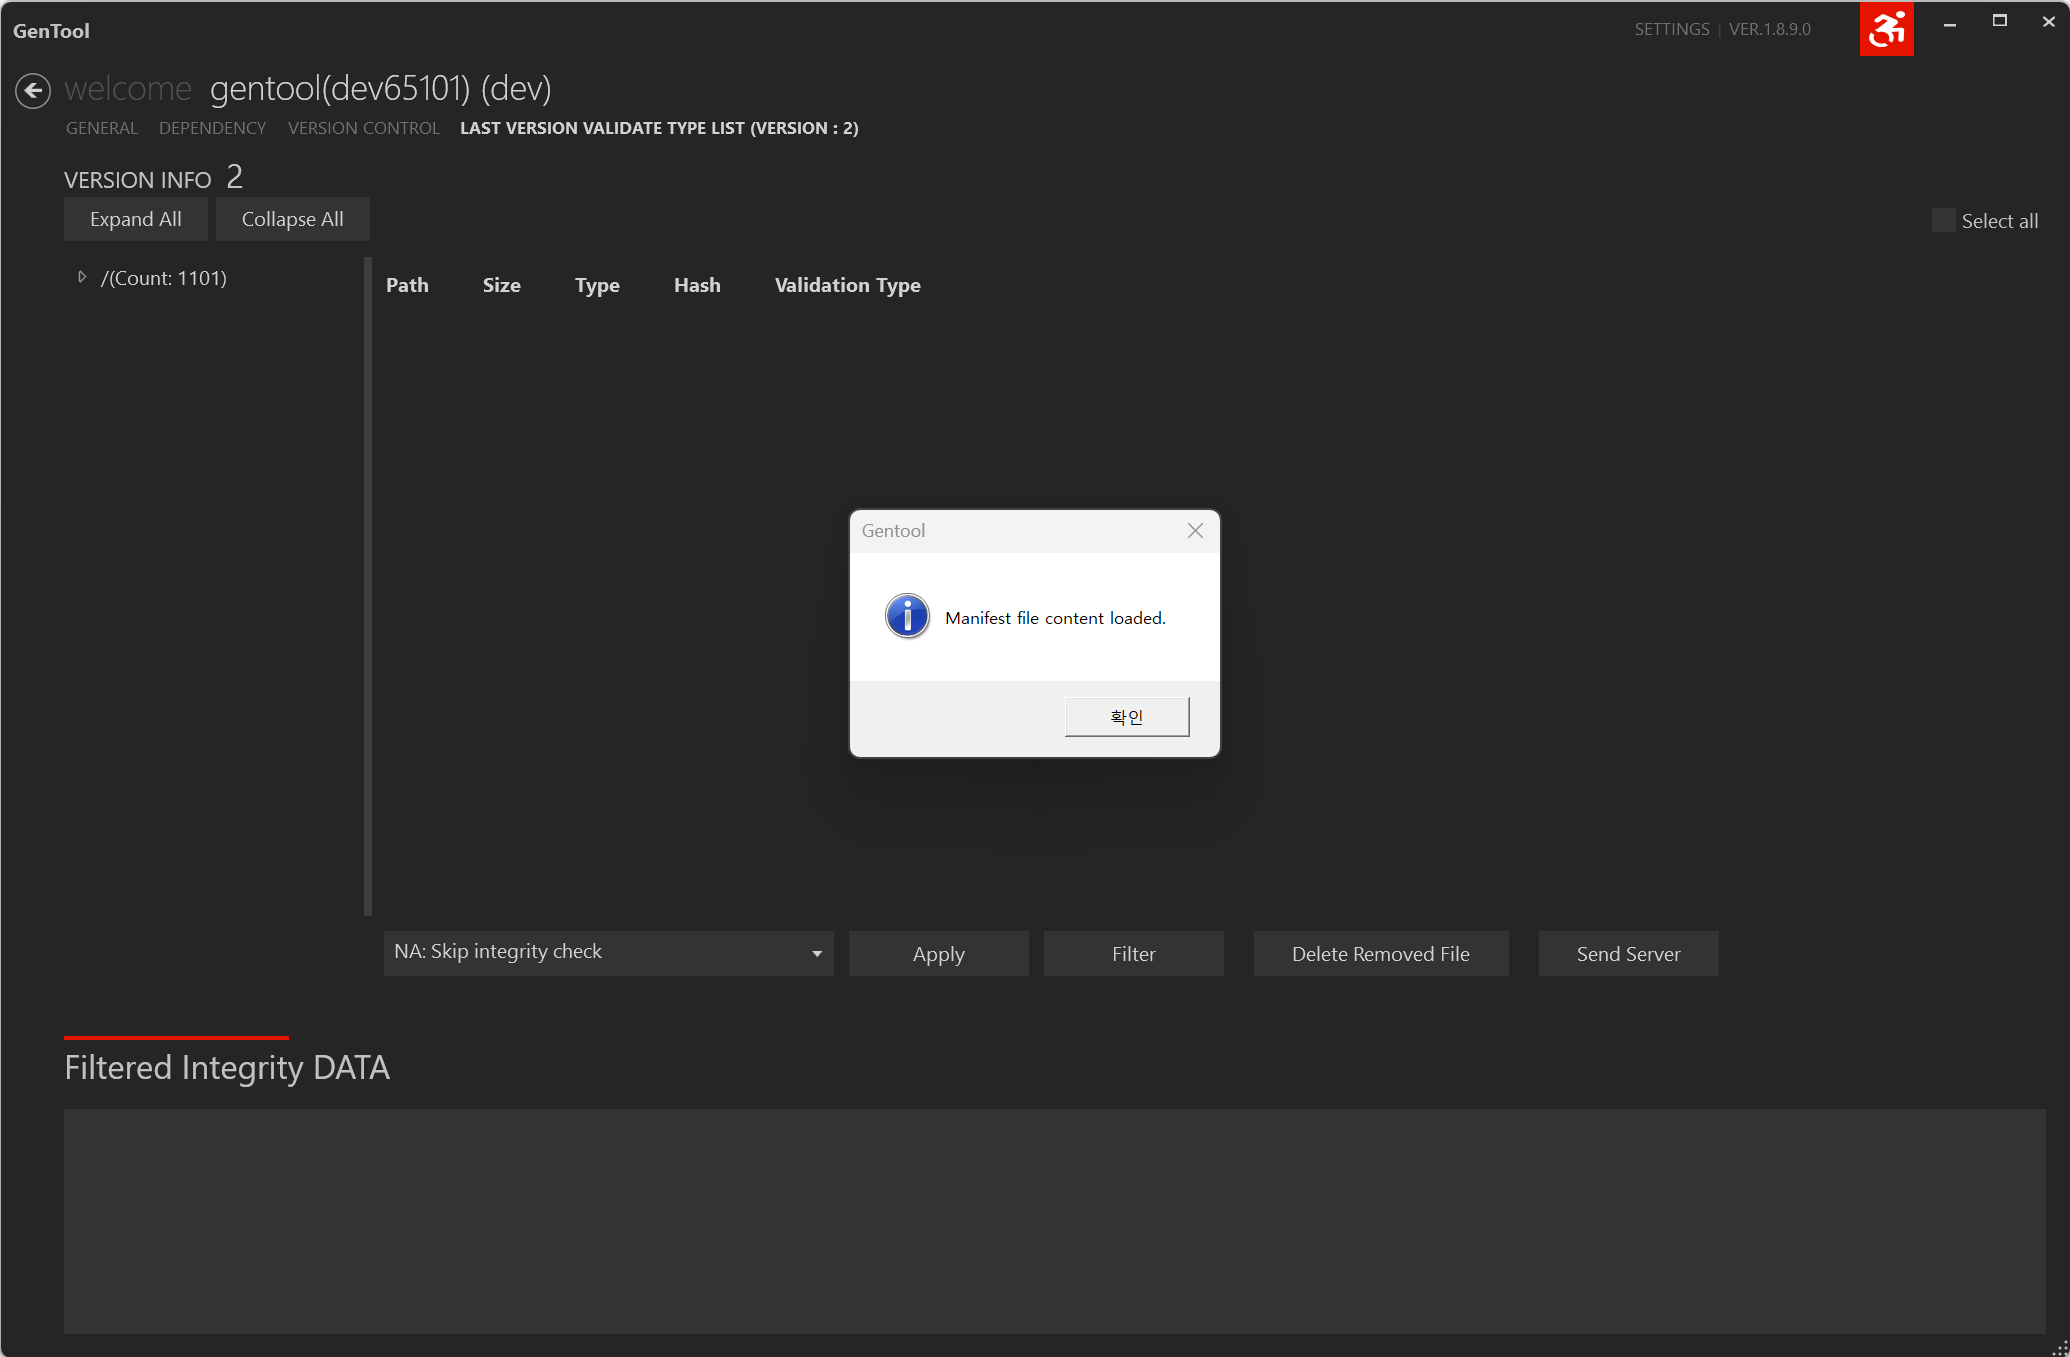
Selecting the LAST VERSION VALIDATE TYPE LIST tab loads the current version's integrity info asynchronously.
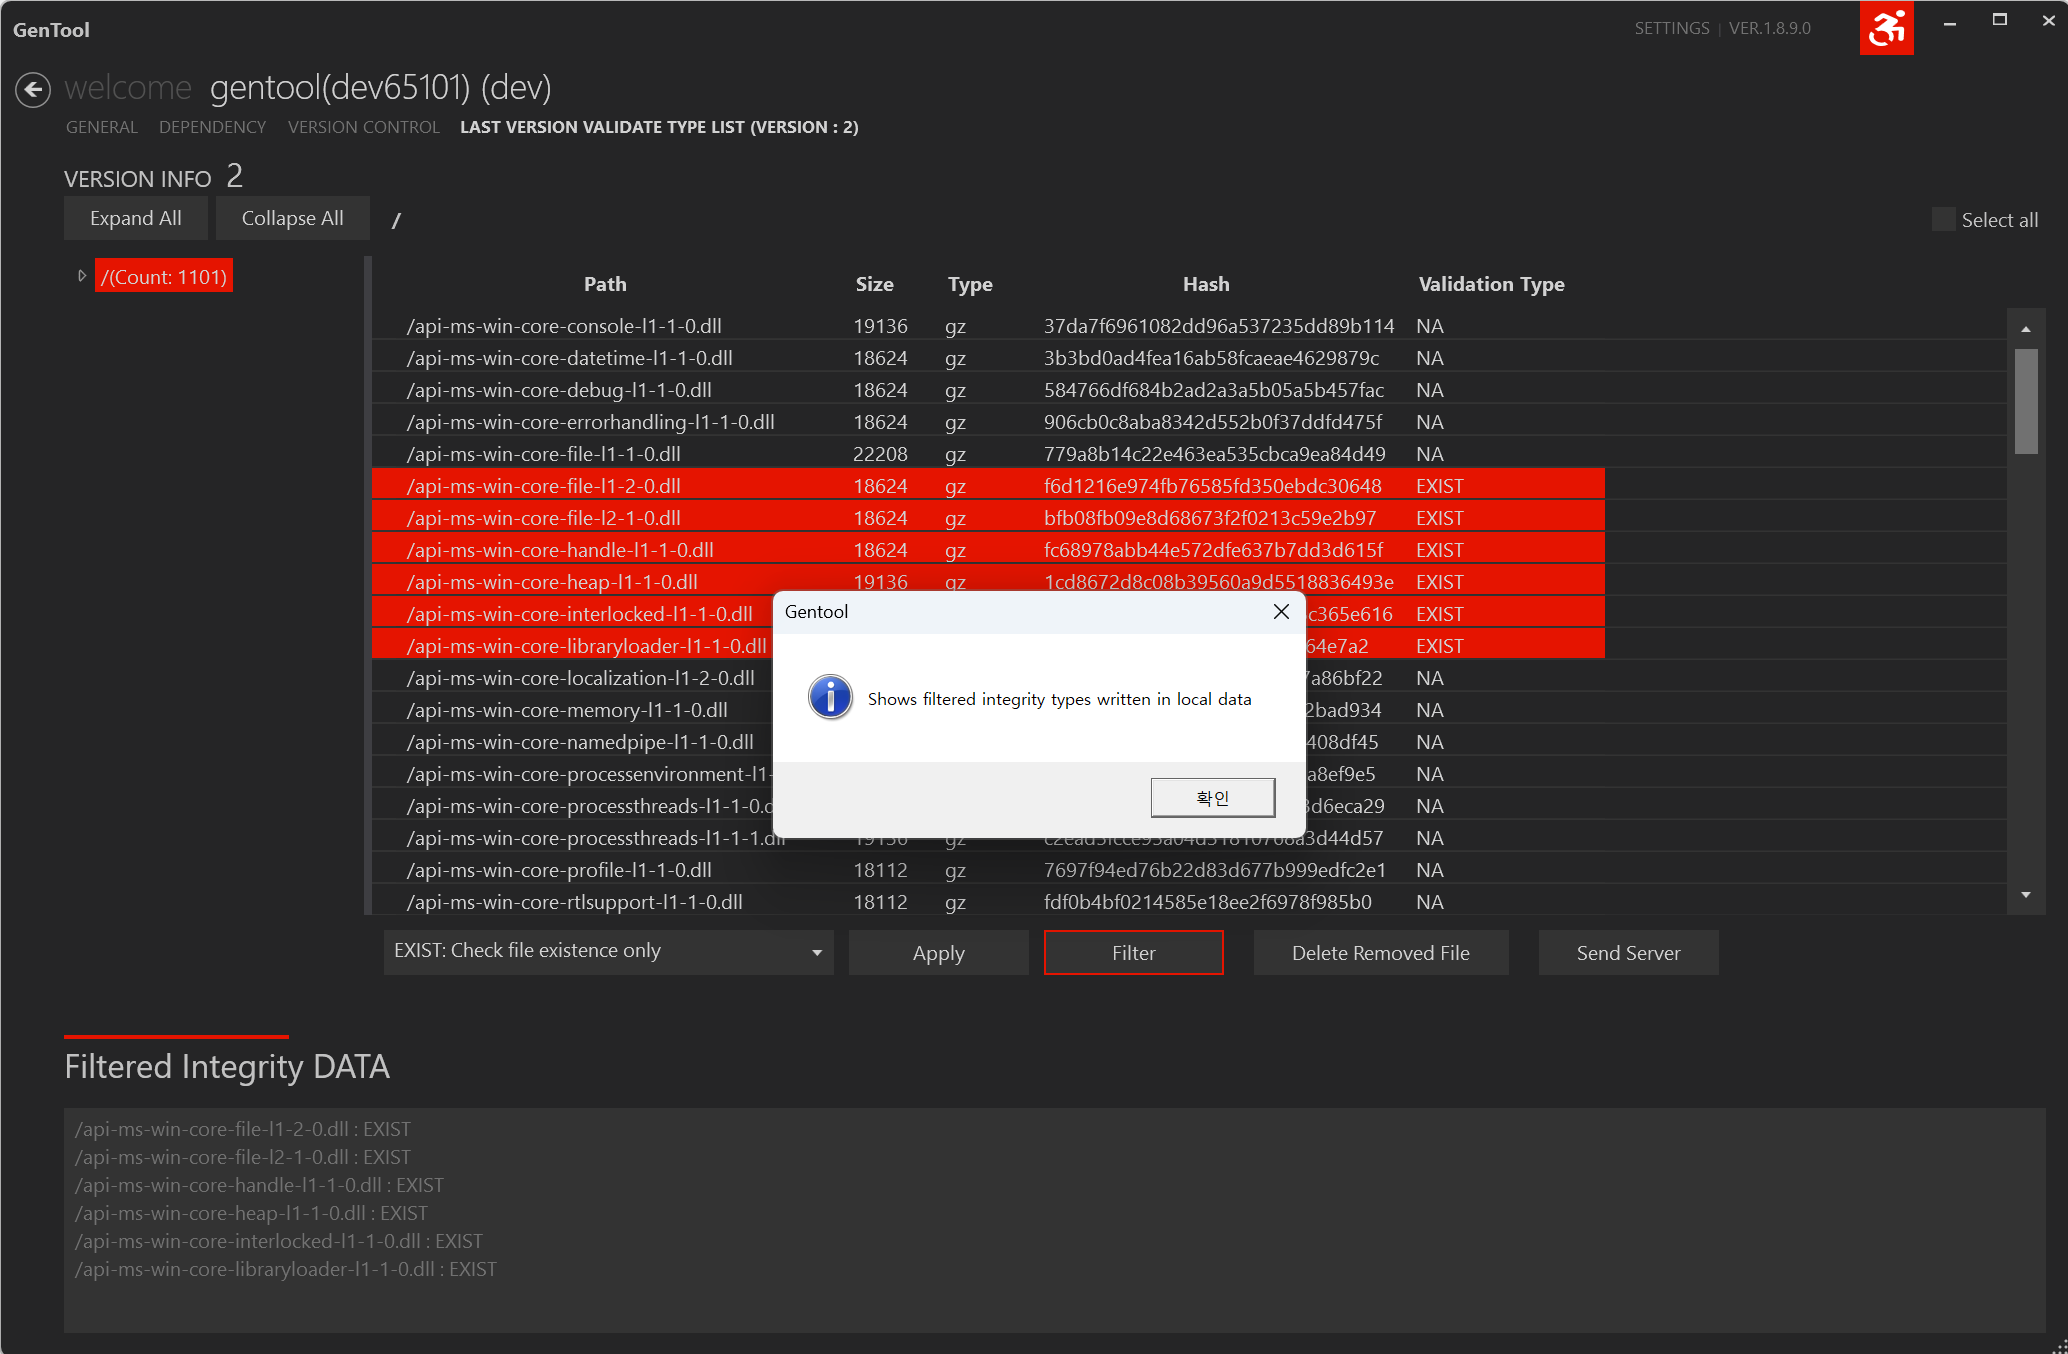
| Item | Description |
|---|---|
| Find file | Expand the left tree-view node and select a folder path. |
| Select file | Select files one by one to set the integrity-validation type of the selected file. |
| Select All checkbox | Selects or deselects all files in the currently selected folder at once. |
| Validation-type combo box | Sets the validation type to apply to the selected files. |
| Apply button | Applies the validation type chosen in the combo box to the selected file list. |
| Filter button | Displays the list of files with the validation type selected in the combo box. |
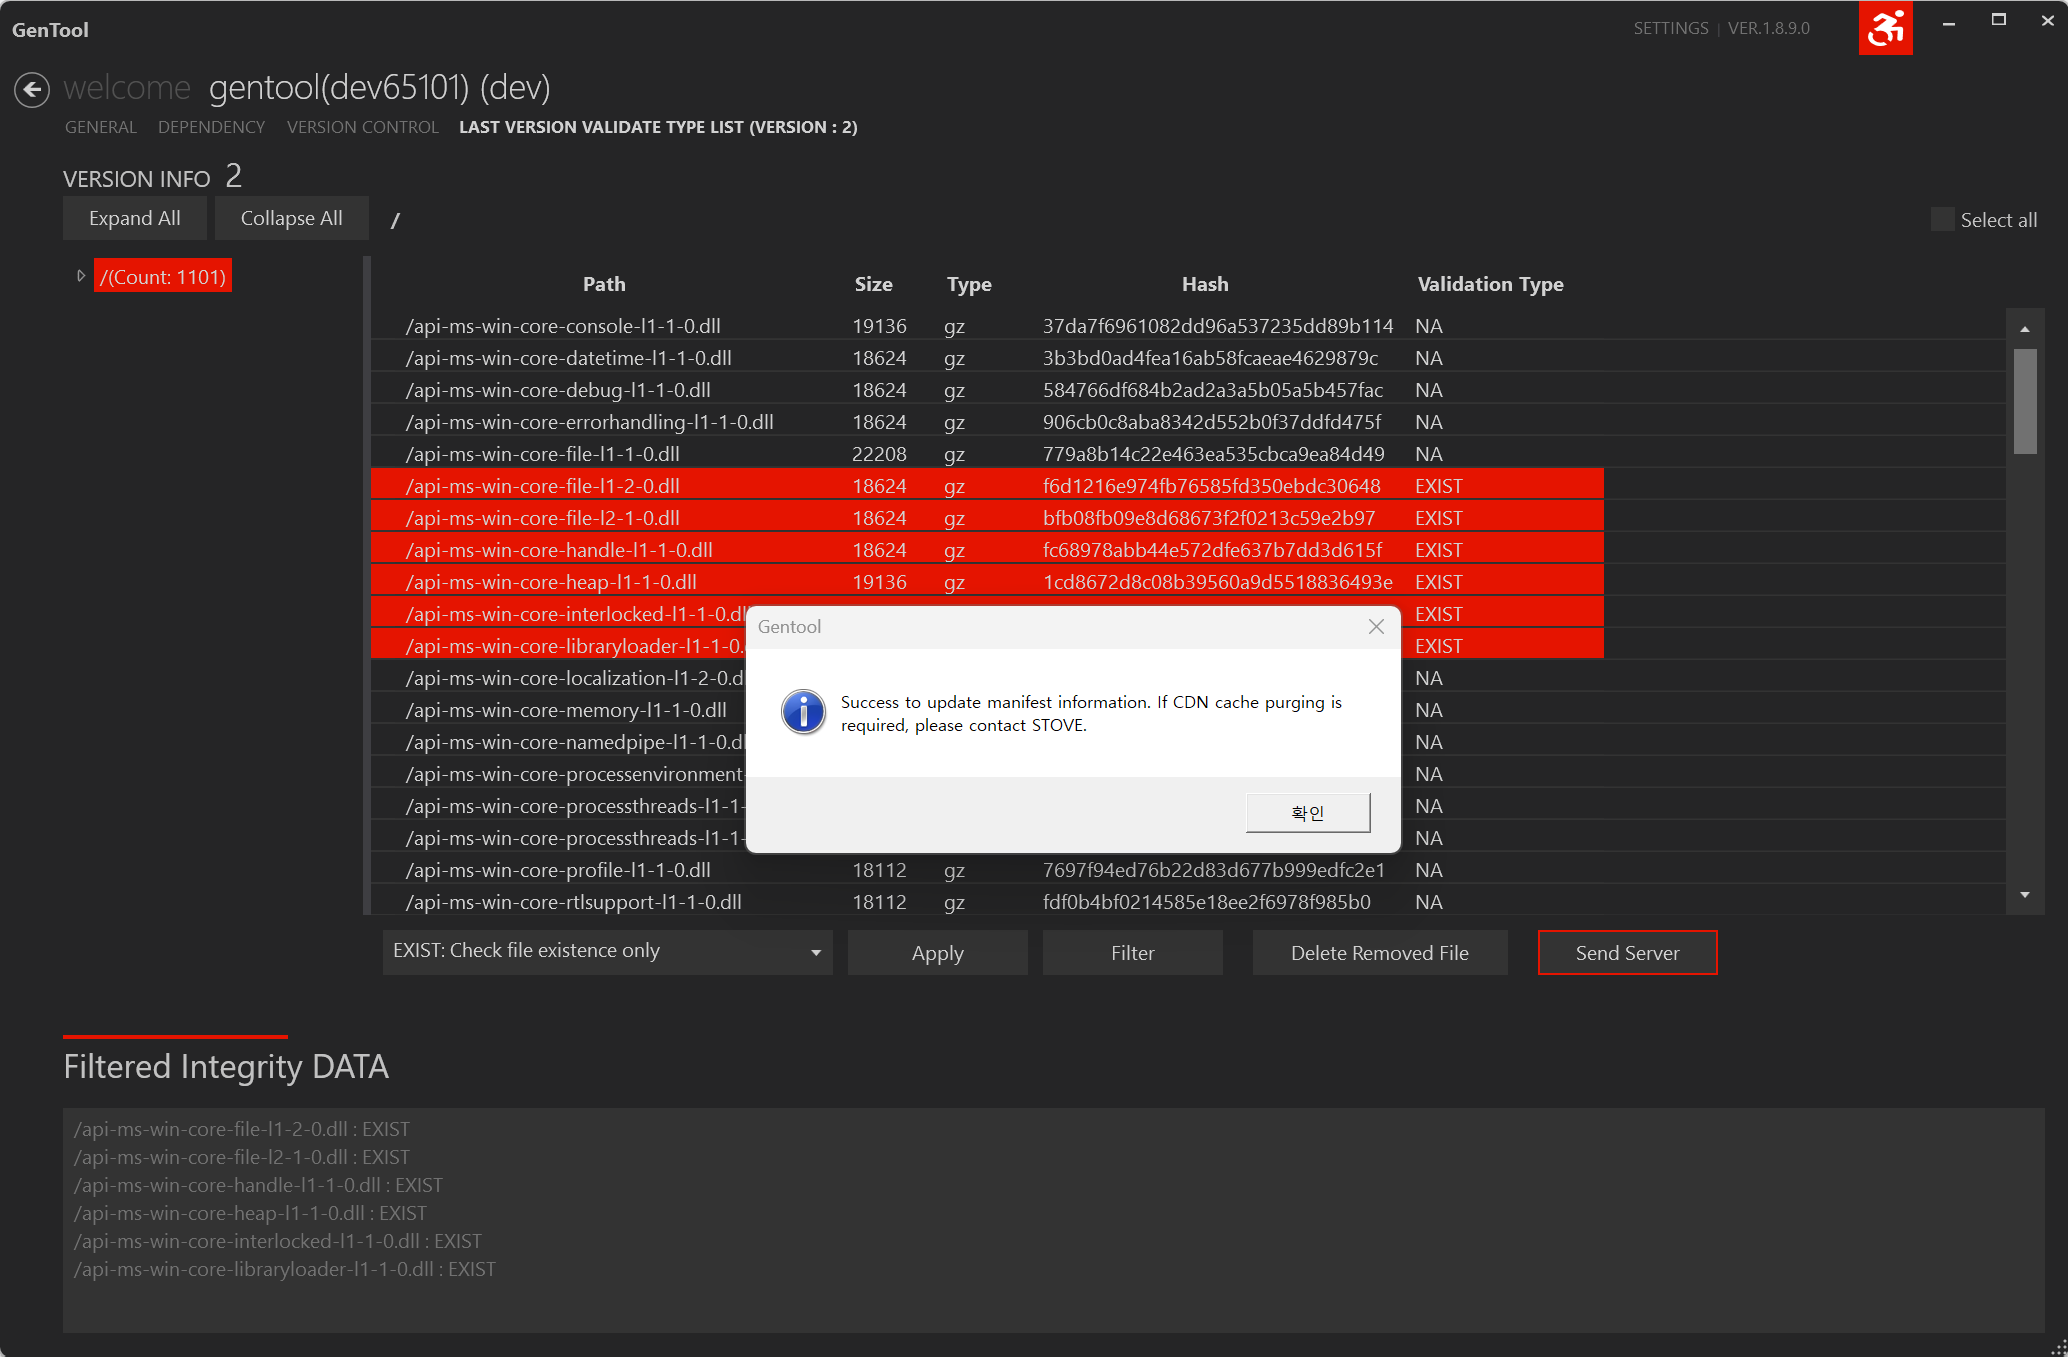
| Send Server button | Applies the edited integrity-validation-type info to the server. |
If you need to change integrity info, be sure to proceed all the way to Send Server.
Once you proceed to Send Server, a cache purge is needed.
ㆍ Usually the edits are applied some time after the Send Server action.
ㆍ If the edits aren't applied, contact the STOVE representative.
- Files removed from a GenTool build are marked
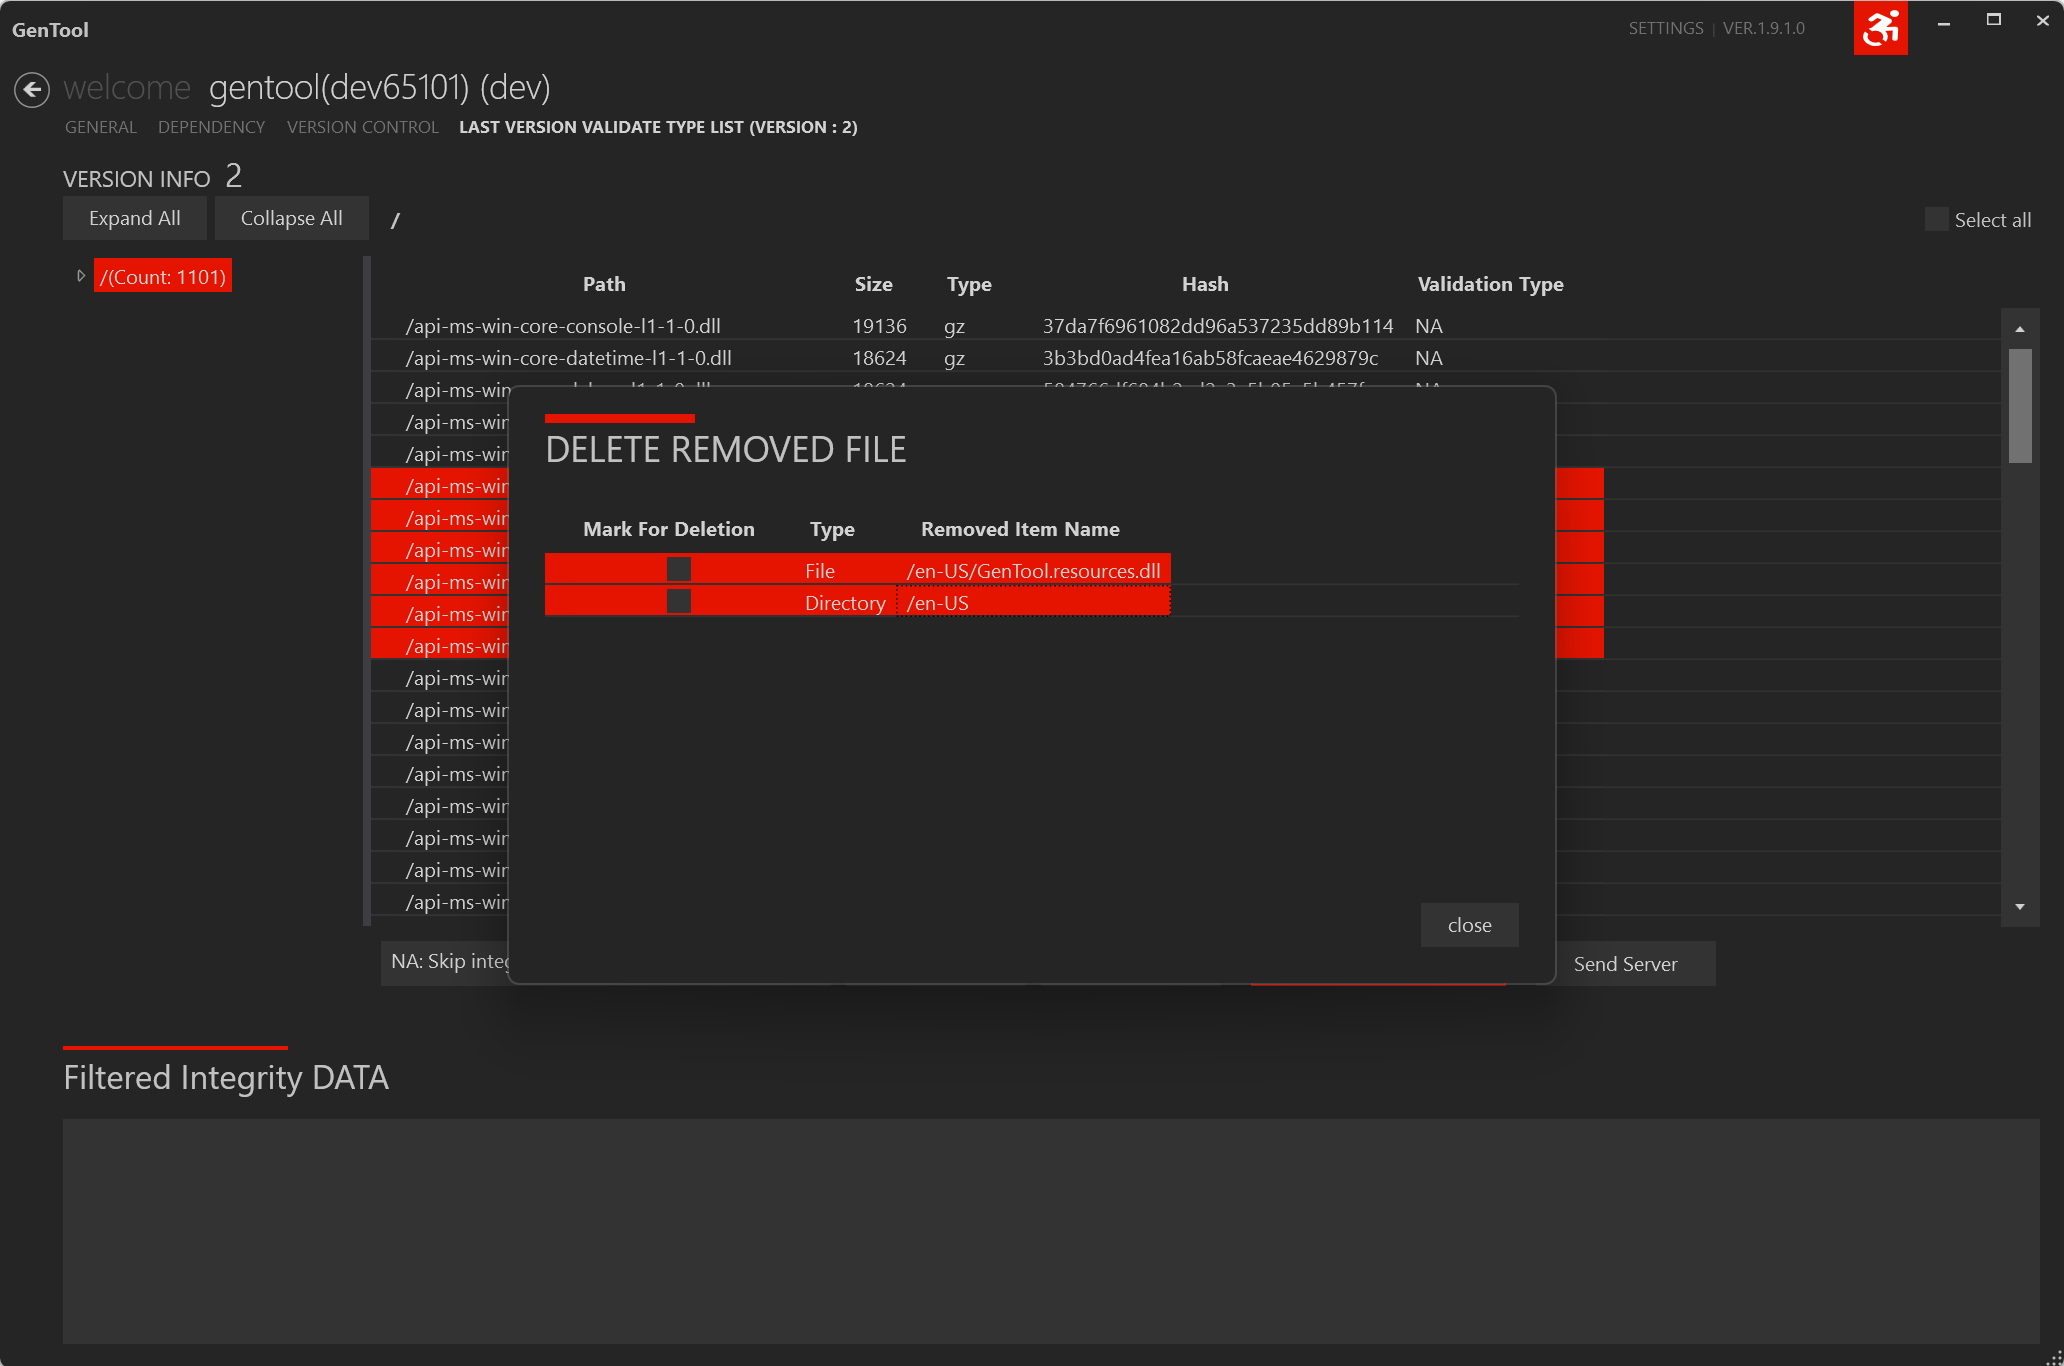
Rand directoriesE, stored in the manifest file. Even as builds repeat, once-deleted file/directory info is kept, and the launcher deletes local files/directories based on theR/E-marked info. - For example, suppose the distribution strategy for a resource file/directory included in the v1 build changed so that, instead of including that resource in the GenTool build, the game downloads it at runtime.
- In the v2 build, you remove that resource file/directory and build, and this resource is marked
R/Eand recorded in the manifest file. - When the launcher updates to v2, the R/E-marked resource is deleted locally and, on game launch, dynamically downloaded and stored locally.
- After that, when a v3 build is uploaded via GenTool and the launcher updates to v3, the
R/E-marked file/directory (which the game has now dynamically downloaded locally) is deleted locally again and, on game launch, dynamically downloaded again and stored locally. - If you want to prevent a specific file/directory from being infinitely repeatedly deleted/downloaded between the game and the launcher, you can delete the R/E-marked info so the launcher no longer deletes that resource locally.
| Item | Description |
|---|---|
| Delete Removed File button | Opens the Delete Removed File dialog. |
| Delete Removed File dialog | Select the file info to delete from the removed file/directory list and close. |
| Send Server button | Applies the edited "R/E" marking info to the server. |
If you need to change the R/E marking info, be sure to proceed all the way to Send Server.
Once you proceed to Send Server, a cache purge is needed.
ㆍ Usually the edits are applied some time after the Send Server action.
ㆍ If the edits aren't applied, contact the STOVE representative.
WELCOME
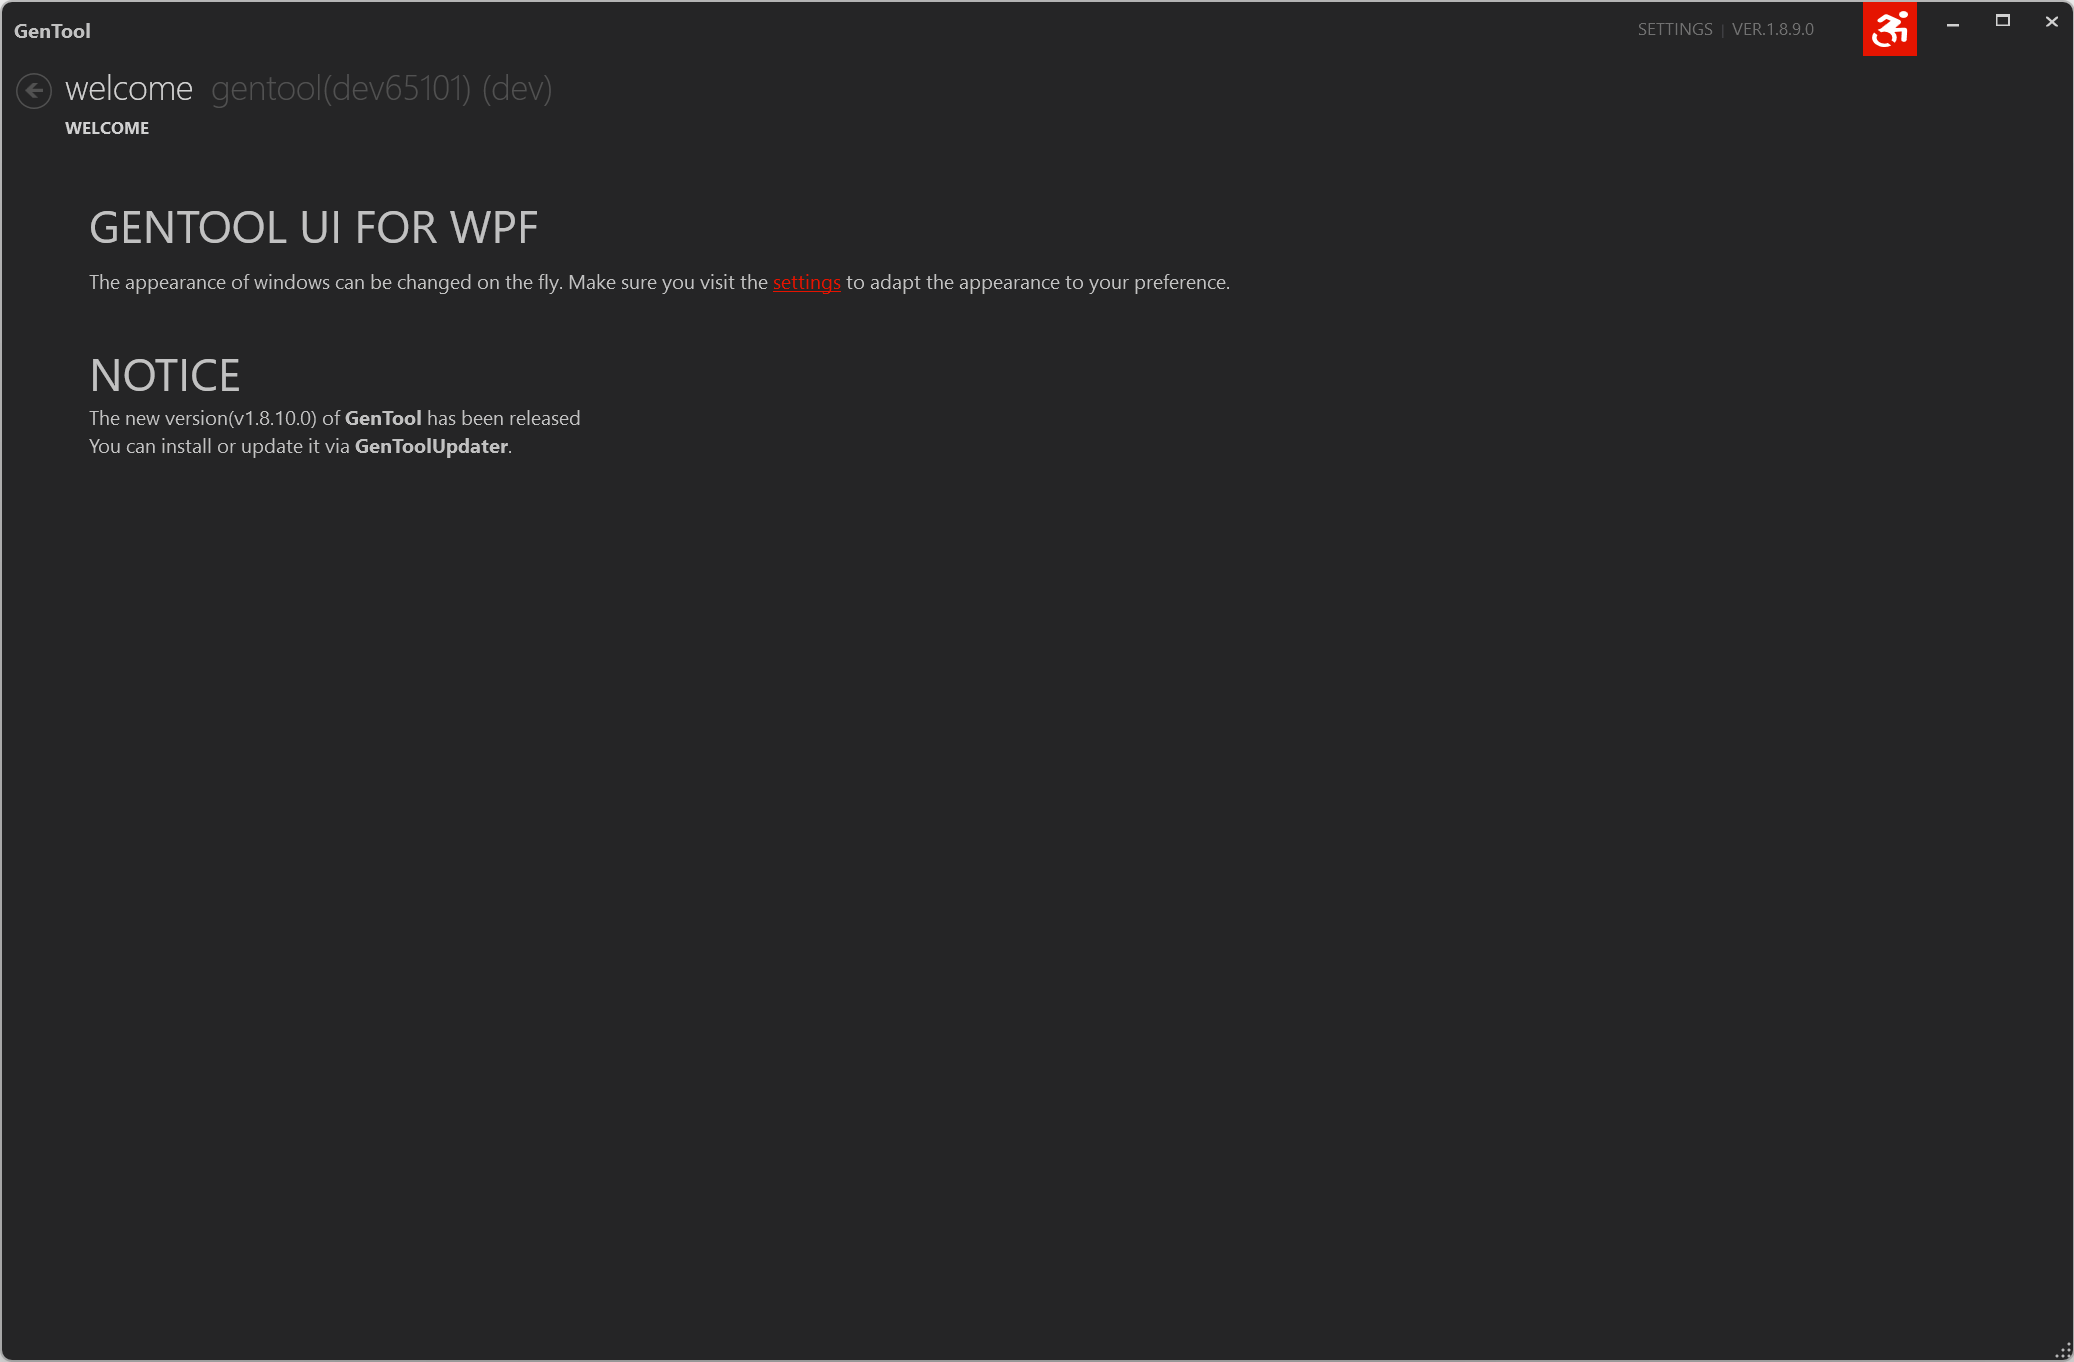
The initial screen of GenTool.
- Provides a link to move to the Settings screen.
- Shows a notification about a new GenTool version. The notification is shown only when a new version has been released.
SETTINGS
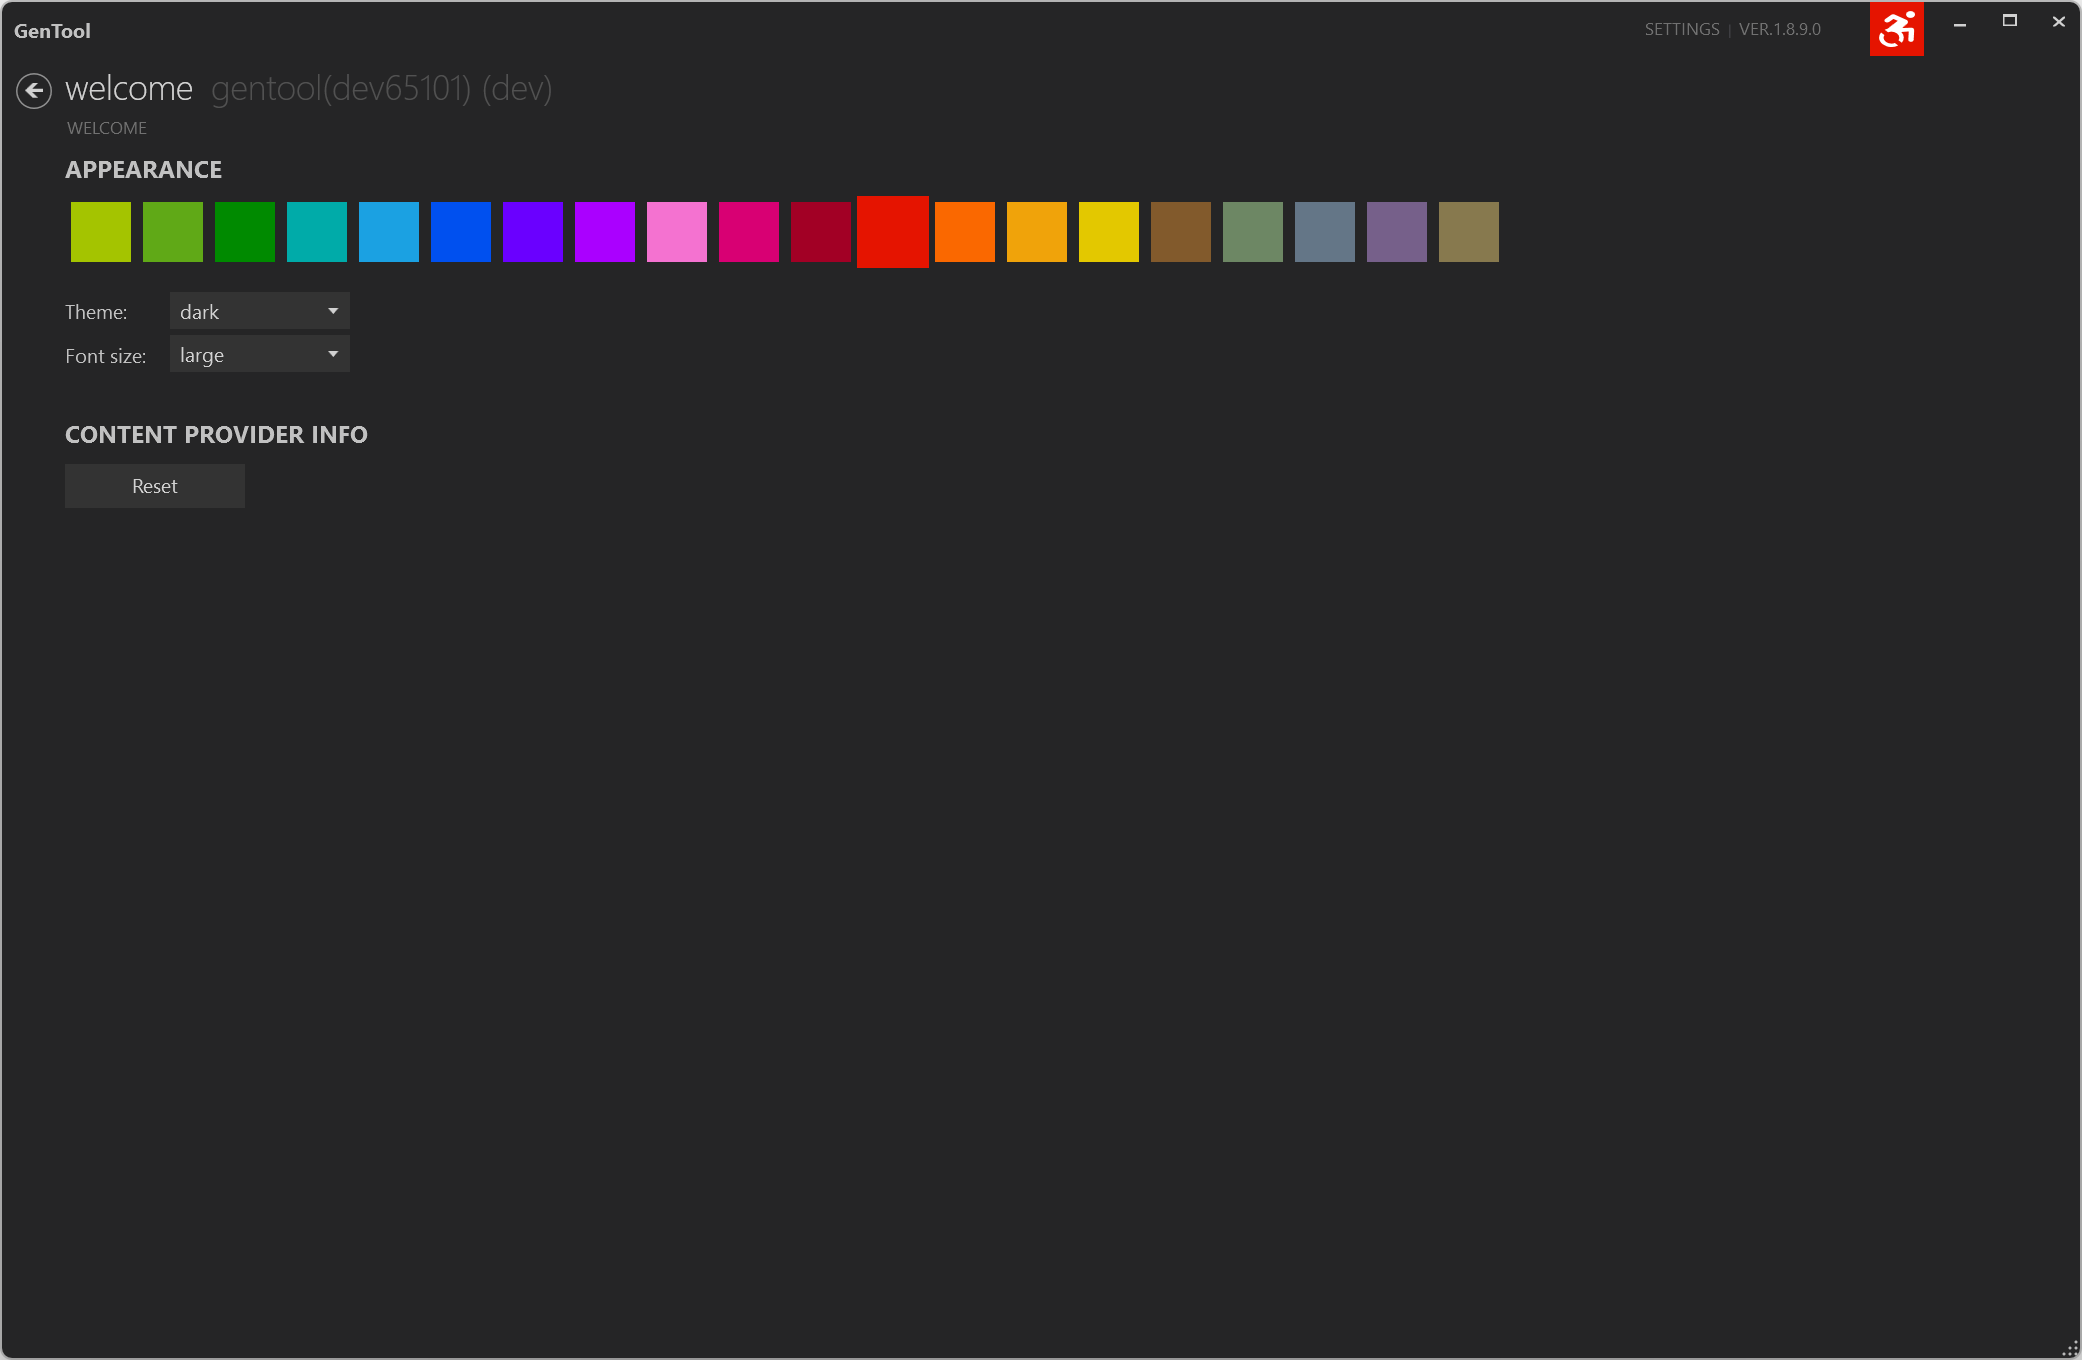
- You can change the program's theme, colors, font size, etc.
- You can reset the CP info saved via the Remember feature in the CP-info input field.